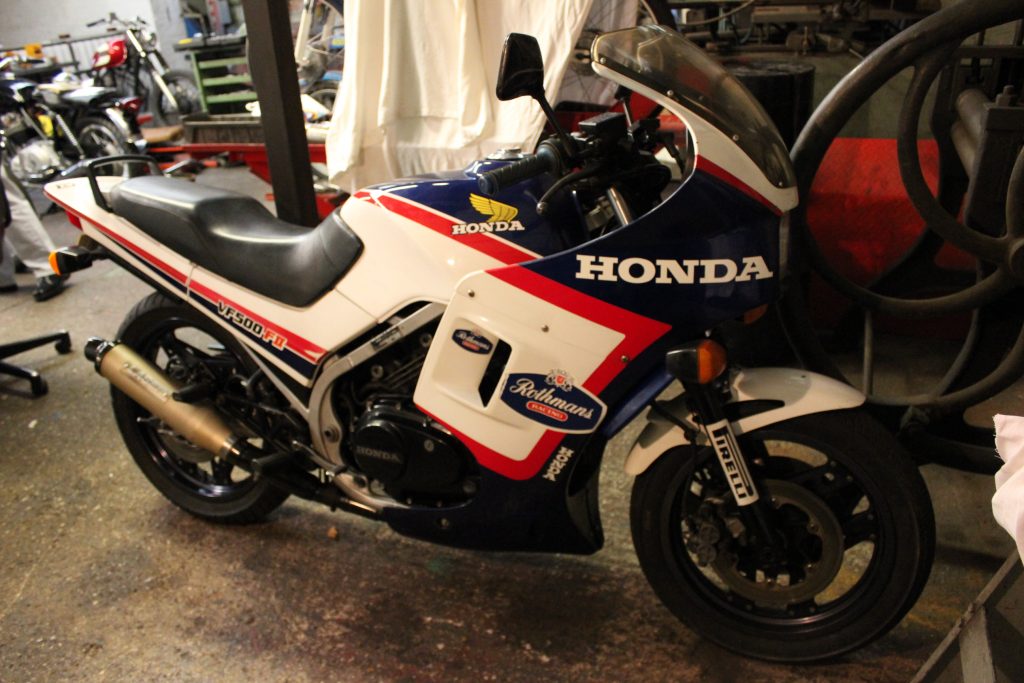
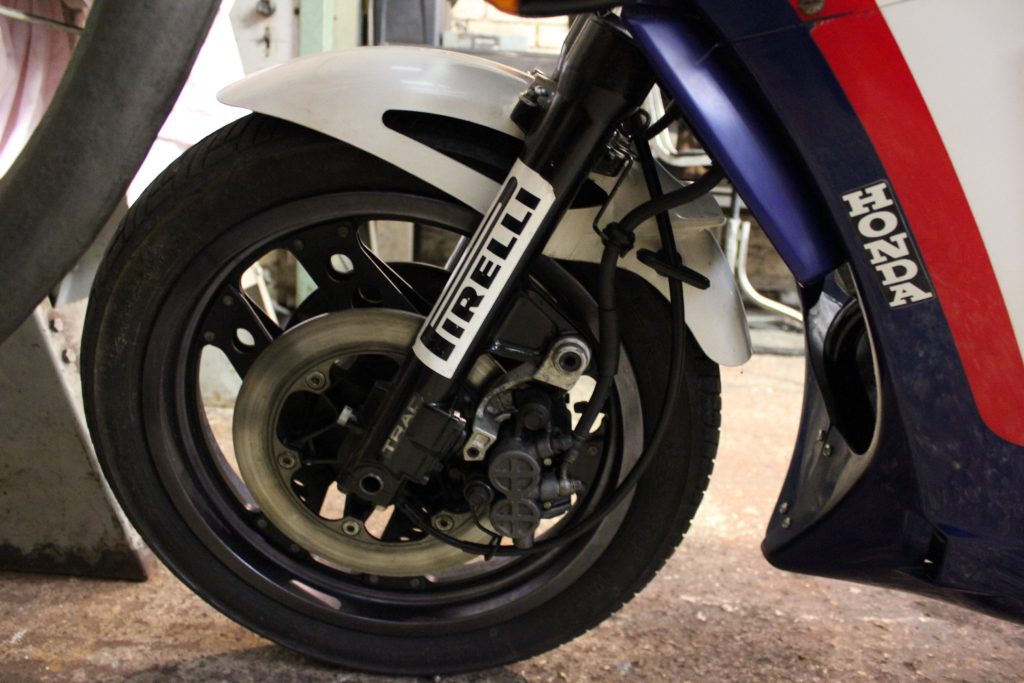
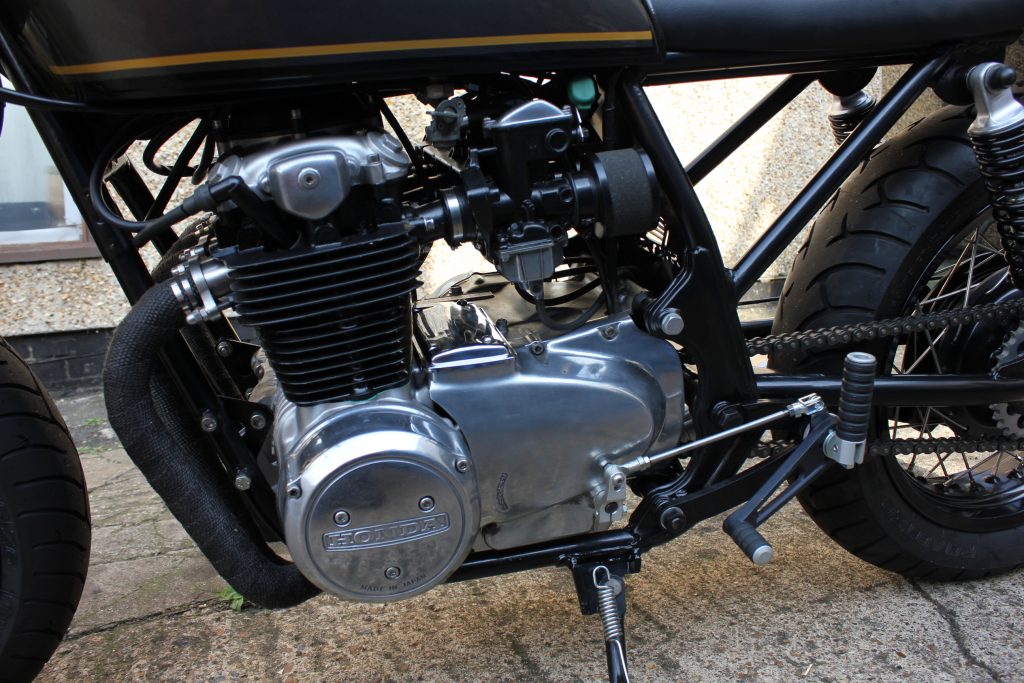
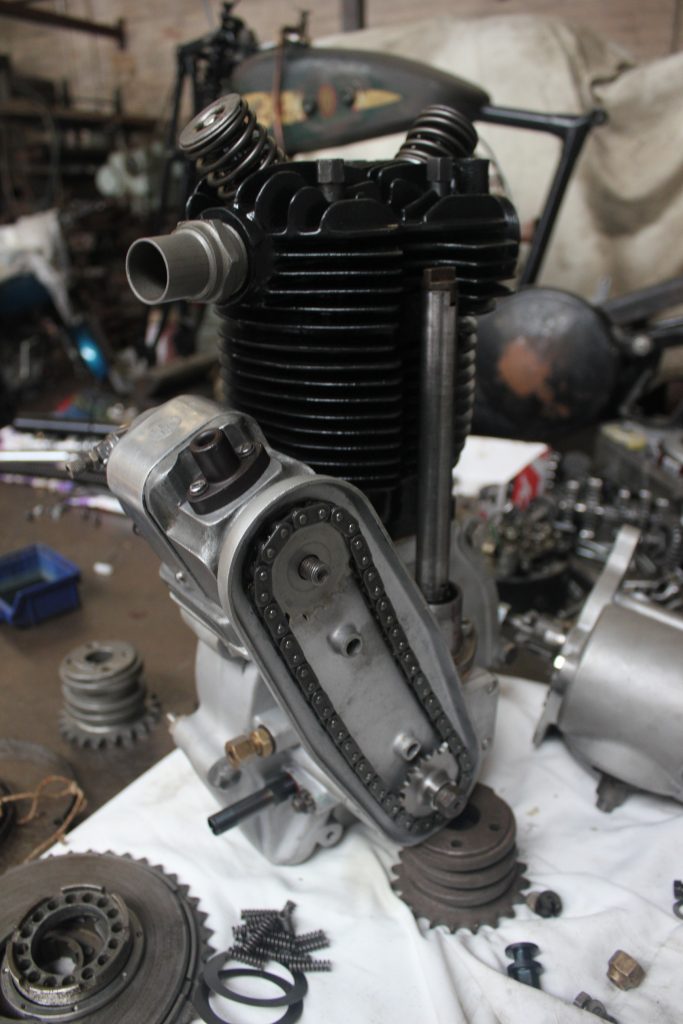
A chap called into the workshop and was desperate to get rid of a bike that he purchased from new as it was stored in his rather minuscule back garden that required an addition to the back of his terraced house. I couldn’t wait to see what might be hindering the first part of the extension so I visited him promptly. Laid up beneath a tarpaulin was a ball of grease that was to be the saviour of this neglected machine. One hundred pounds secured the deal and I found a Honda VF 500F2 in the back of the transit on its way to the workshops and equipped with its paperwork.
The Honda in the past sailed through all of its mot’s due to a full service history right up to the day of laying up for a rather early retirement. The VF defiantly saw the day that it was going to be undressed from its grease protective jump suit, for the day was here. Unscrewing the sump plug let the golden fluid flow form the engine into a clean stainless pan, it was too clean to throw away so I thought it a good idea to put it back into the engine to retain provenance, only kidding, but I did put it back as it was so clean and new looking.
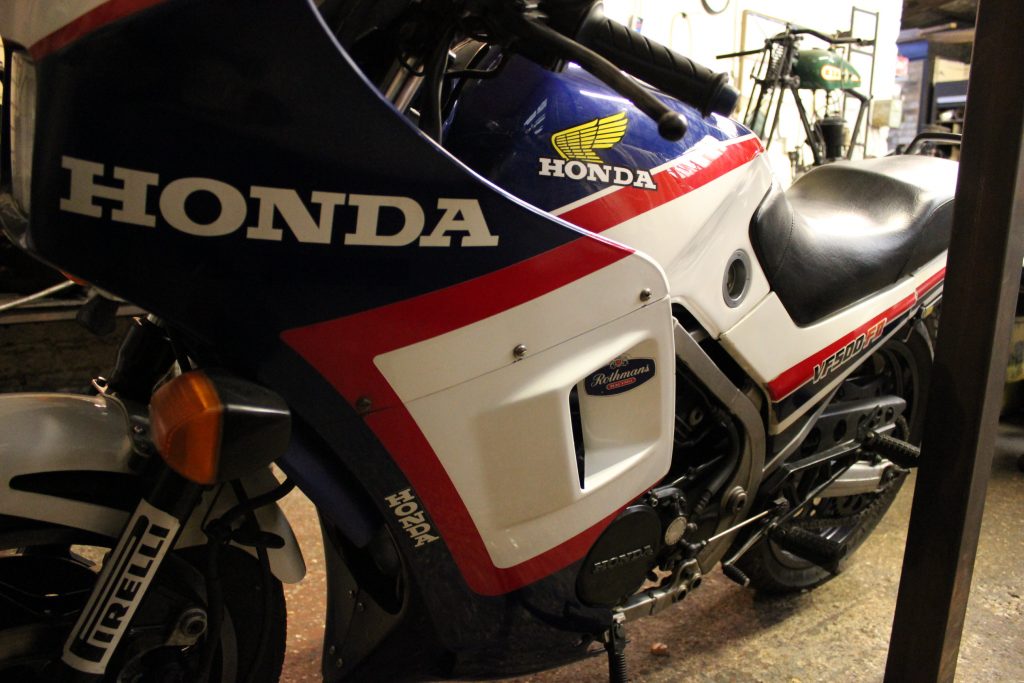
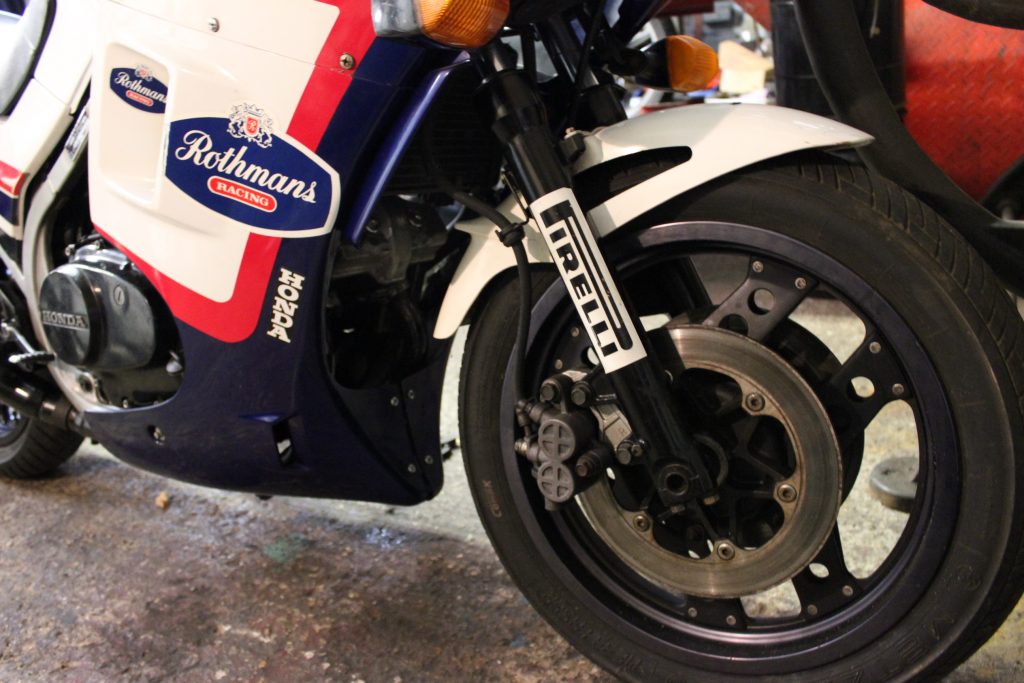
Decreasing was a major tack but as the stuff was removed it only revealed good clean paintwork. Hondas like all Japanese machines were never undercoated or paint primed as they were built to a profitable price and were never going to be perceived as surviving 10 years or even reaching the head heights of being classic. This Honda F2 being very rare in the UK is now considered a modern classic at 35 years old. the 35 years didn’t show on her body work, I mean the plastics, there was no plastic surgery needed on this one, she was as fresh as a daisy when the grease fell away to reveal all of the add on decals that would have advertised oils, furls, brake fluid, coolant and such. I stripped them away with the grease.
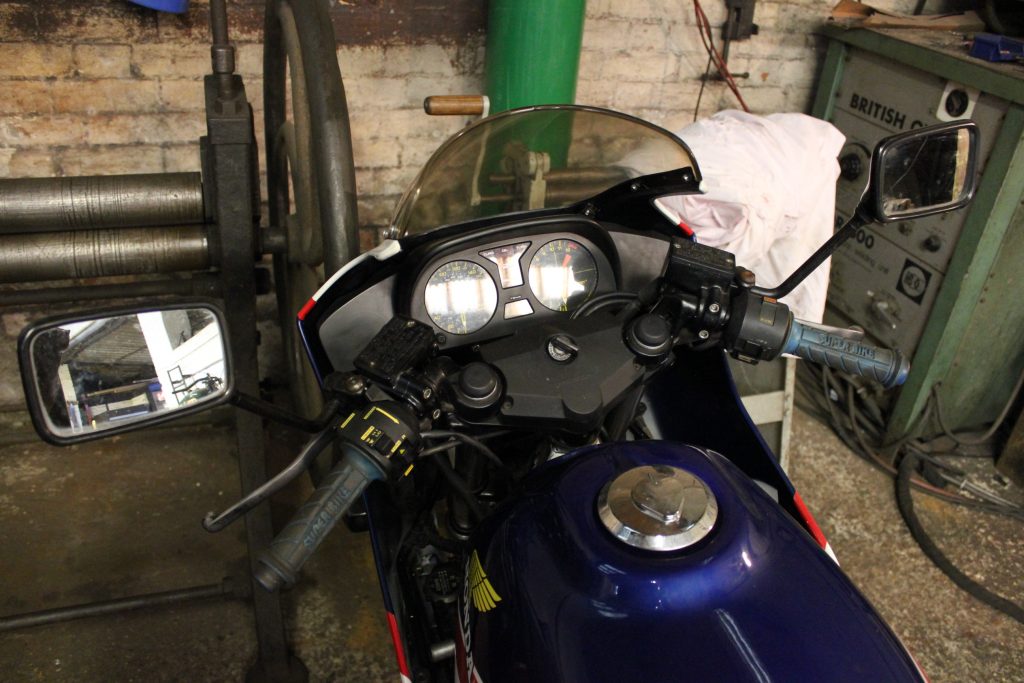
The only part of the bike that wasn’t attended to was the petrol tank as it was missing with all of its fittings. Boy these tanks are very difficult to find in the UK as there were so few Honda VF 500s sold in this country. They were mainly aimed at the US market, although there was the smaller VF 400 that is mainly aimed at the Japanese home market. There was also the 750 that found favour in the US. The VF 500 was only manufactured for three years and came in 2 sizes, the F1 was the half faired model and the f11 was fully faired. A tank was procured unfortunately without the fuel tap and knob but this wasn’t going to hold the project up, so I decided to give the tank to my brother for a 2k paint job a plastic tank was rigged up to the bank of four carbs that nestled within the nether regions of this machine.
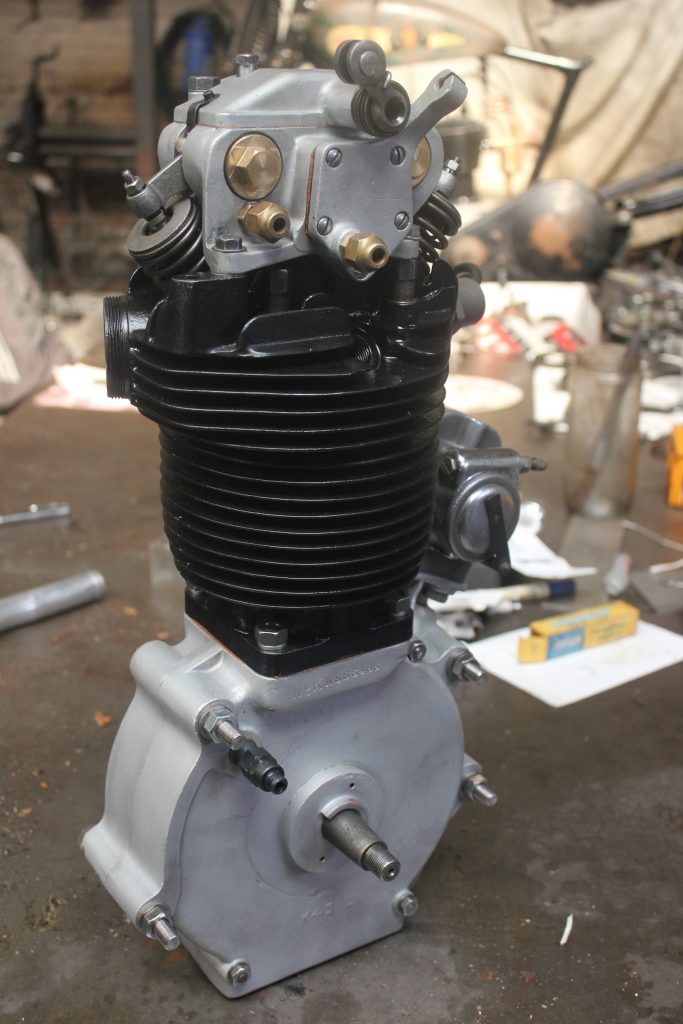
I would like to say, bish, bash,wallop, she started on the button but wish full thinking gave way to “shit I’ve got to take the carbs off “. This wasn’t such a big job as long as you are armed with a hot air blower to loosen up the clipped air intakes as you would have to be a titan to remove them cold or a tougher man to replace them without the hairdryer. Cooked and all removed from the aluminium intakes. A block of carbs in my hands with all of its operating tendrils removed. These being CV carbs they are quite simple to work on long as the parts are kept in order, if you are new to carbs. Don’t forget to screw the air screws home and count the amount of turns it takes, IE :2 ¾ turns. When replacing them with the spring, washer and rubber seal attached in order, screw them home lightly and back them off to the amount of turns that you originally had. I put the carbs back into the nether regions and put all the cables back into there places and linked them up to my plastic gravity feed tank, choke on, ignition on and bang! She fired up.
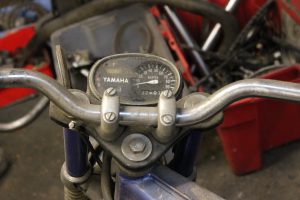
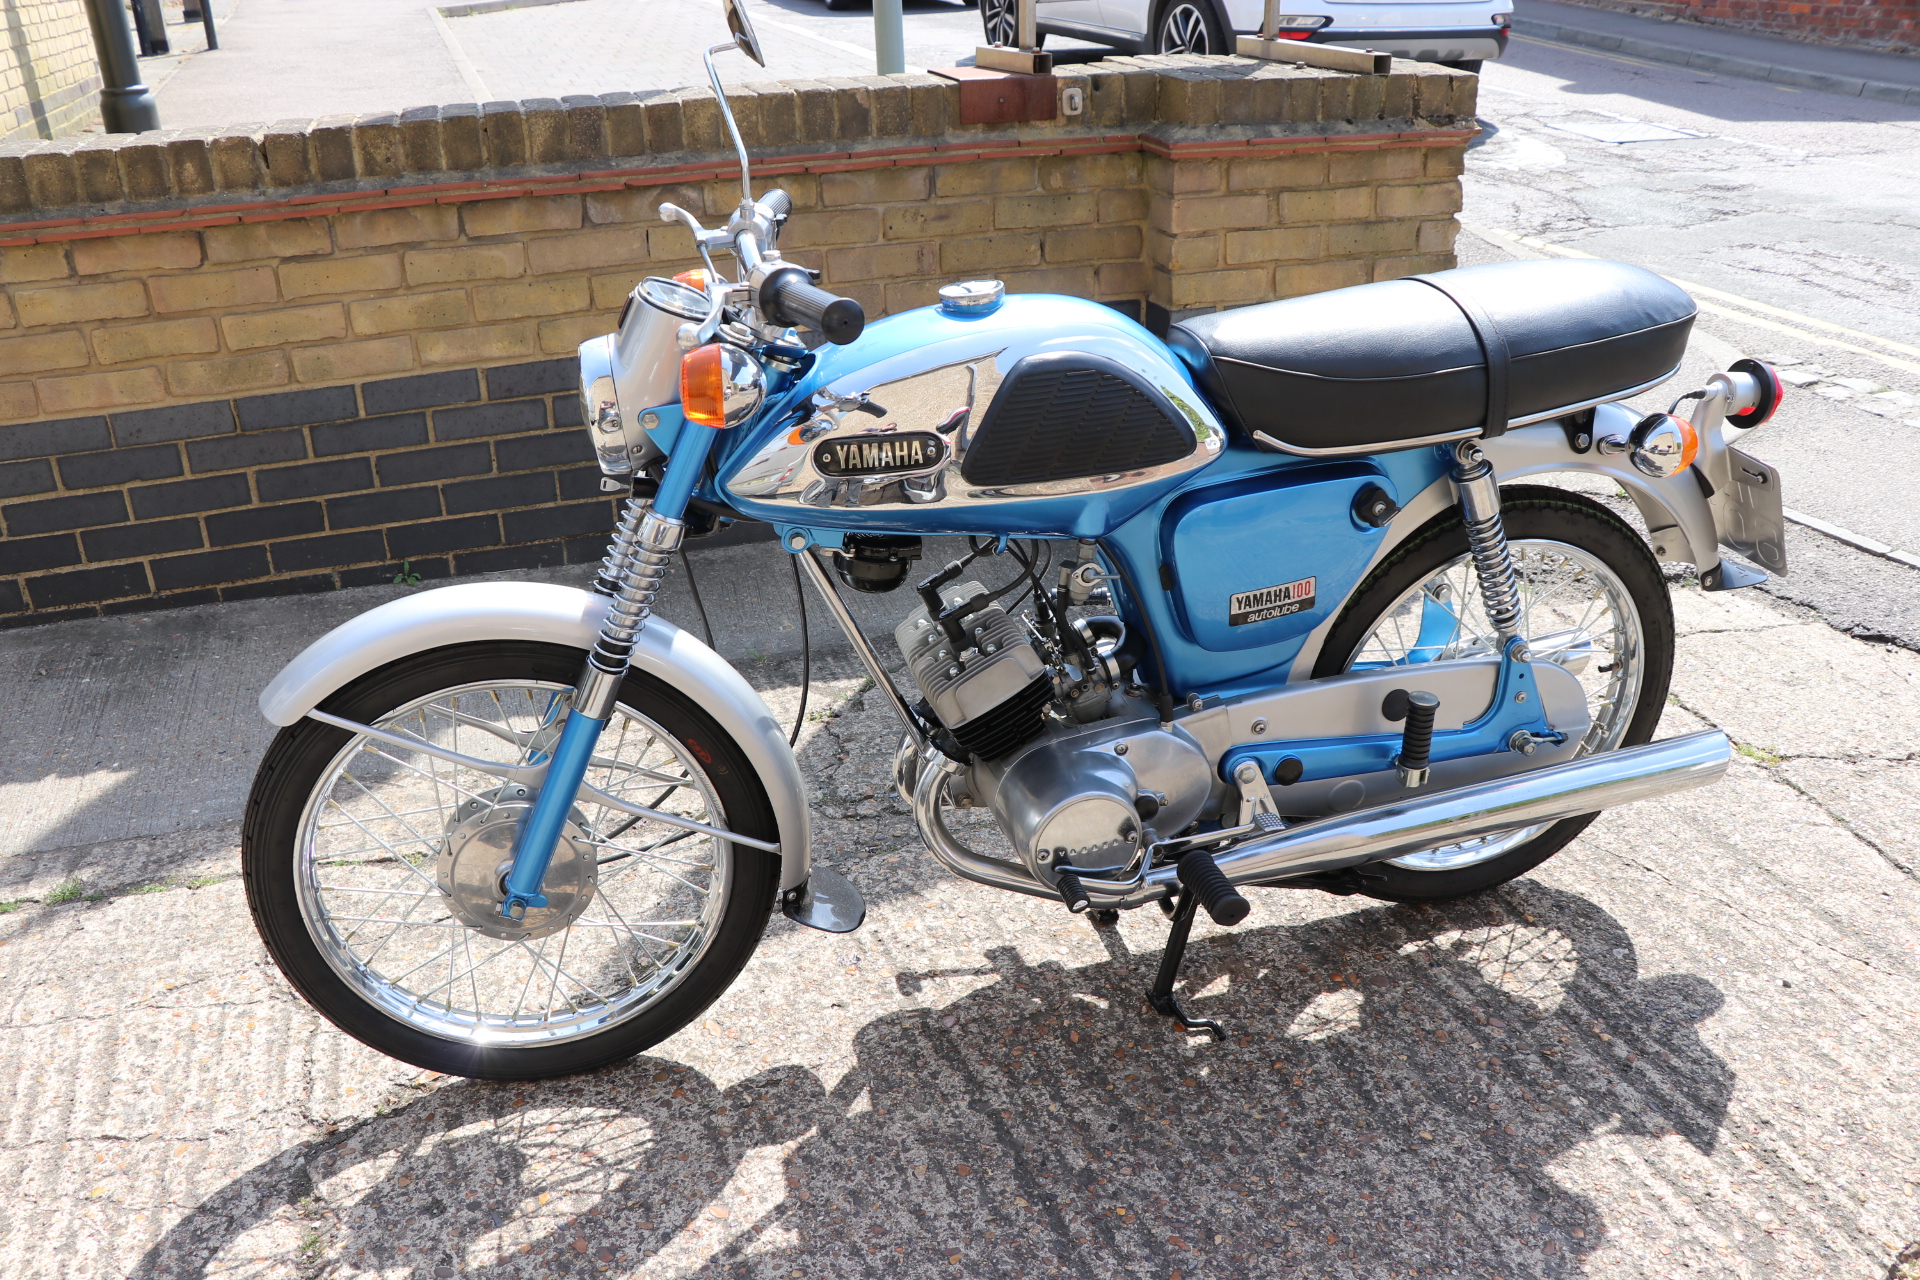
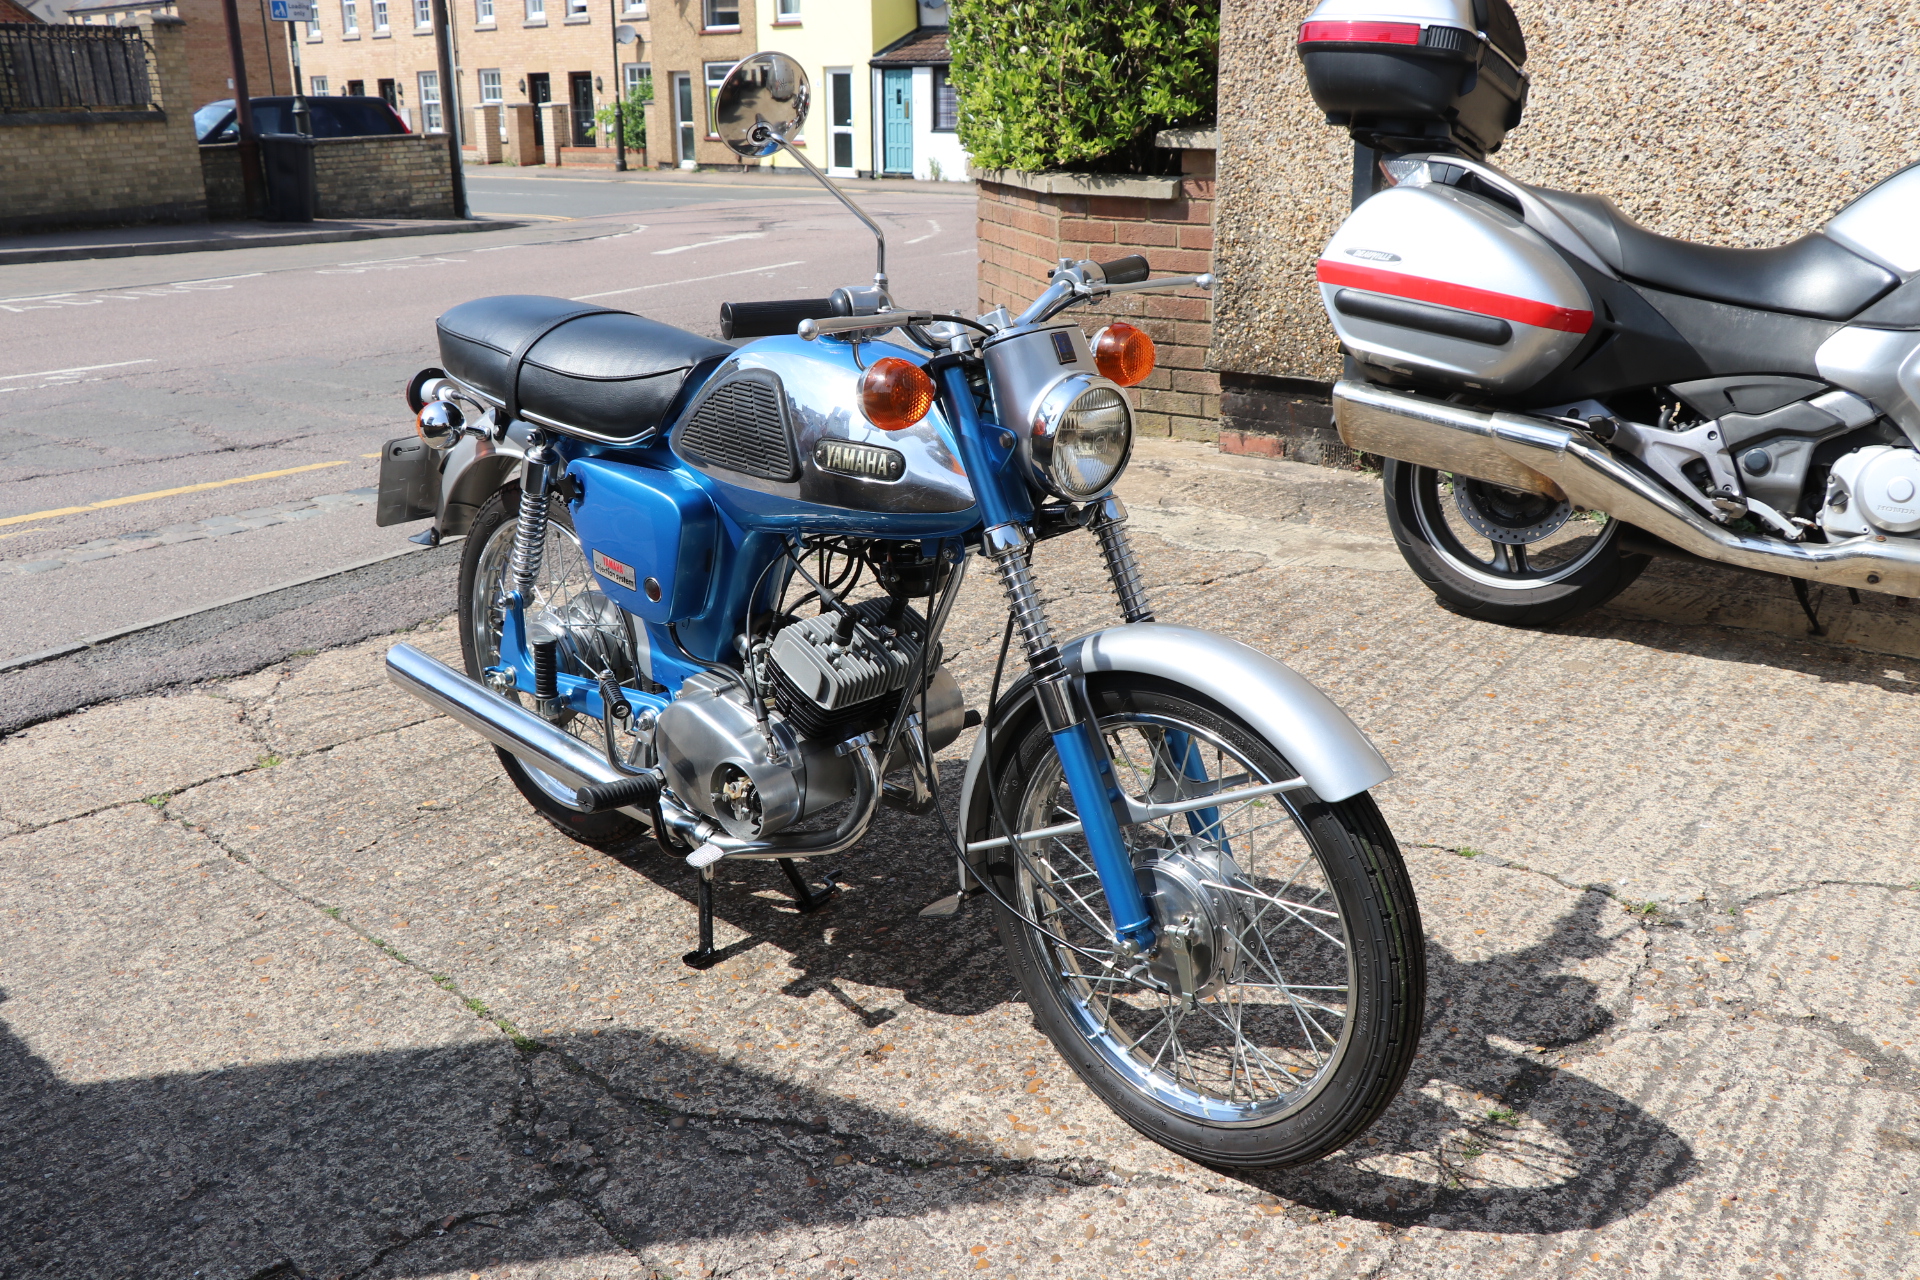
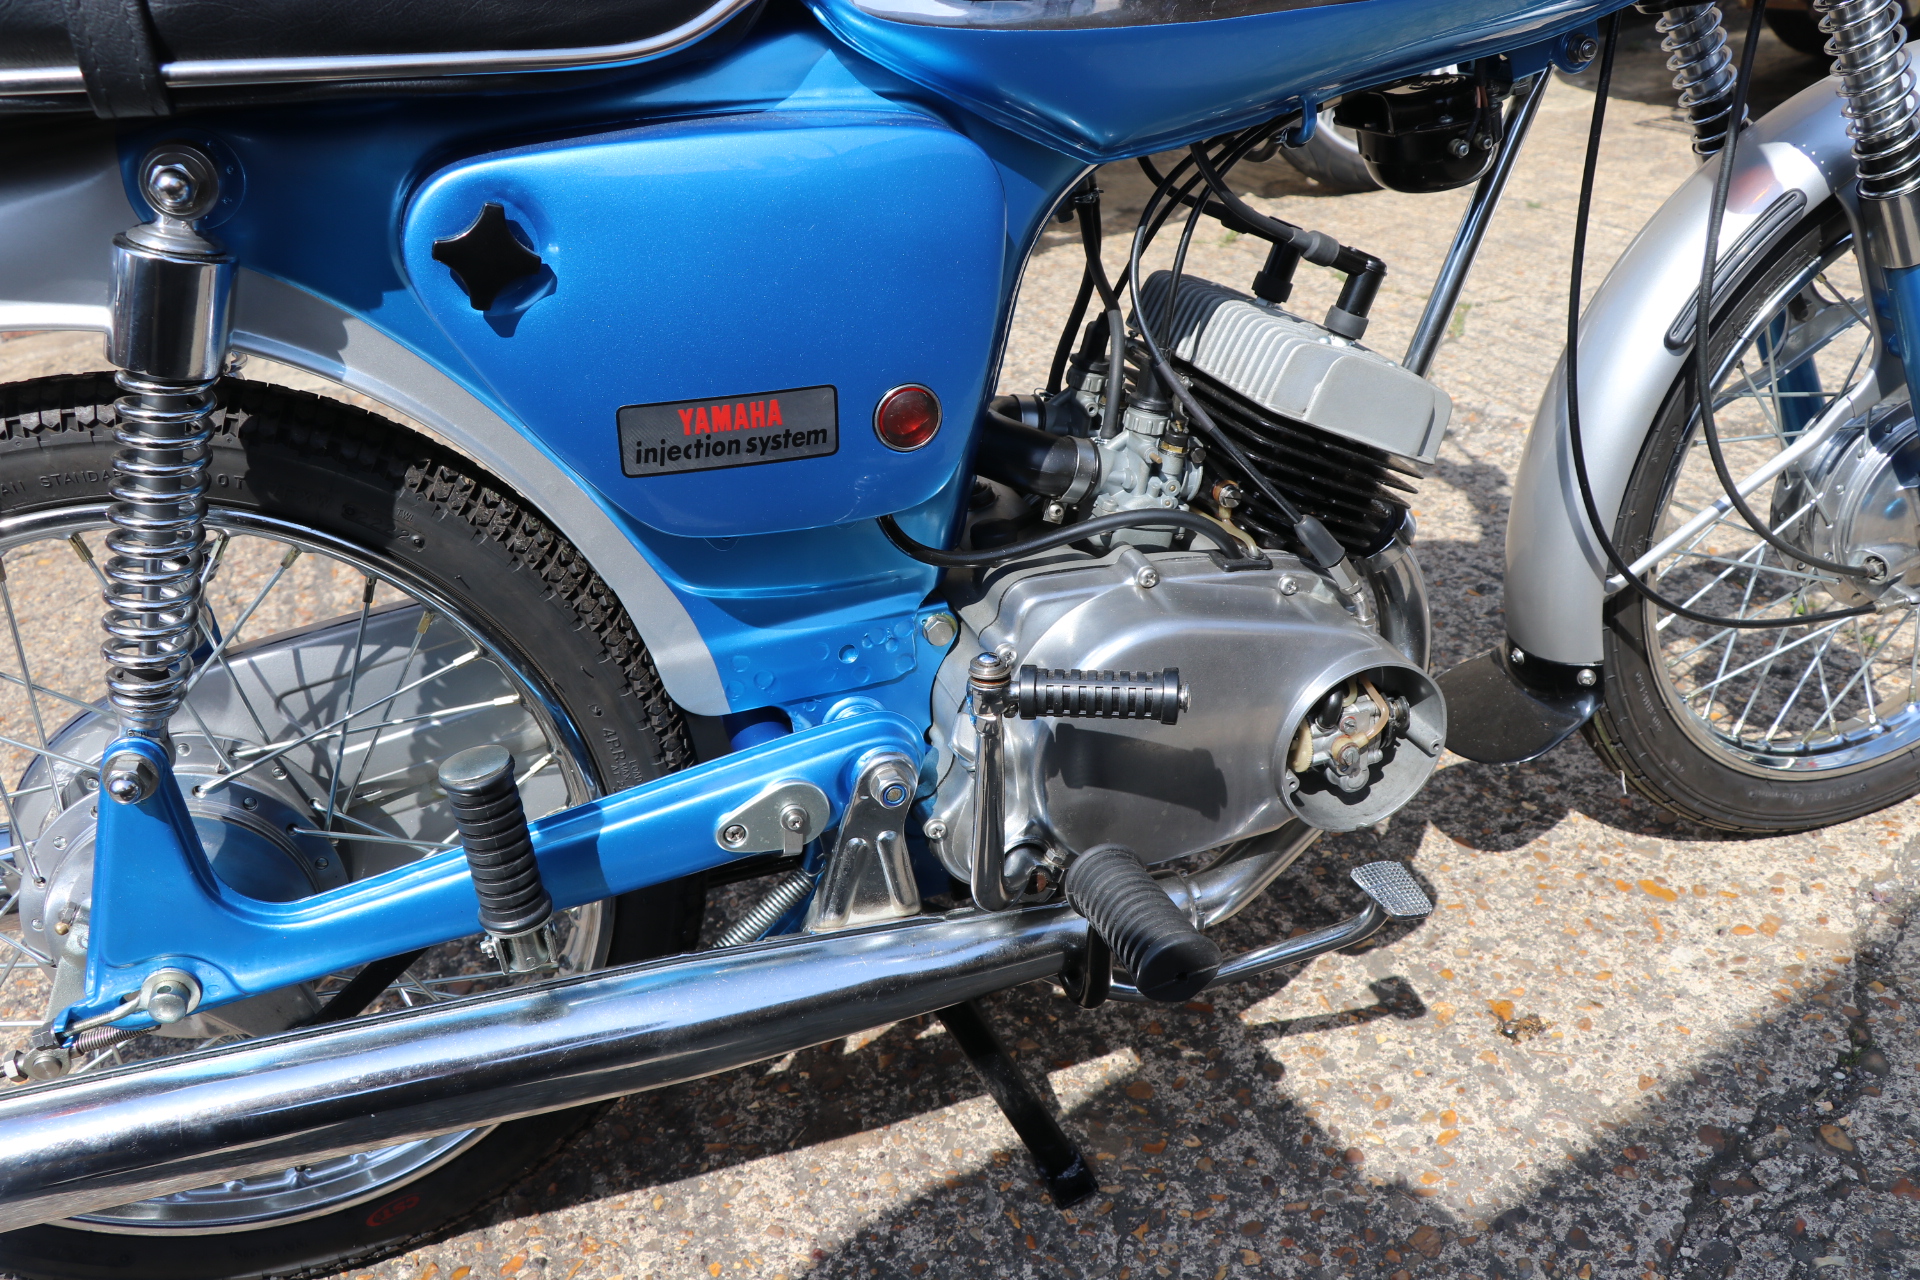
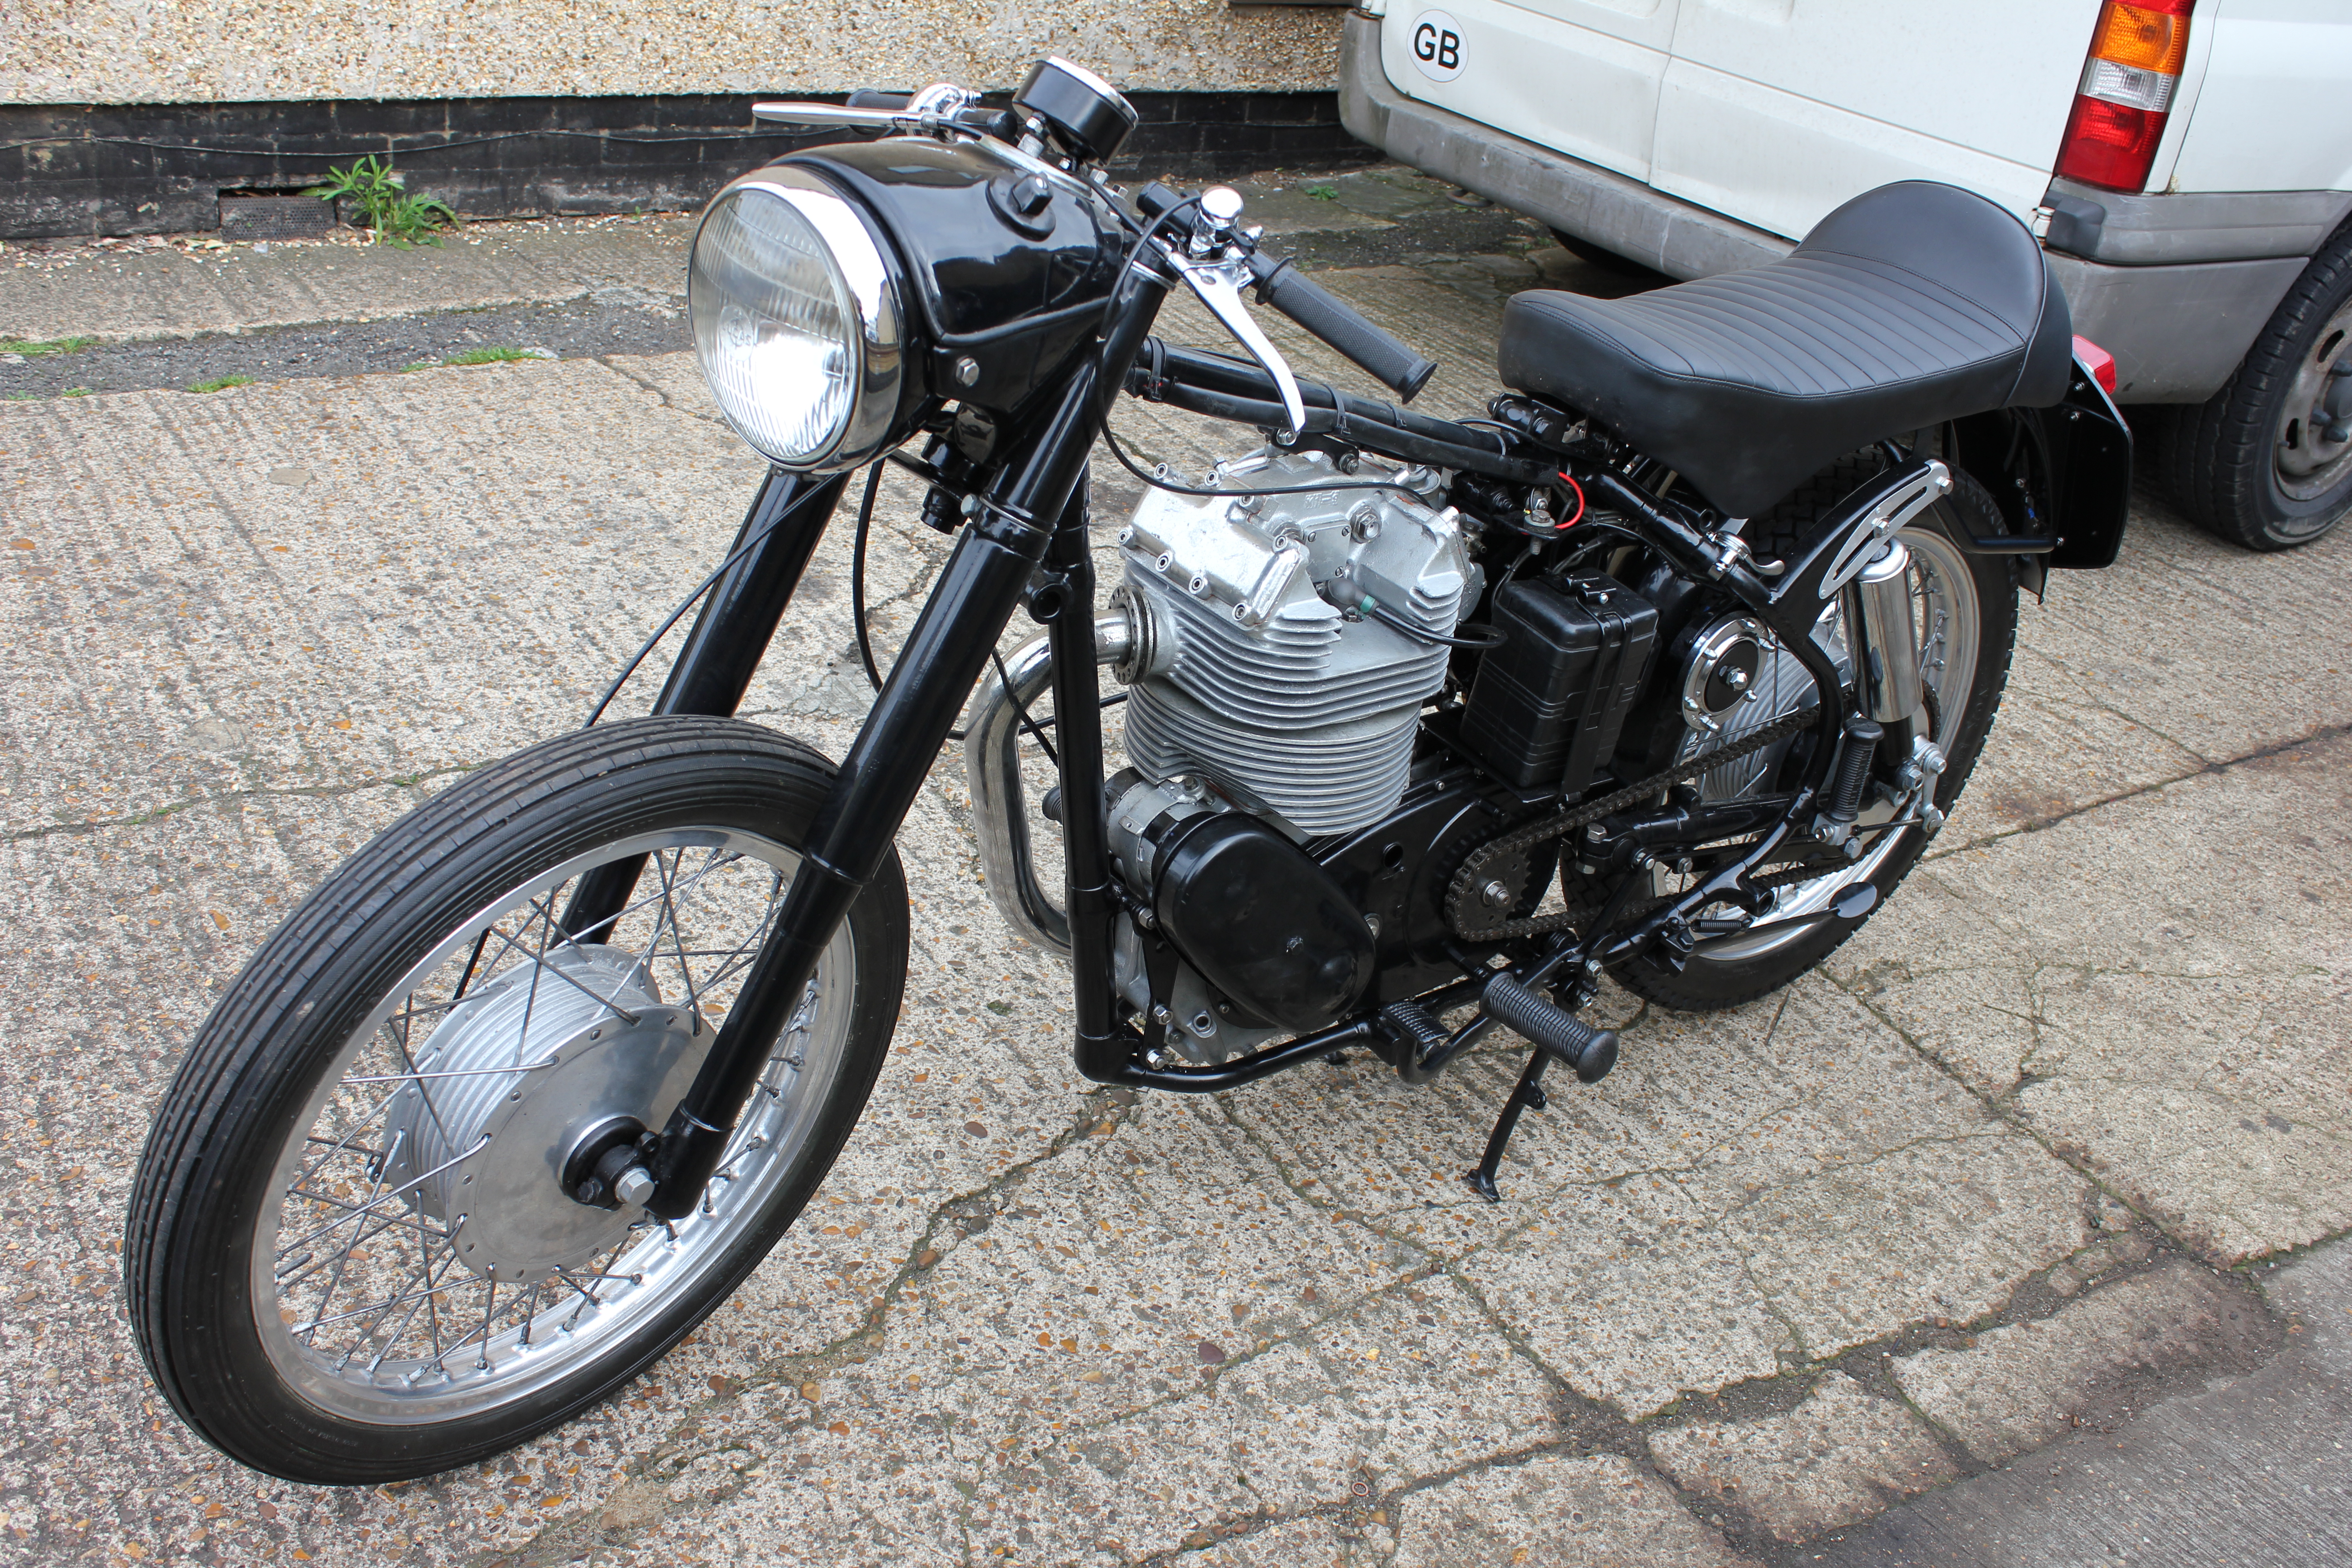
Having been tipped off that there was a little Yamaha languishing in a barn since 1980 I decided to drive the 3 miles and arm myself with £300 as this is what the seller wanted. On fist sight I haggled a little as it had been fitted with micron exhausts that were not period for 1967.
The little twin cylinder was a big hit in the US and not many of them were exported to the UK as we were still running things like bantams. But there were a few dealers that would sell a limited number and the punter who was lucky enough to buy one would be more than mildly surprised at the little machine performance.
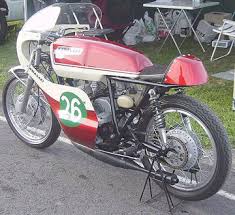
In the late sixties Japanese two strokes  really came into the forefront as they were dominating all of the lighter classes in the “TT” and loads of short circuit races. Yamaha pitched a few over the counter racers such as the TD IC.
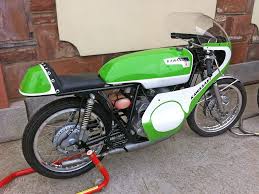
Kawasaki also sold the A1R and A7R.
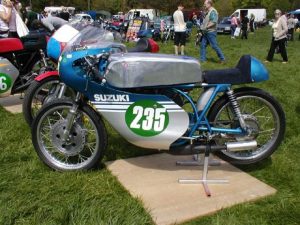
Suzuki retailed the T20 over the counter production racer.
The successes of these machines in production racing allowed the 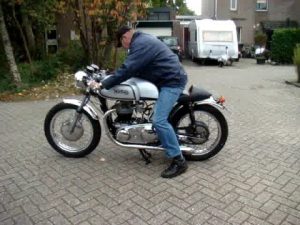 public more choice in owning a lighter, sportier bike for the road other than the Norton Cafe Racer
or a BSA Gold Star
if you could afford one, Triumph Boneville
or even a second hand Vincent
unless you had loads of dosh to buy a new Stevenage built one. A new generation of bikers were going to take the risk of not owning a British machine and were going to purchase a machine that would drastically out perform the choice that there fathers rode to Mallory park to undertake spectating duties.
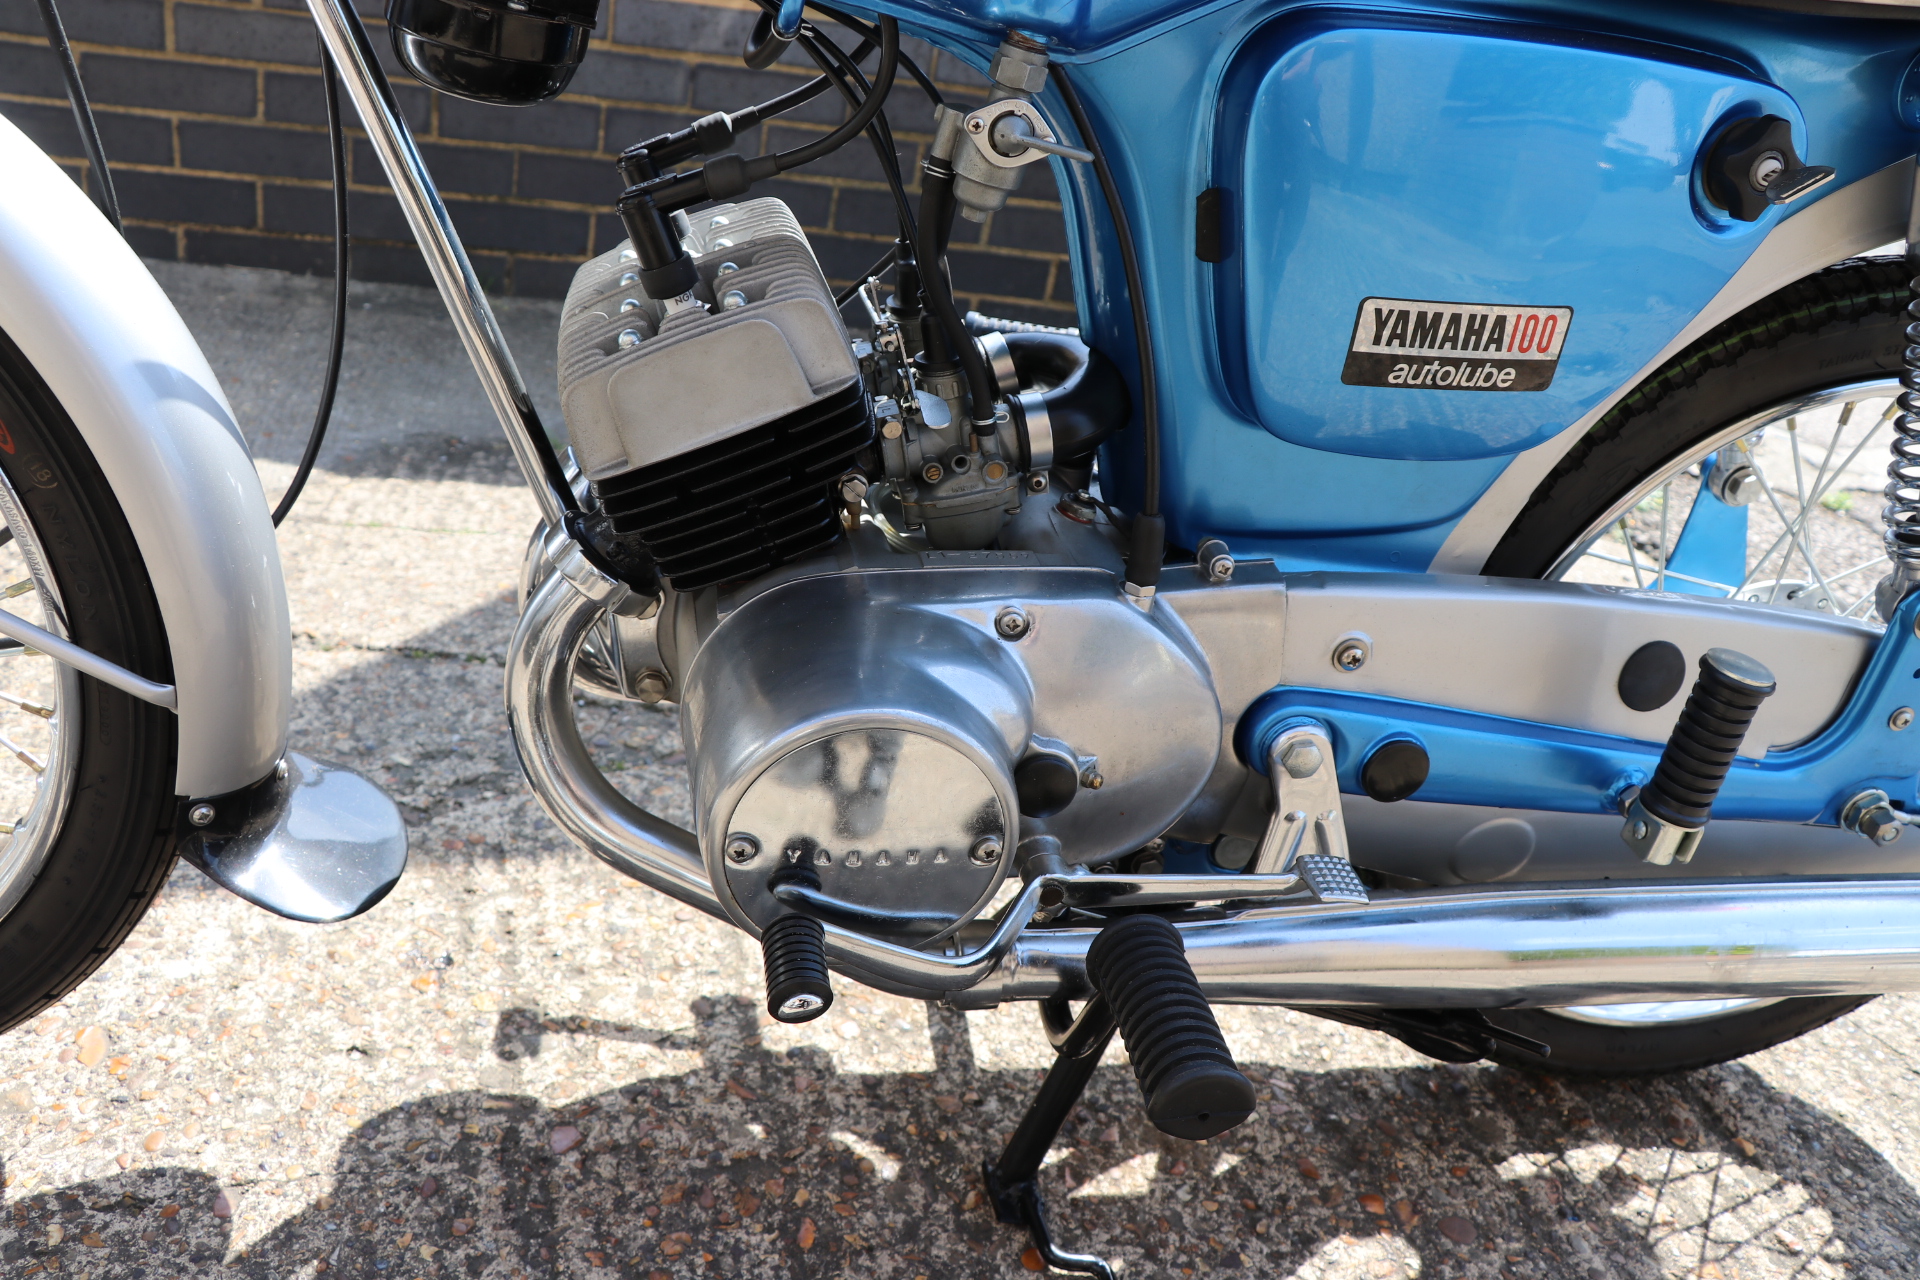
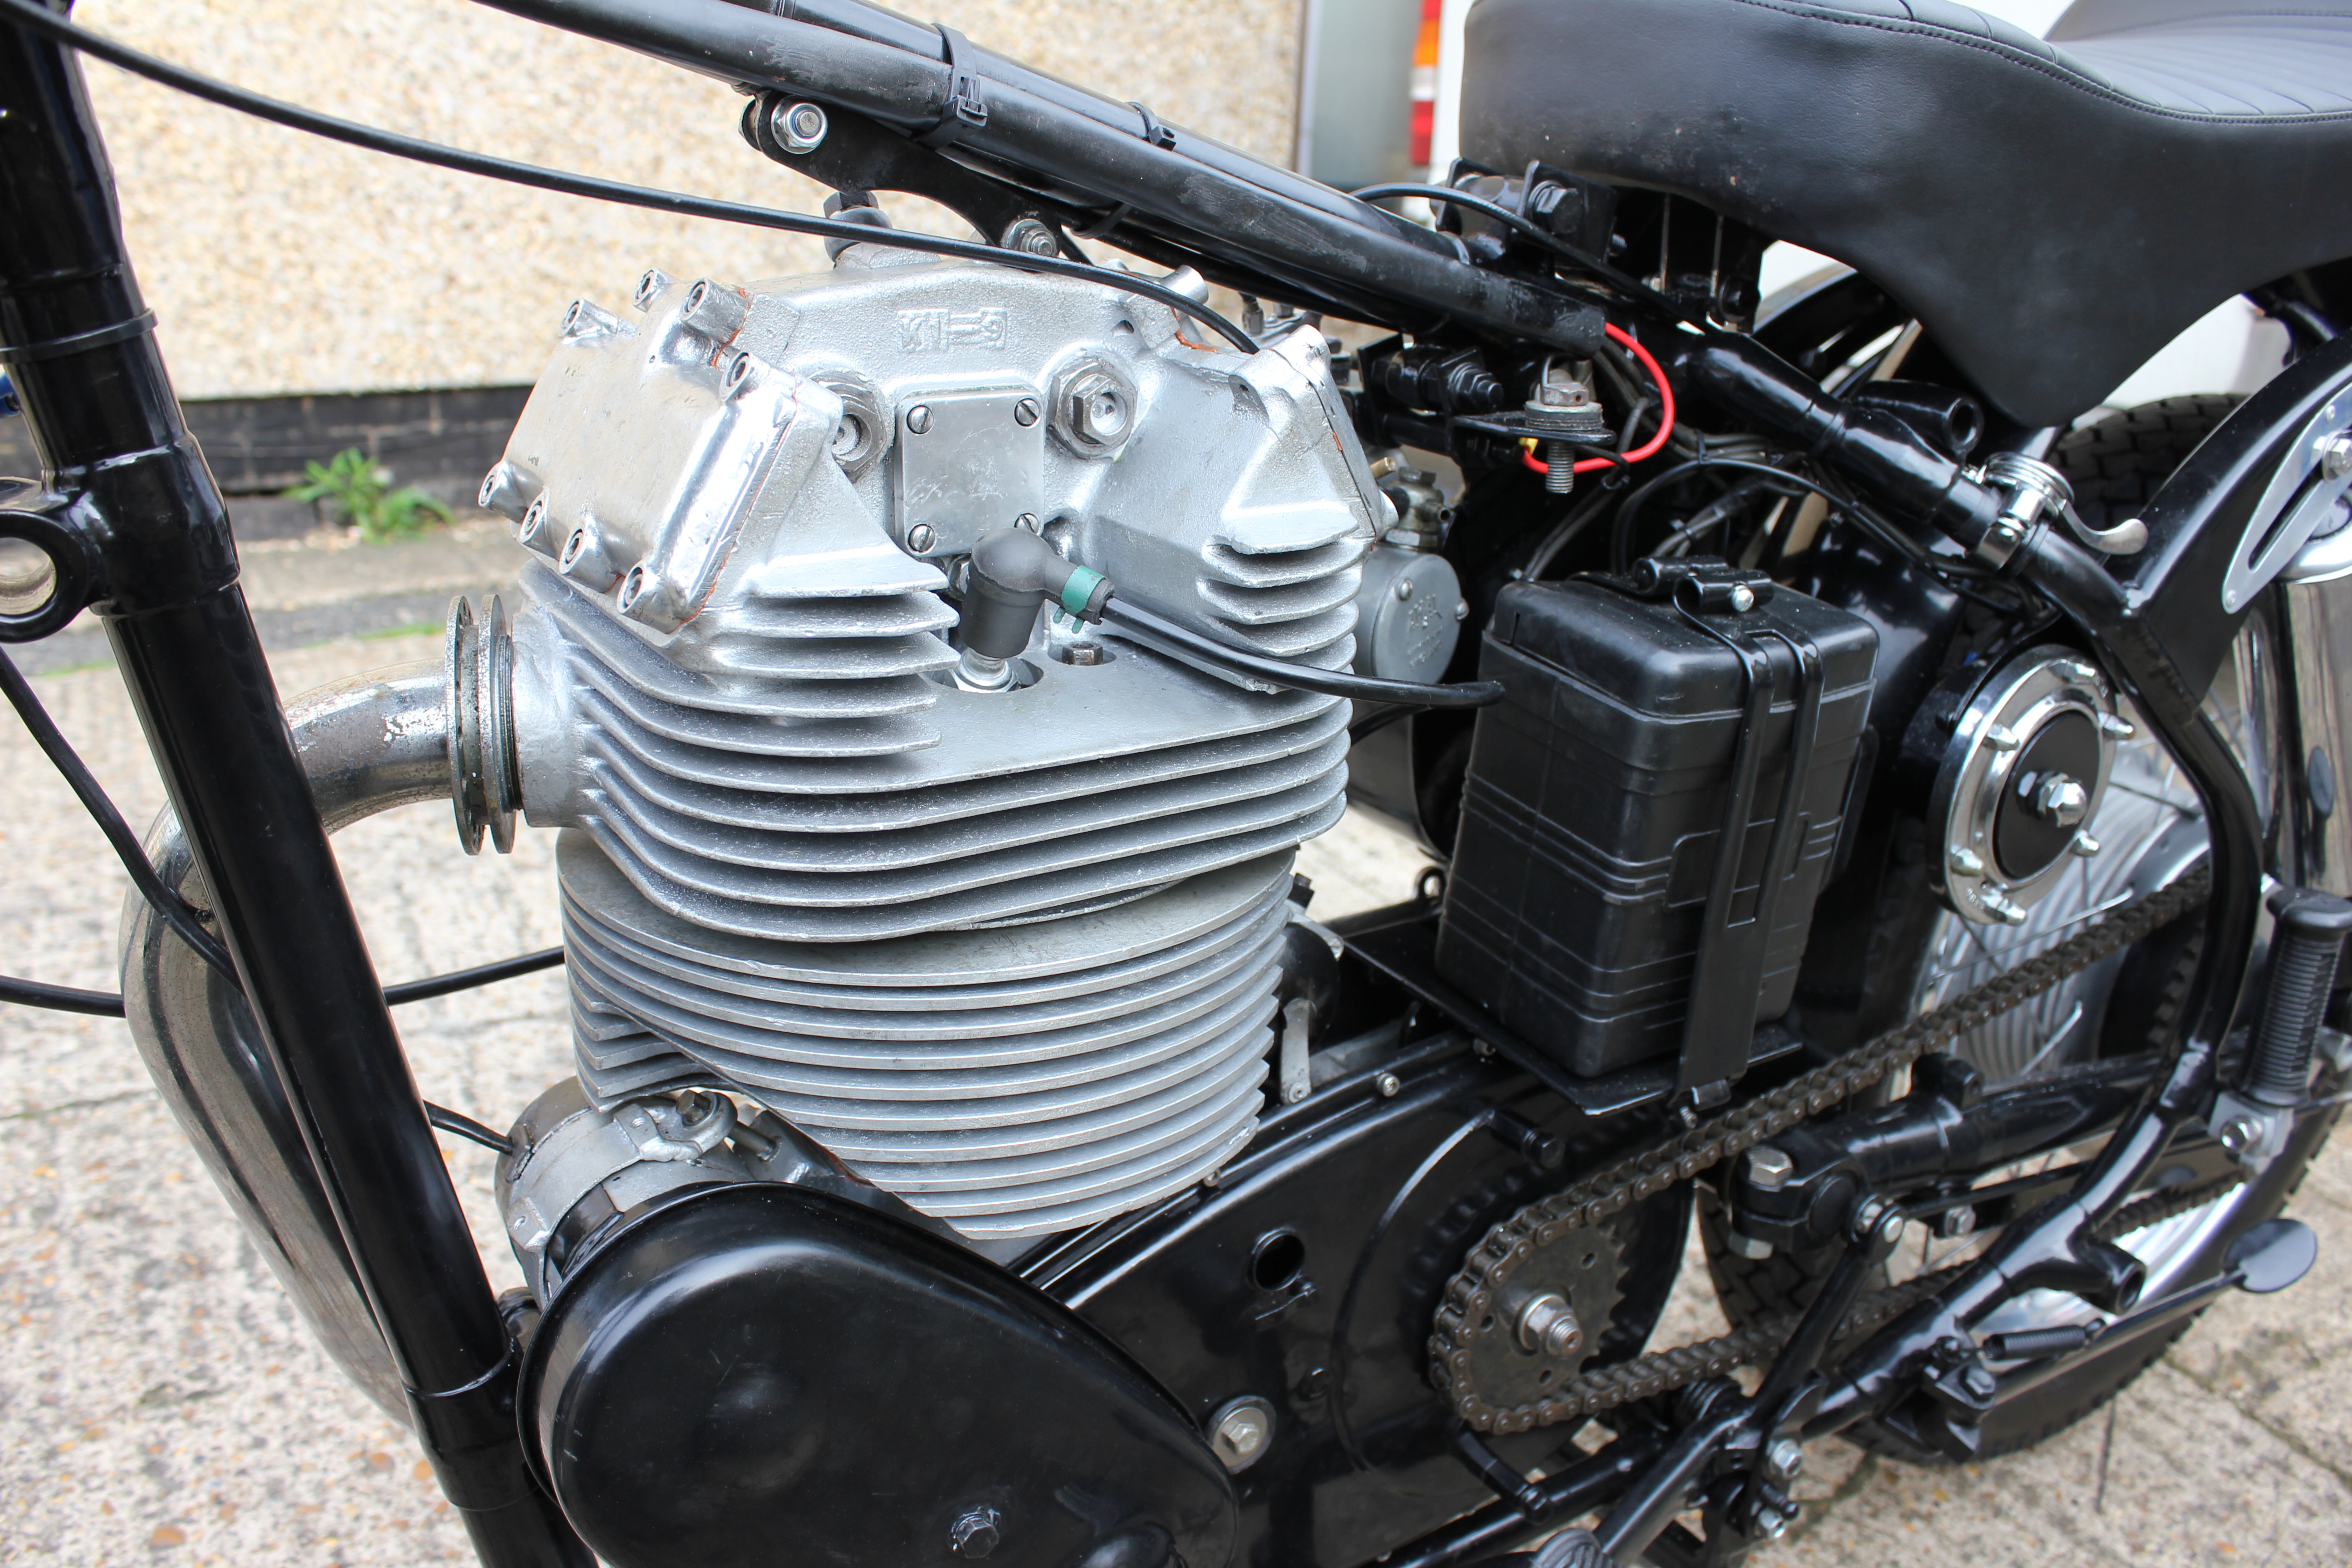
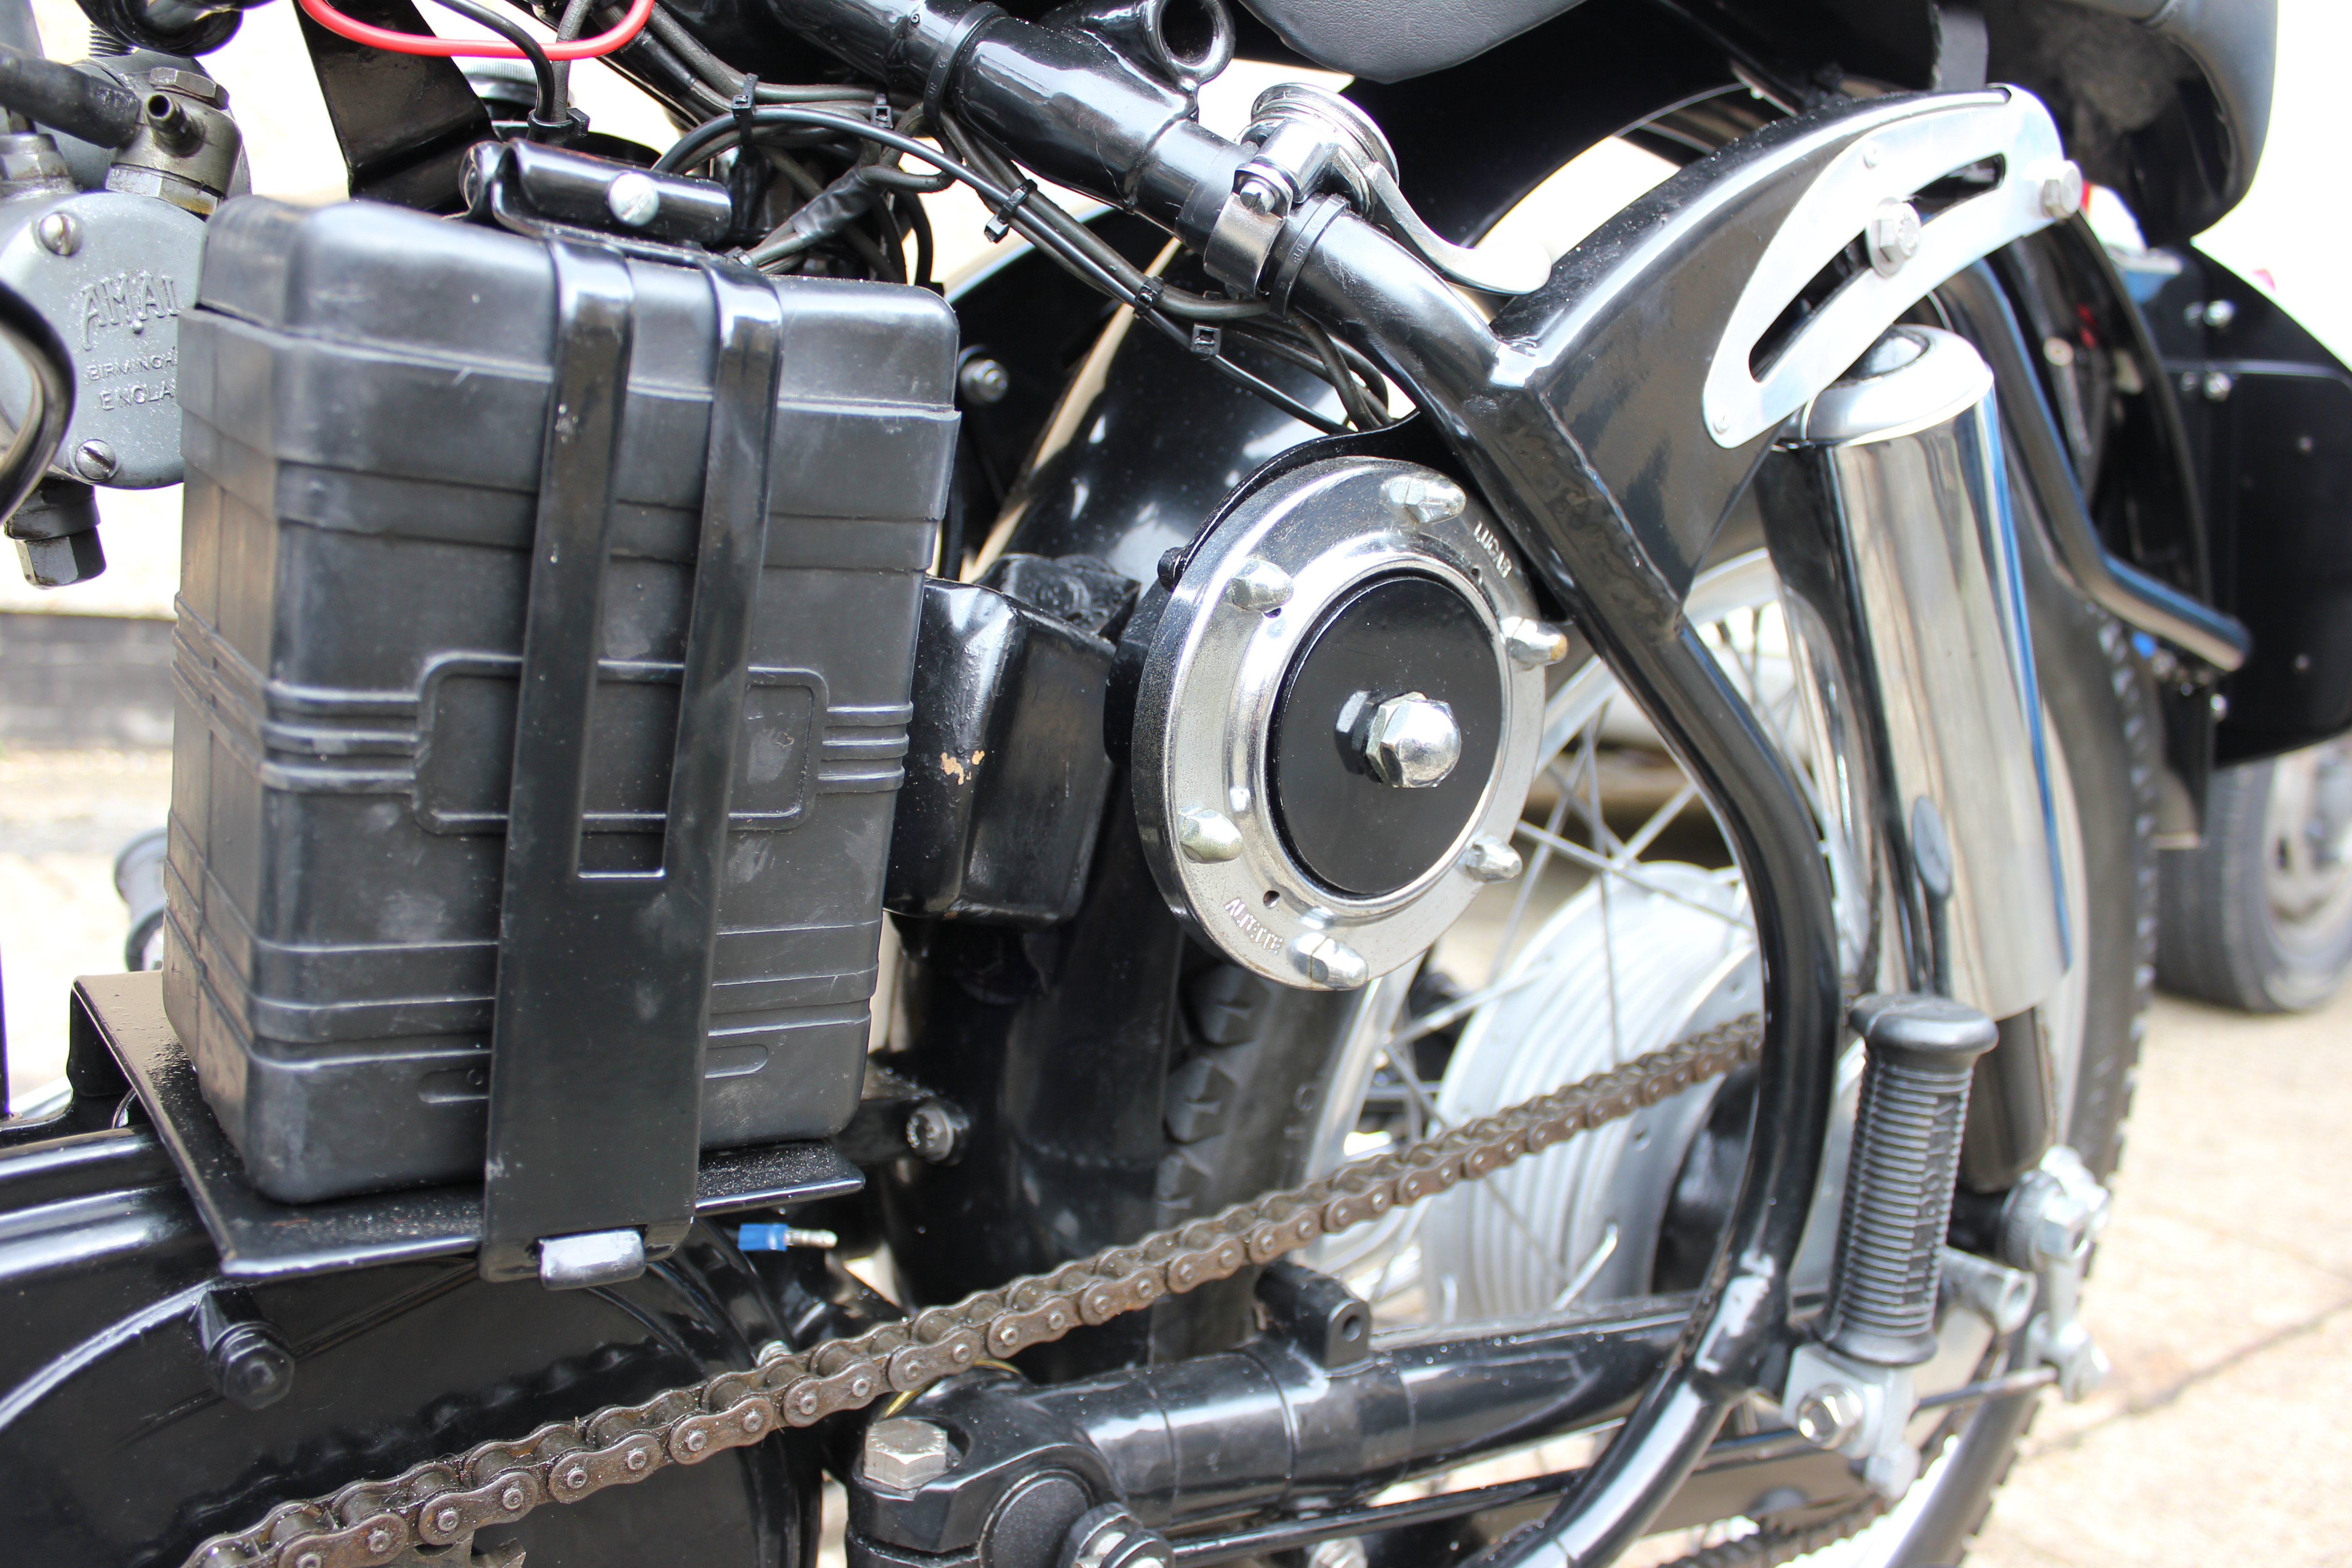
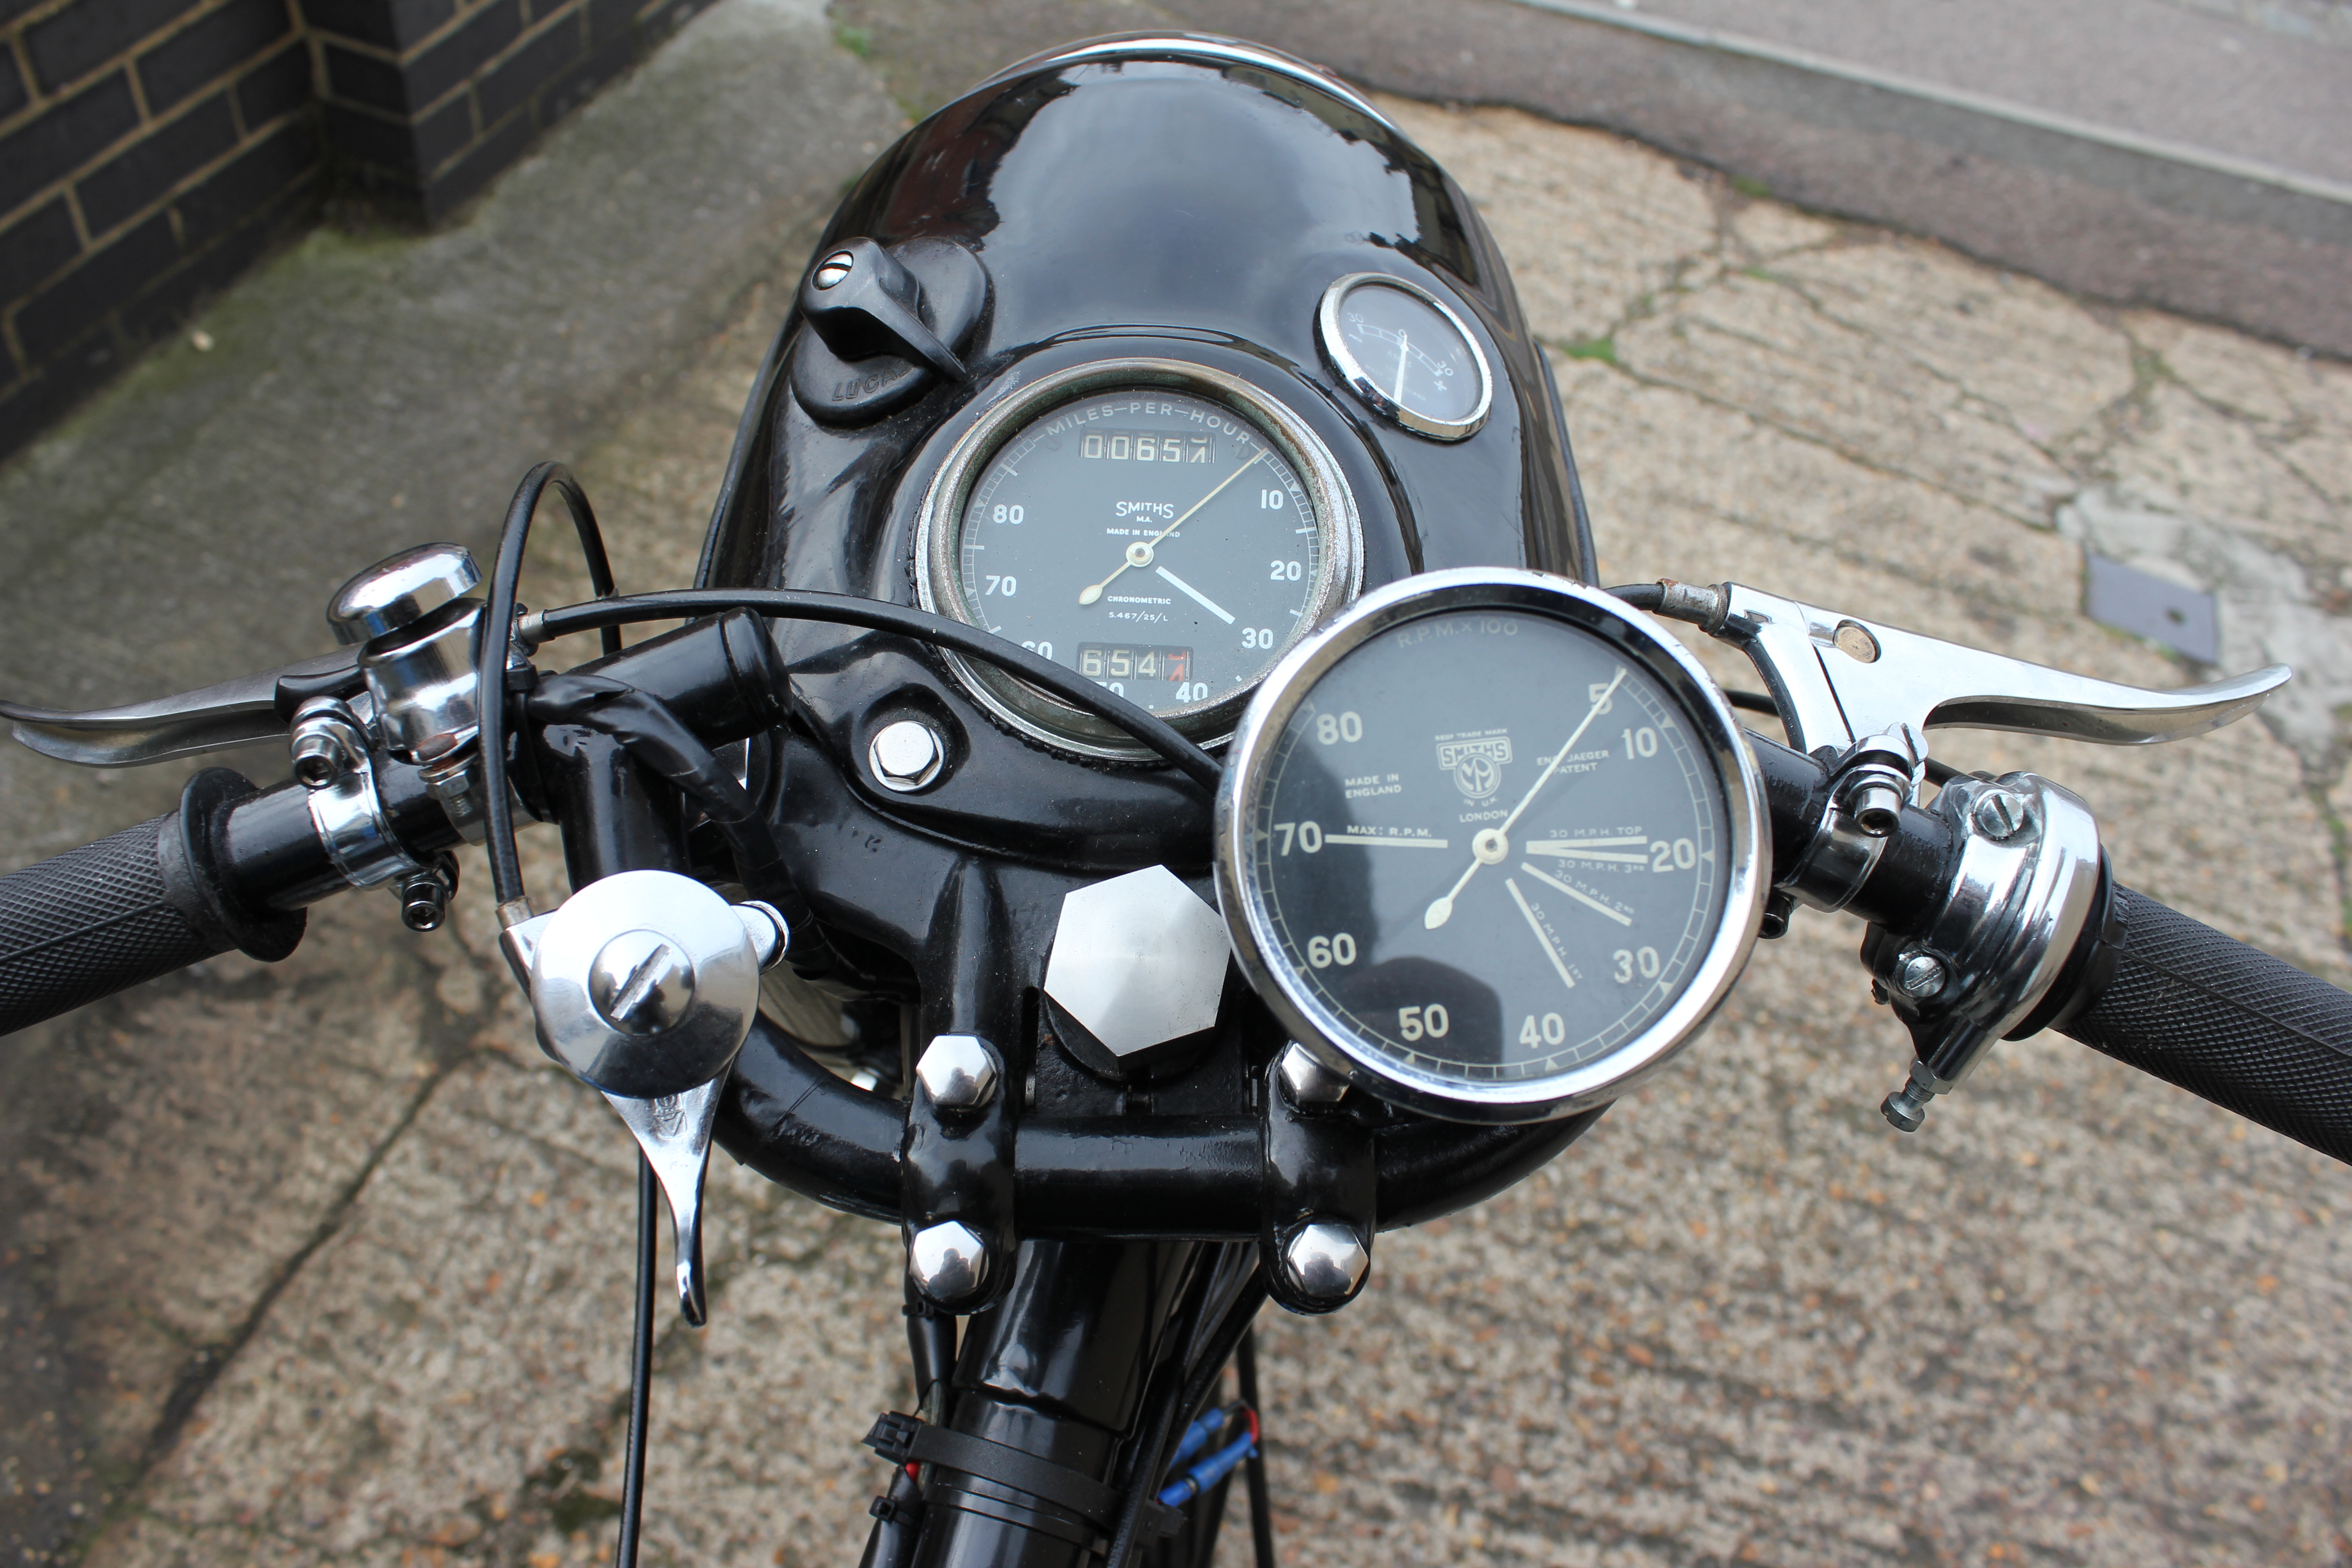
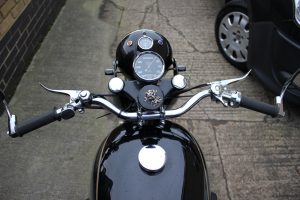
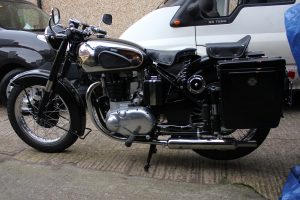
The little Yamaha with its 98CC displacement sold on the back of there successes in racing and was probably a riskier purchase as it was so small for a twin cylinder, only 49CC per pot but it didn’t require a petroleum oil mixture as the oil was metered via a lovely little oil pump that scavenged a metered amount from its separate oil tank fitted with a little oil level window, it all makes sense. The pump was controlled by another cable linked to the throttle and could be adjusted to give a rich or weak petrol to oil ratio. It was best to set it up so as to blow a little smoke just like a typical 2 stroke. When on top revs it shouldn’t give out an unsightly trail of smoke not unusually the YL2 could be revamped using a “GYT” kit. The full kit comprised a tank, seat, barrels in aluminium exhaust system sitting at a high level with heat shields for the expansion chambers, GYT stood for genuine Yamaha tuning. The kit when fitted would boost the machine performance to allow it to be competitive in short circuit racing and to take the piss out of stuff on the road that was a lot bigger. If you own a “GYT” kit now consider yourself lucky as there were so few made. The barrels were made of aluminium and lined with a cast iron liner with modified porting. The tank and seat unit were of fibre glass and the expansion chambers were tuned to give a wide range of power. These little engines would withstand a lot more tuning to give better performance that would rank it a championship winner of its time. A standard speed of 65-70 at 8500 RPM and a wide rev band that would be forgiving if you missed a gear and dropped into a higher one, this suited the market that the bike was aimed at.
The bike in its year of manufacture was focused on the new boy to the road who wanted to own a real bike not an ordinary commuter bike and to put it through its paces and get performance in return. The Yamaha YL1 didn’t disappoint. Yamaha of course sold the Yamaha YL1E, “E” being the electric start model, WOW. It didn’t need electric start unless you were ridged with arthritis but it was a nice touch to make a small bike seem somewhat bigger than a lot of its brothers who sported more CCs.
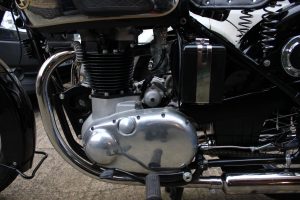
On opening the engine for full restorative surgery there wasn’t anything surprising as it was rock solid in construction and mechanistically wouldn’t have been out of place in a Yamaha 250CC I would even say it’s embarrassingly too strong in construction for what it has to do on the road let alone if tuned for the race circuit. The barrels although not over ported had so much scope for irresistible tuning as well as the exhaust system that muted the Yams performance, no doubt.
The crankshaft is a little work of art and so solid in construction although difficult to take apart unless you posses the correct factory tooling. this is not so as very simple tooling is needed for a crank split and rod change and then the same tooling can be used to press it all together. Here is what I found when stripping my engine down to the bones, one busted gear in the gearbox unsurprisingly it’s the first gear.
Worn pistons, rings, barrels, funny shaped internal crankshaft rubber seal and all the other rubber seals throughout the engine were exhausted due to long term non use. Pistons and ring sets are easily available in the US, Thailand and Singapore but they so crop up in the UK. It’s unlikely that you would need new conrod and bearing kits in original greases filled packages they are readily available from Thailand. If you require a complete crankshaft unit it can be a little tricky as there are lots of rusty ones, although new old stock, they will still need a bit of work to get them usable.
Gearbox internals are readily available in fine used or new condition, so no costly worries so far. The expensive bits are normally the cosmetic parts such as tank badges and the bits and pieces of rubber oddments that adorn the bike. One real expensive piece of rubber is in the heart of the engine. This rubber moulding separates the two crankcases from each other, prices range from £90 + post and such from the US, but if you look on Yambits parts on the web and get the part number and Google search it, you may get lucky and find one in Thailand as I did for £17 delivered.
All other seals can be got from bearing suppliers as they are nothing special as long as you supply the old one as a sample. Seat foams are not available but if you buy a Hap Jones seat cover and take your finished bike to your local vehicle upholsterer to carve the foam and fit the seat cover you won’t be disappointed as it is one of the last jobs to be carried out.
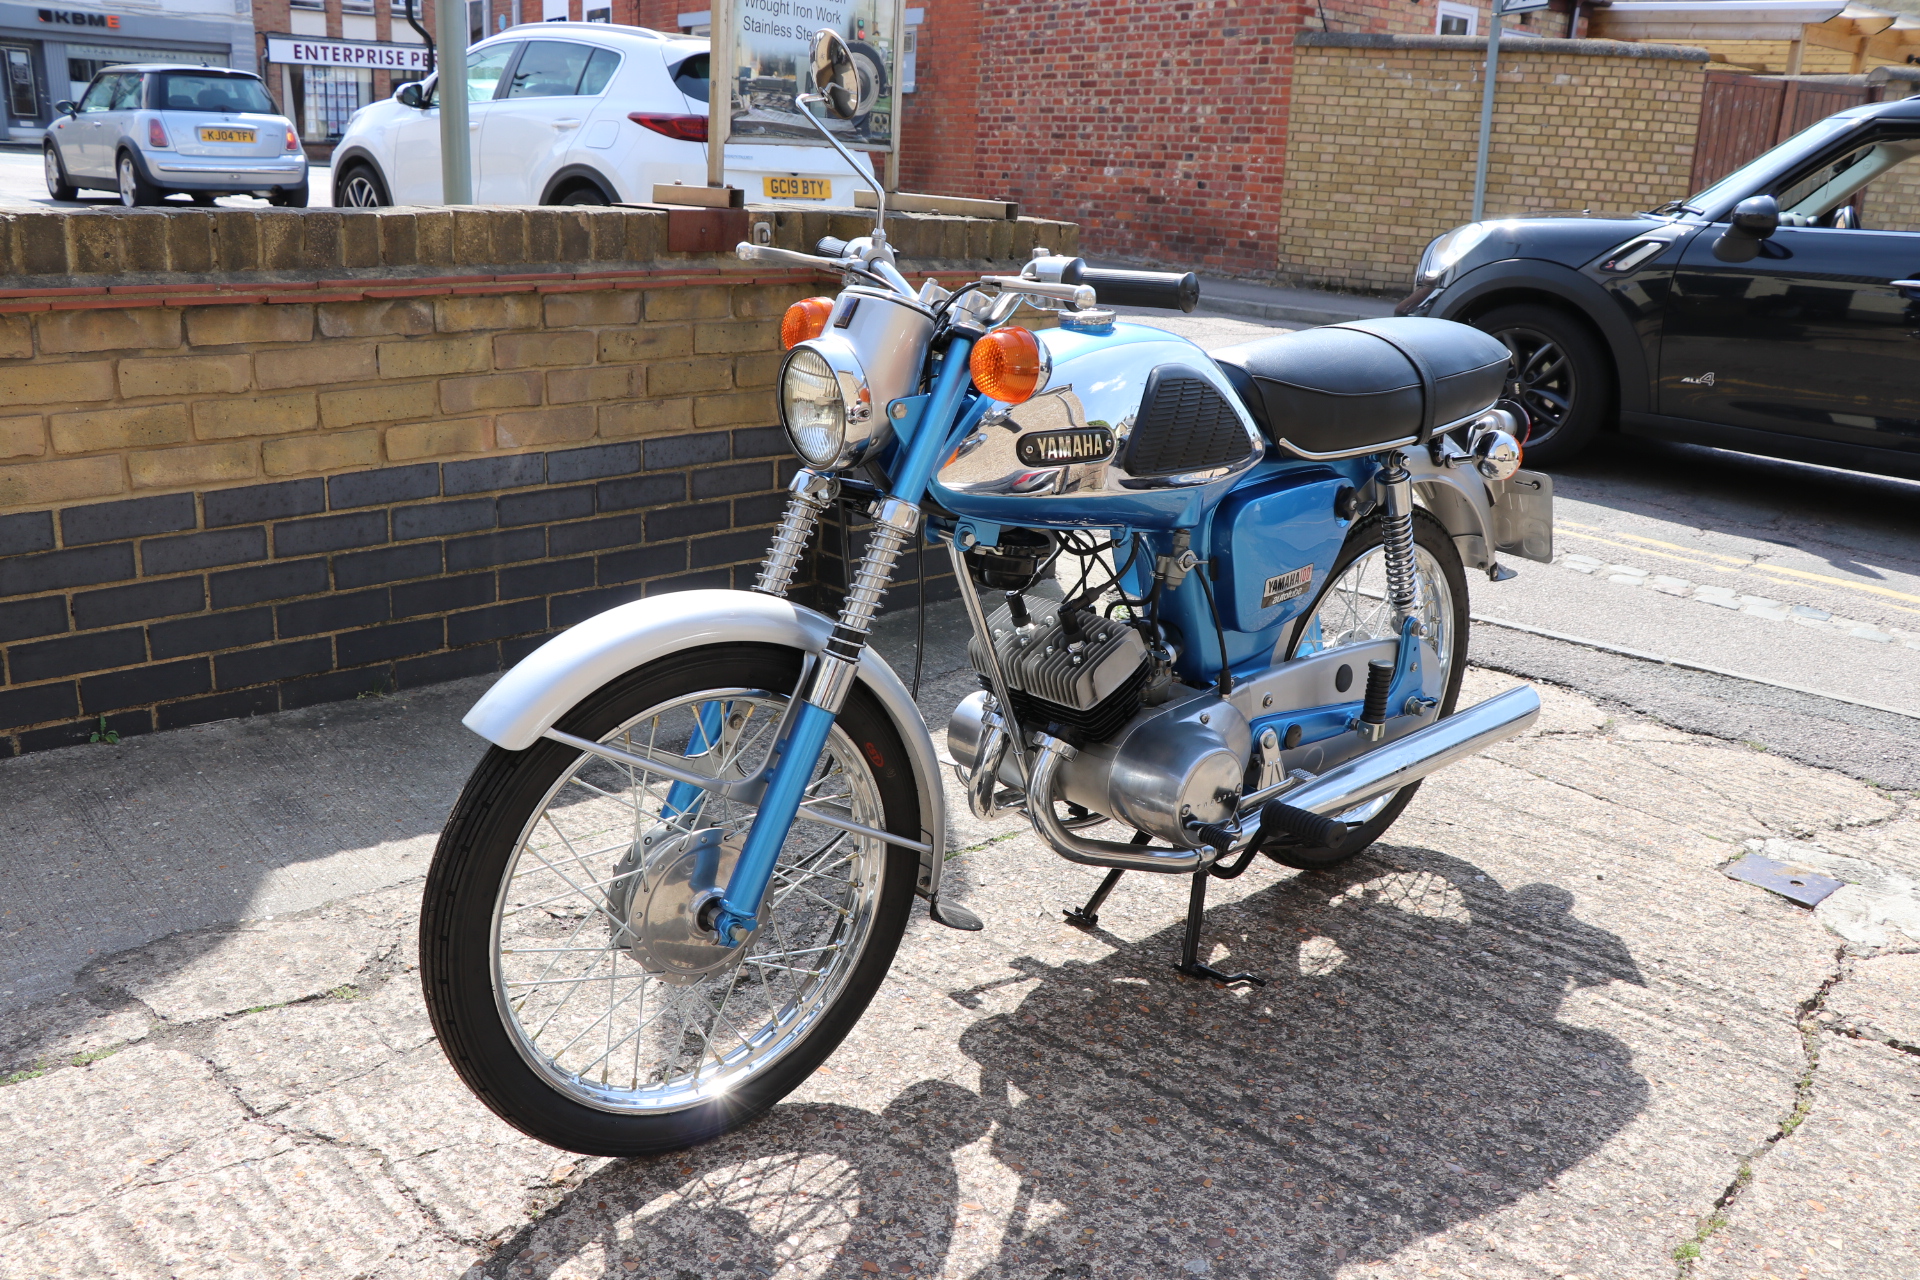
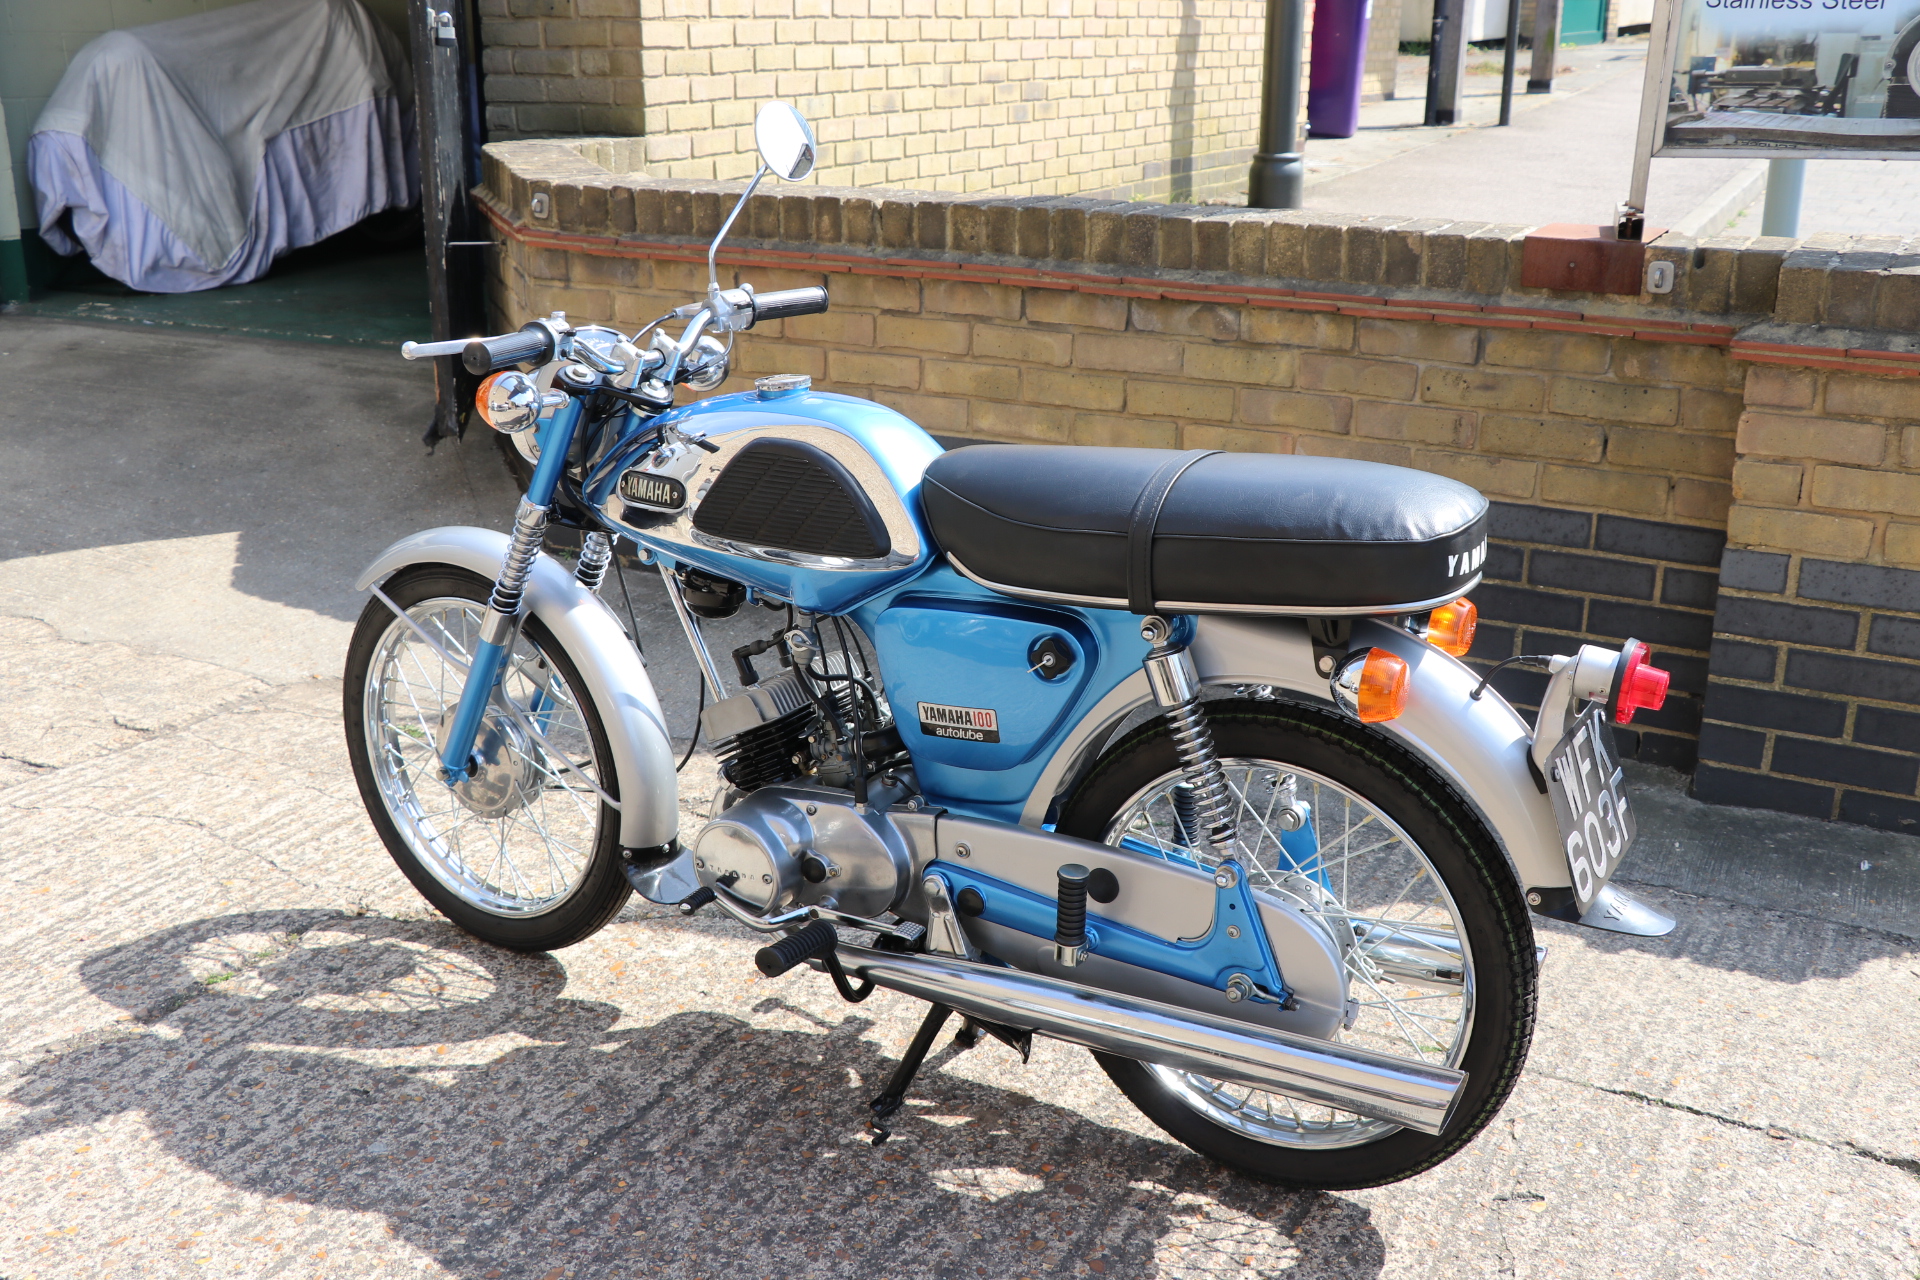
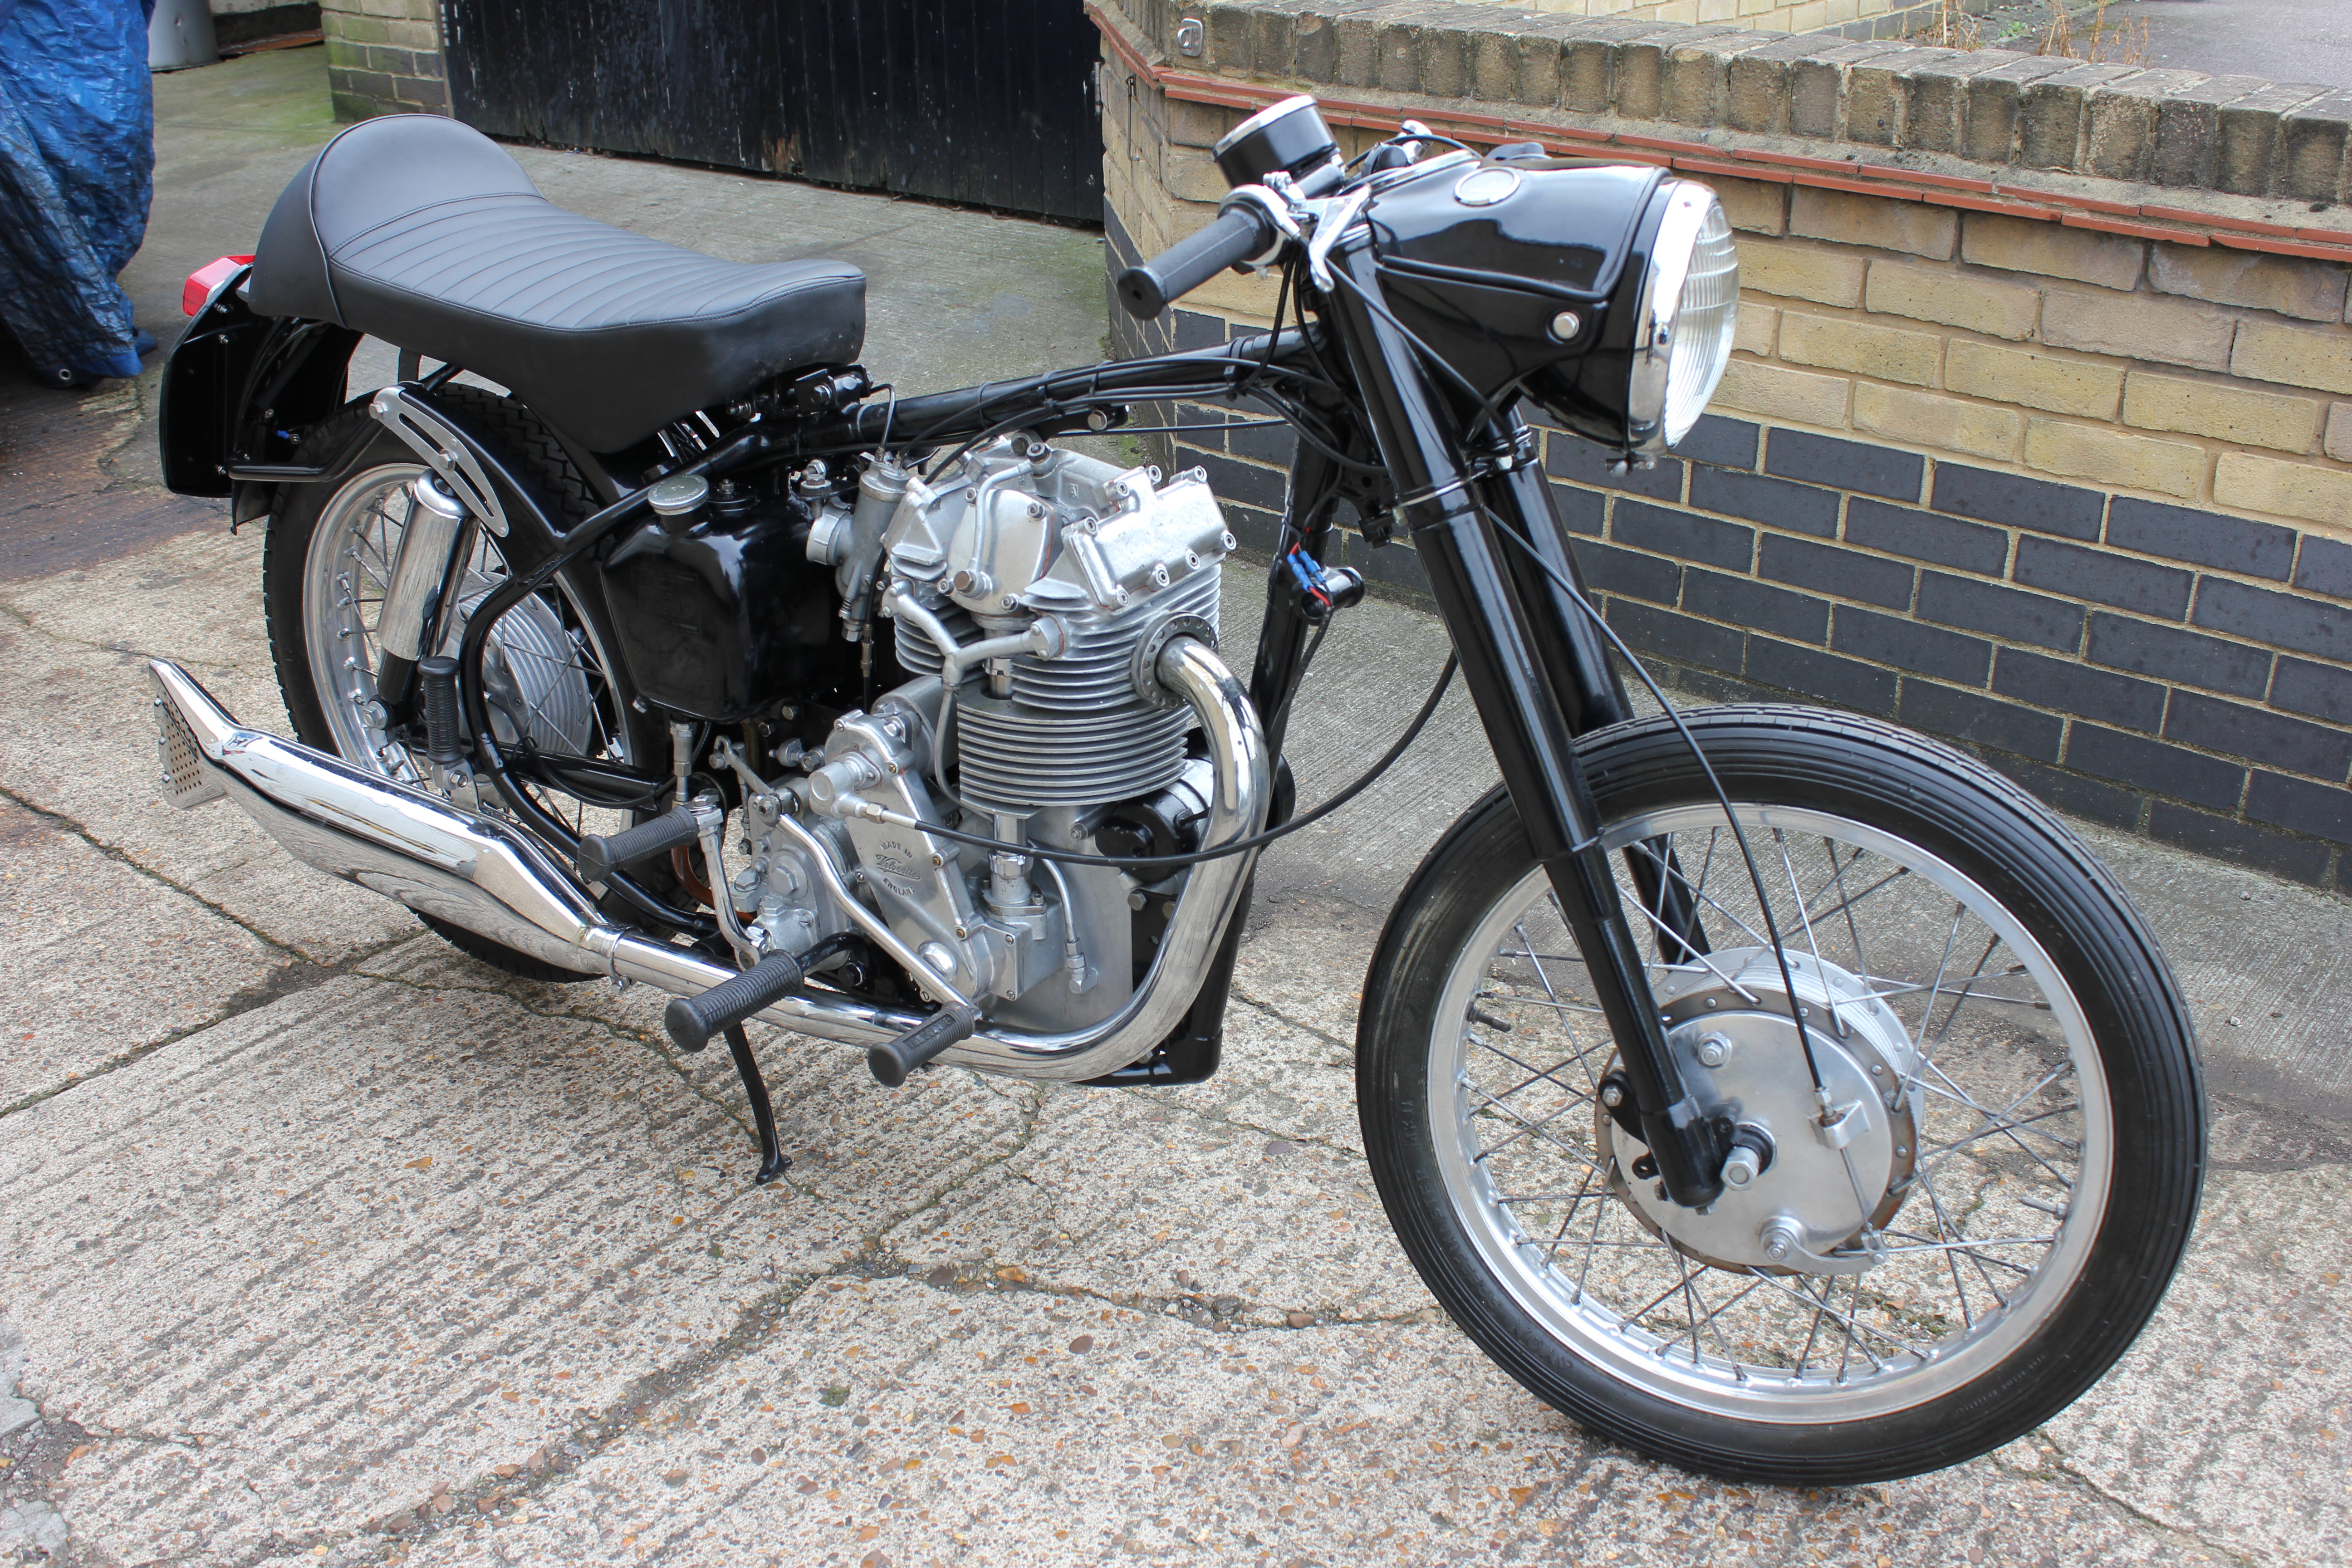
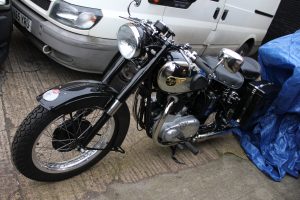
There are very few petrol tanks floating about on the market that are in good condition, they usually have dents in the chrome area as did mine, 4 hours work on my tank restored the dented areas. The tank was then painted in the original colour of peacock blue as used on the pressed steel frame along with the silver paint. On some models the front mudguard was painted silver rather than chrome but both retained the pressed steel anti splash guard at the trailing end of the mudguard. It seems that some of the YL1s were painted rather than chromed, maybe the painted models were to be exported to the UK market and the chrome was saved for the bigger US market or maybe it was based on the year of manufacture. As manufacturers forge links with a given market they most probably put out there most glitzy pumped up model with all the tassels and chrome to the biggest buyer and then step down a notch to the smallest of importers, who knows?
there were indeed differences in specification regarding lighting and exhaust spark arresters fitter to the exhaust system as apposed to UK specs, spark arrestors were fitted to US models as was a slightly different tail lamp design. Not much hope of starting forest fires in the UK and we didn’t have to have our lights on when riding during daylight hours. After stripping the engine down and rebuilding it with no compromises including the entire fittings made from 316 stainless steel it cost me £1500 to gain perfection and ended up better that new. In hours and parts.
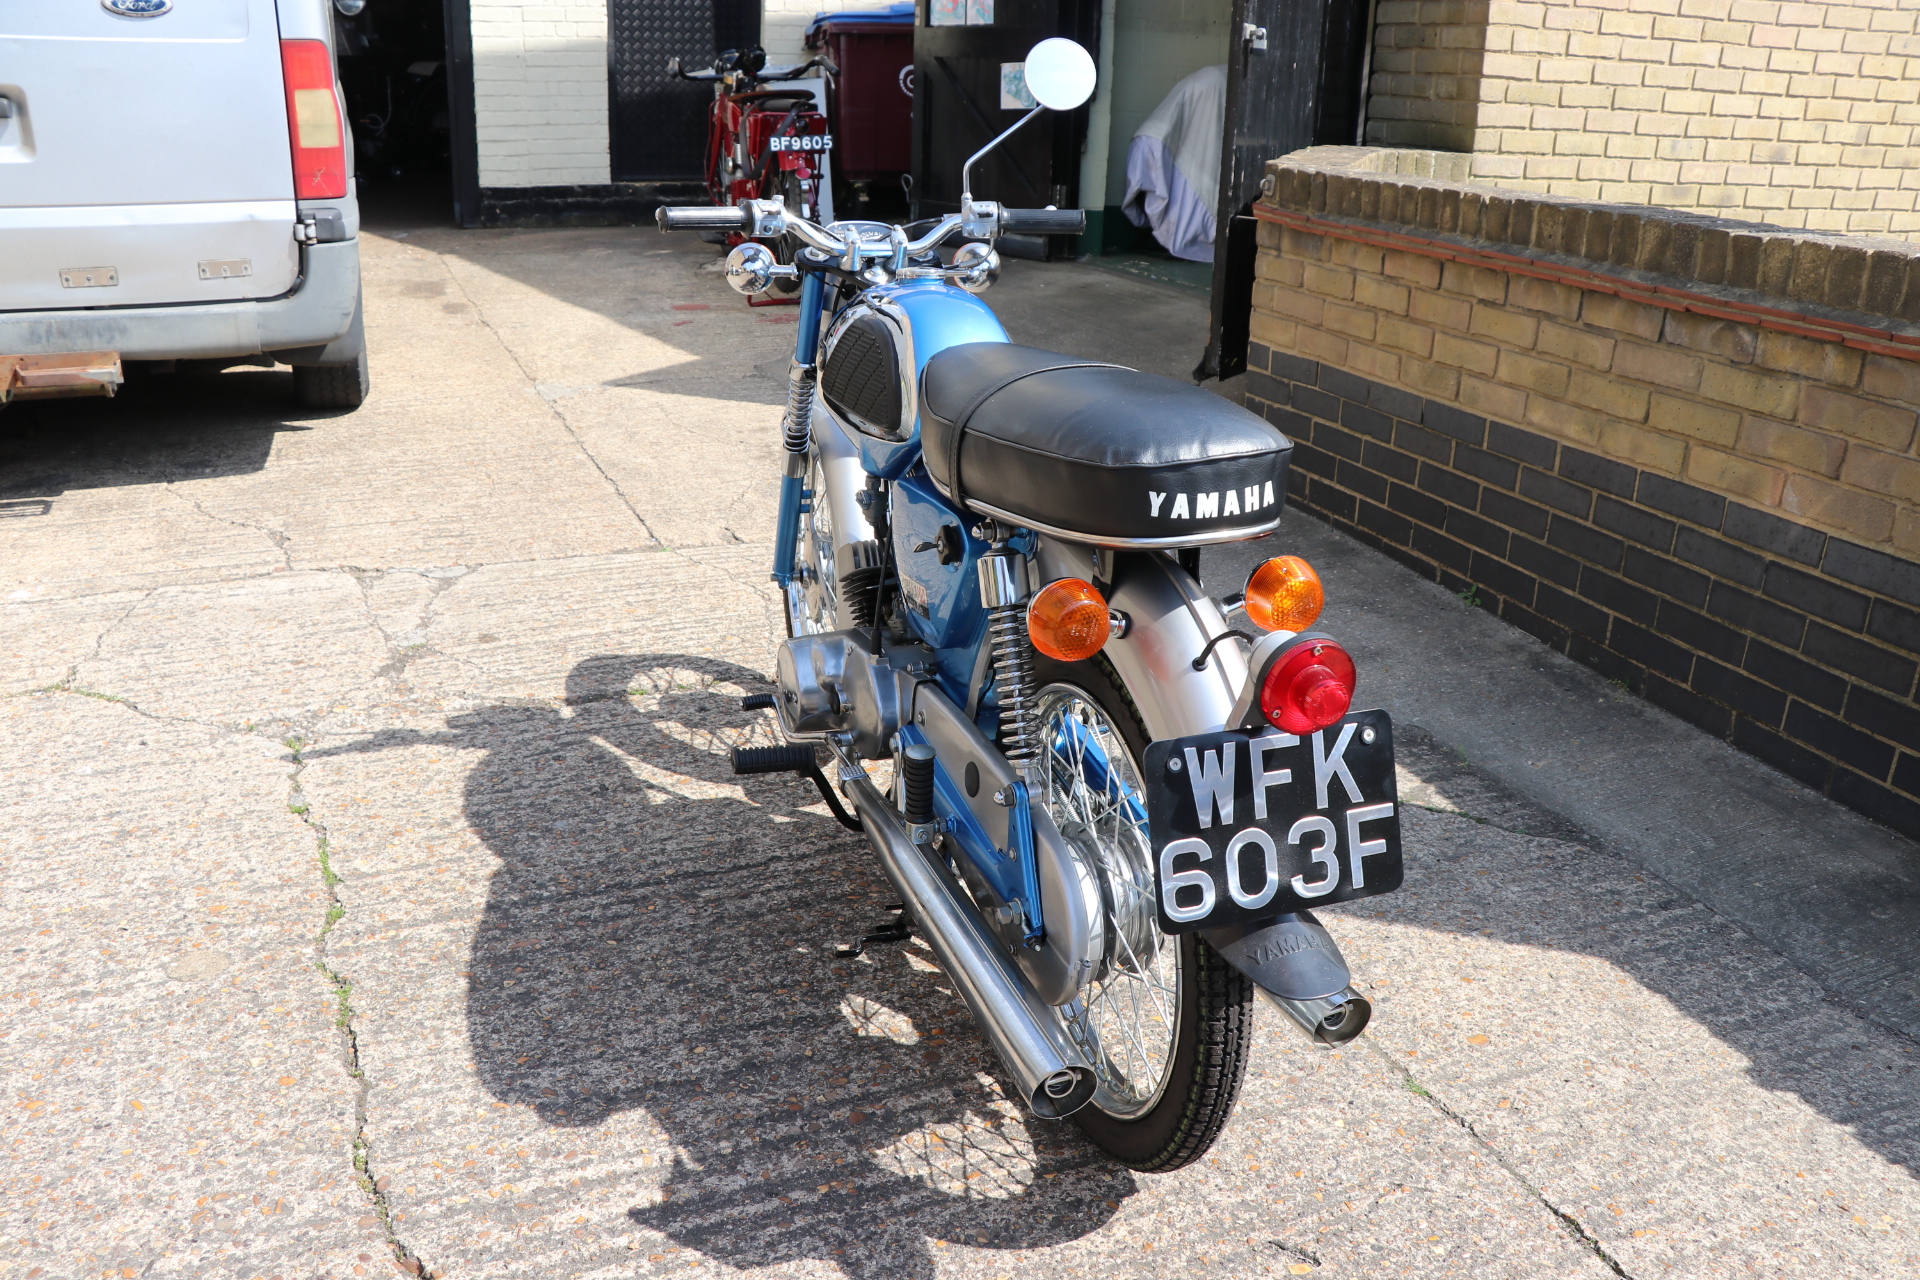
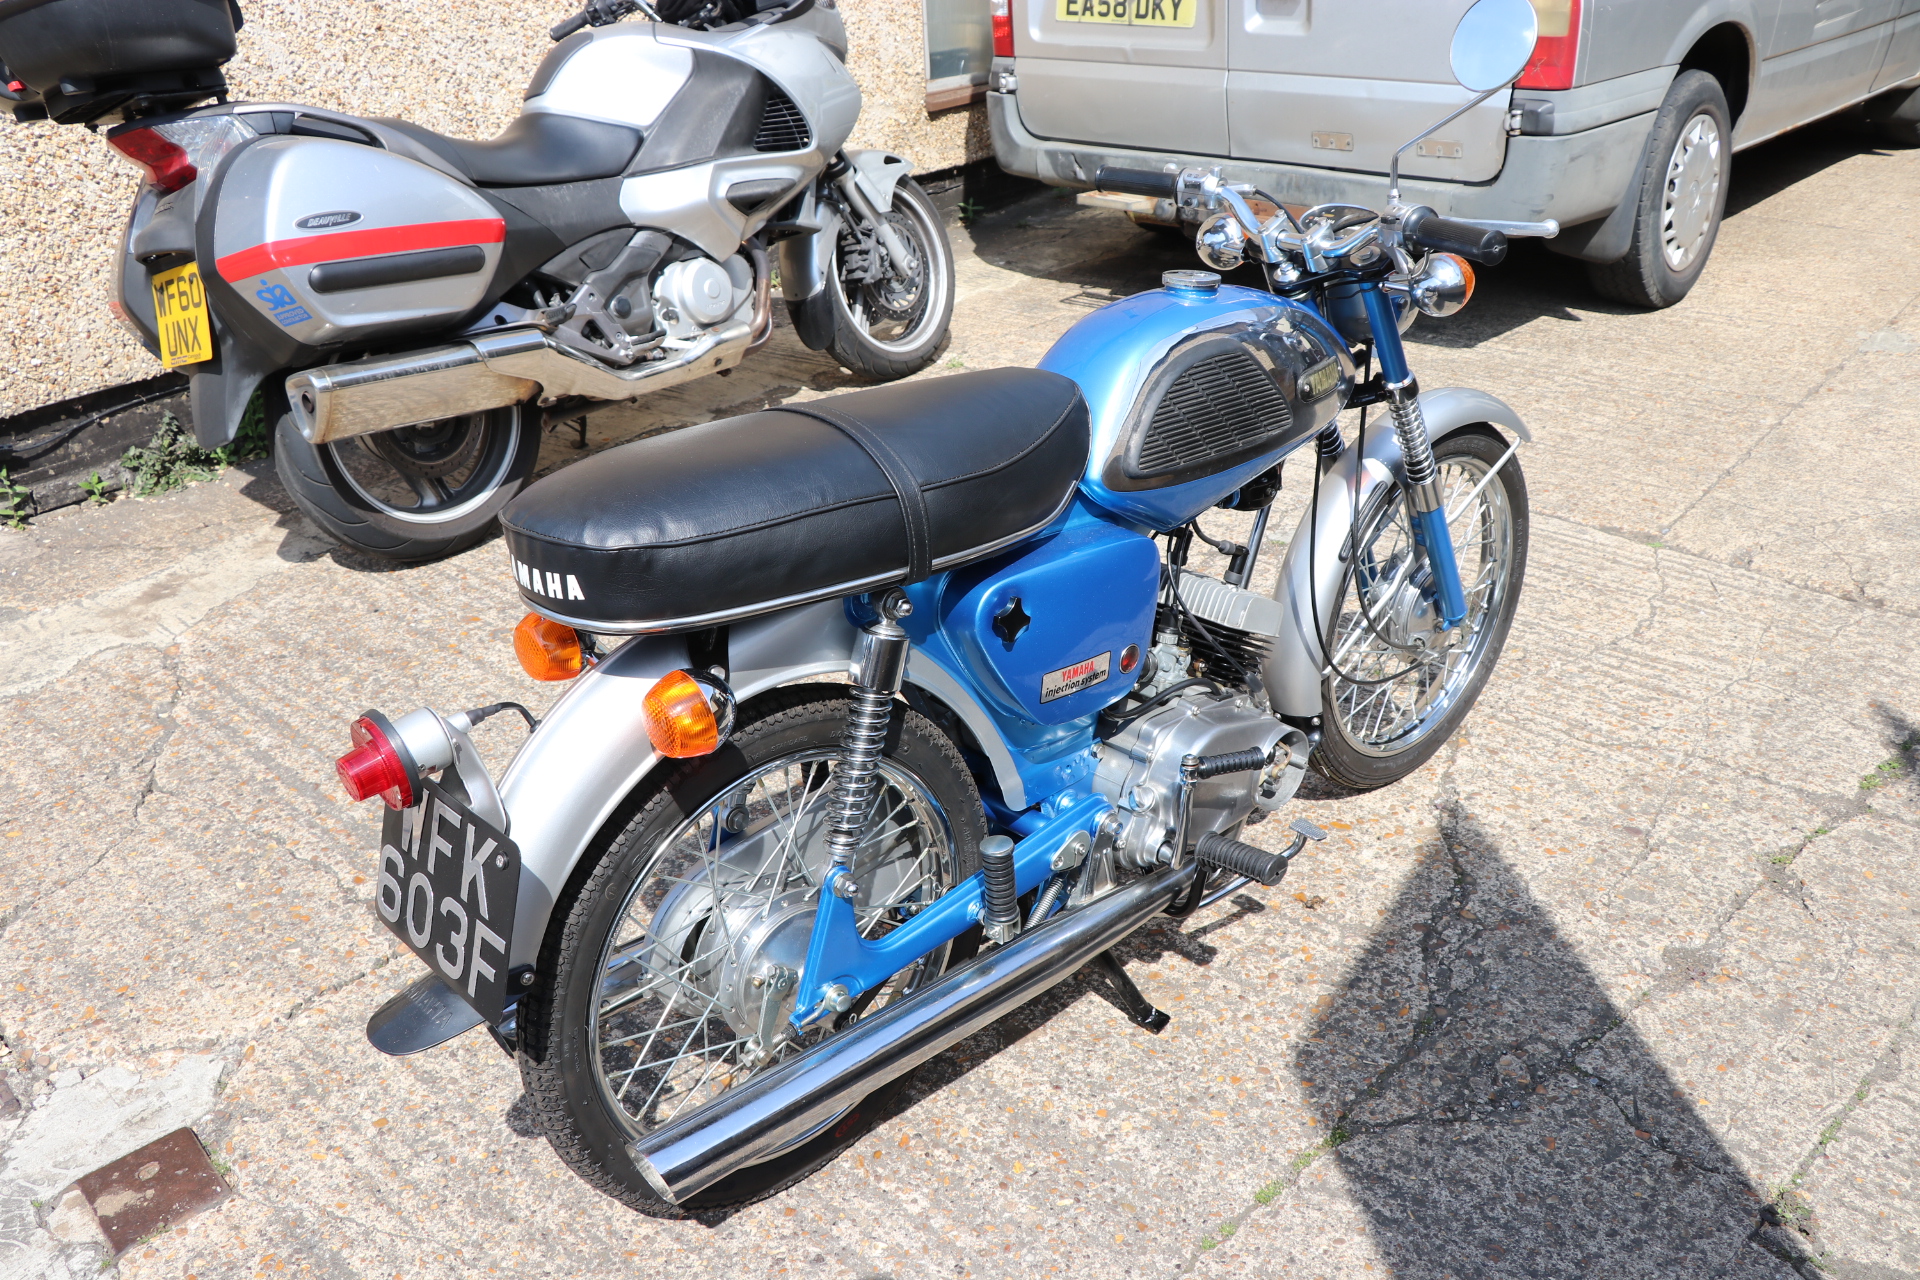
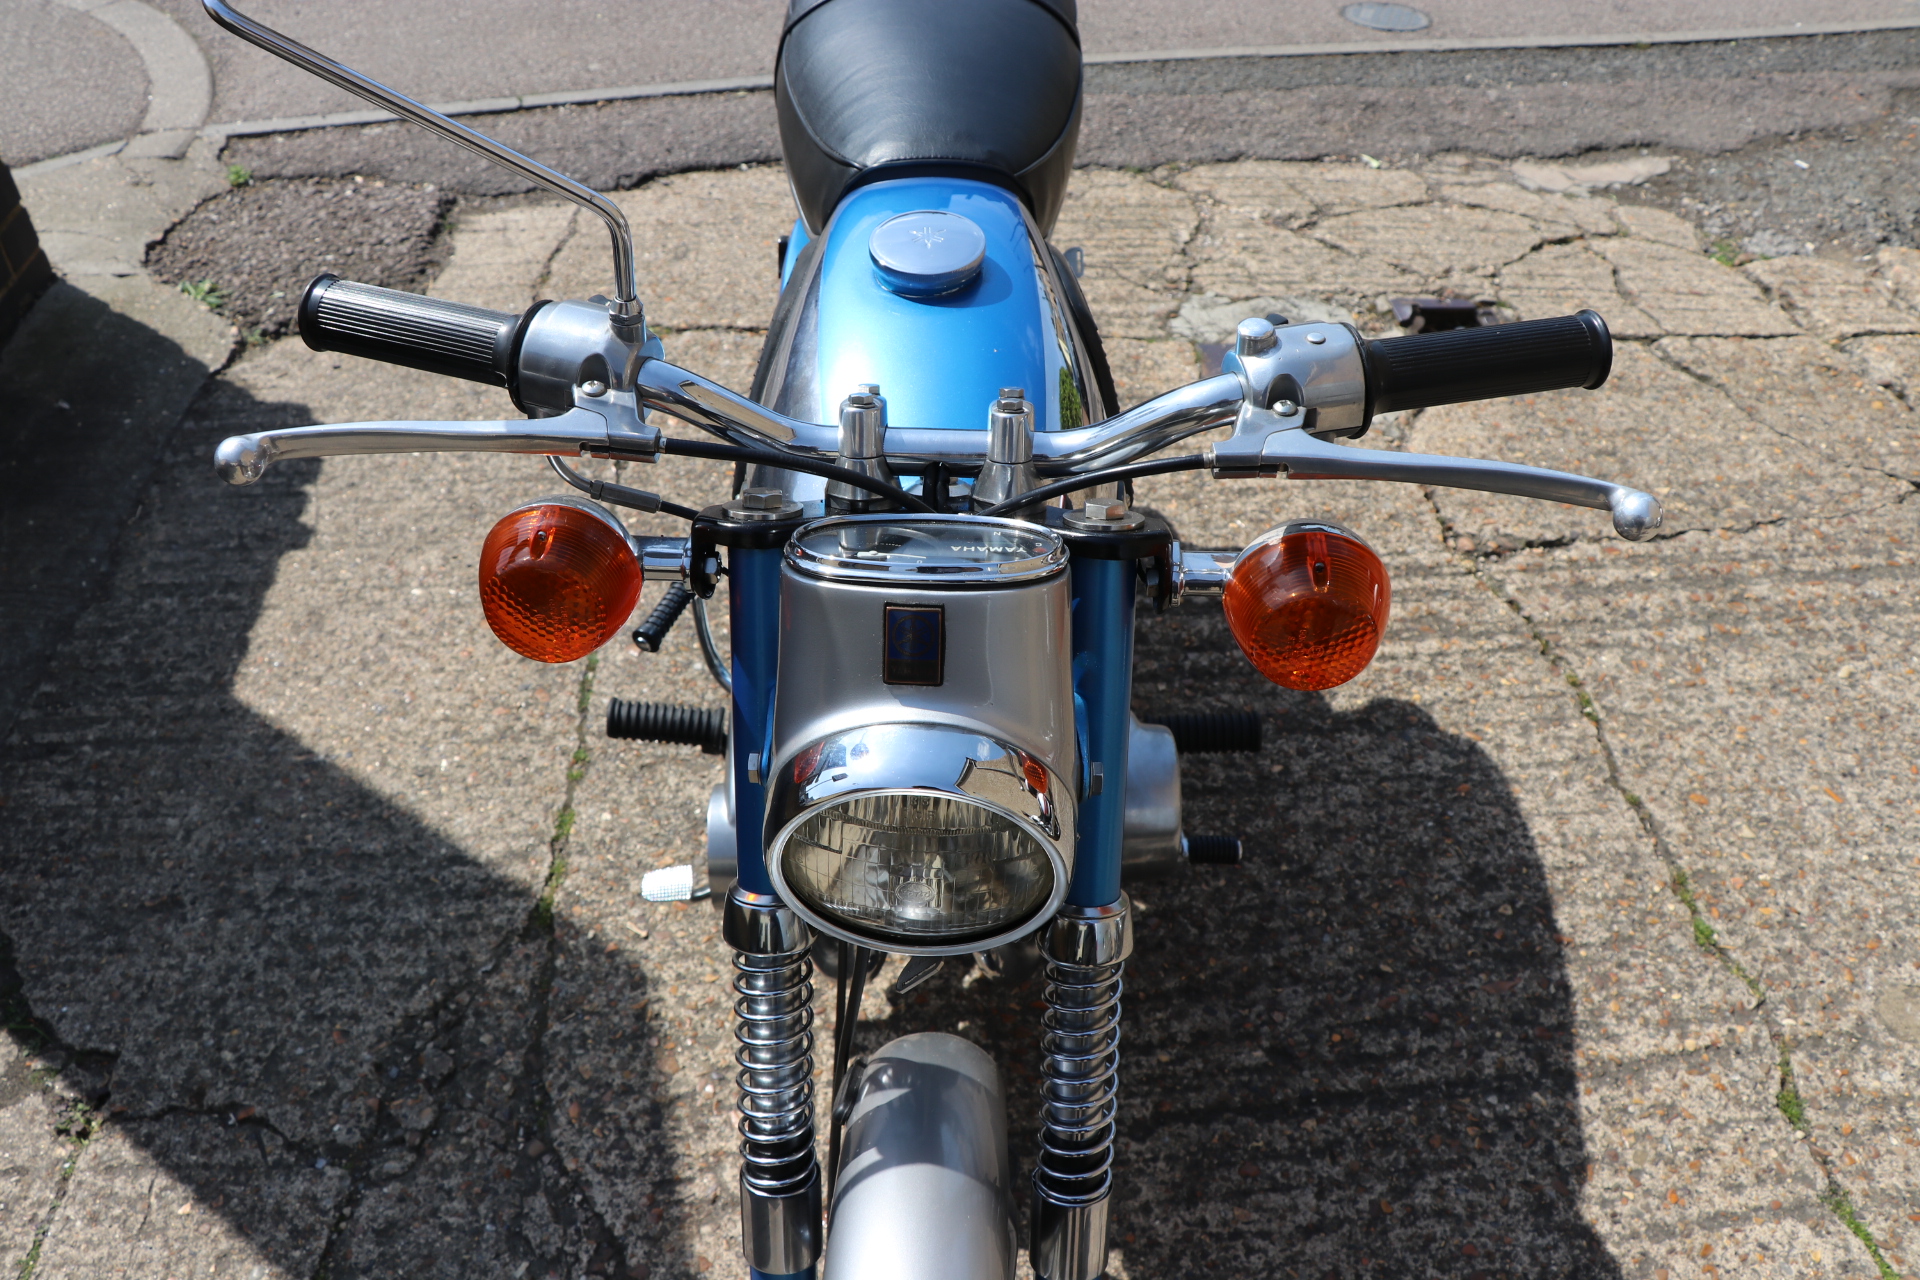
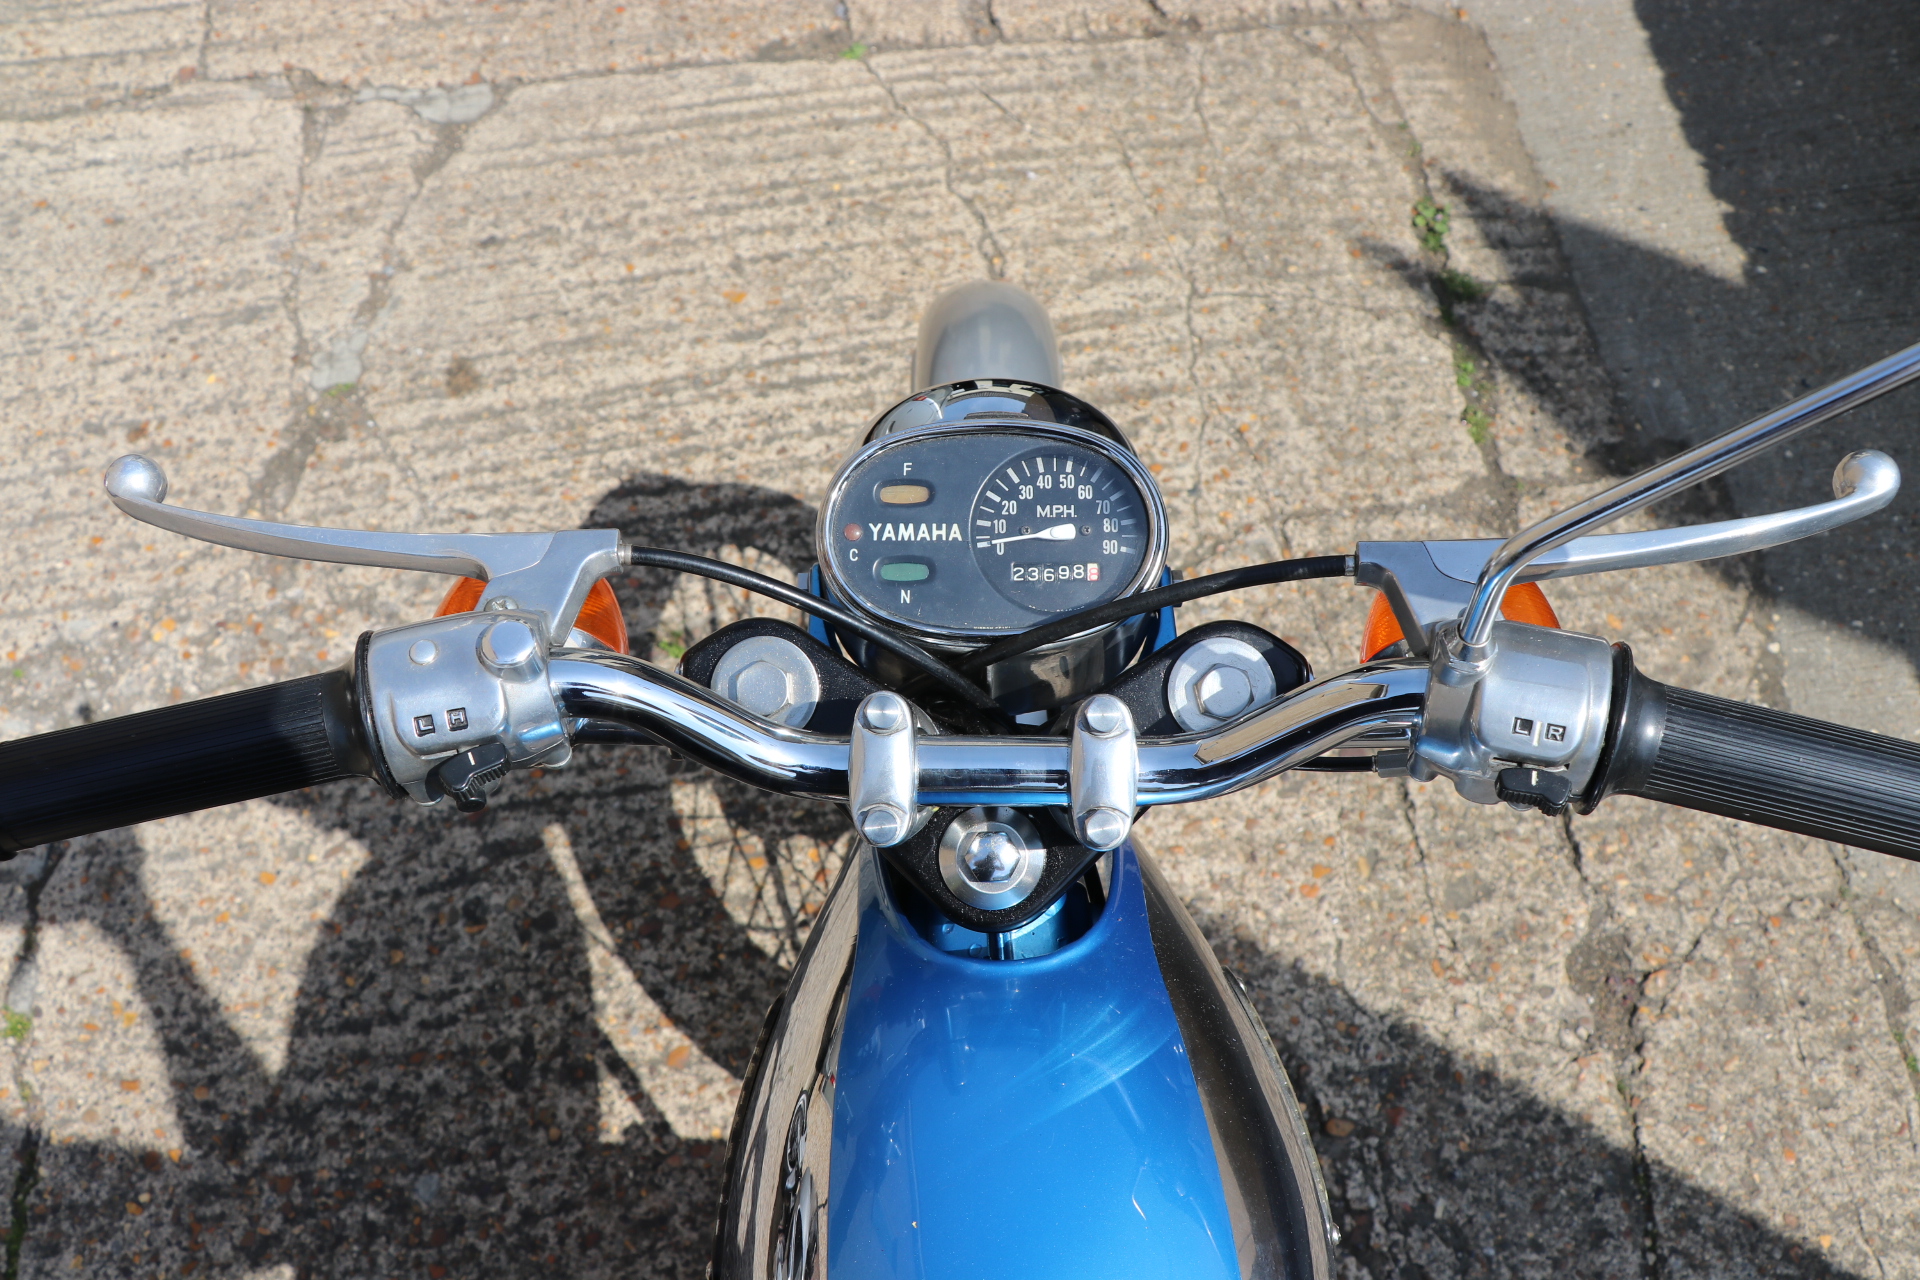
Here are some pictures of my Yamaha YL1.
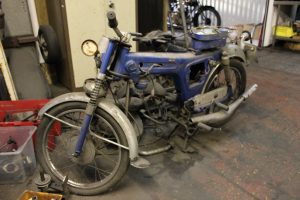
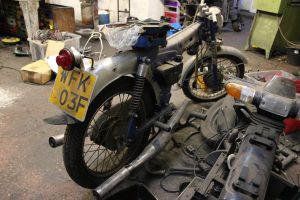
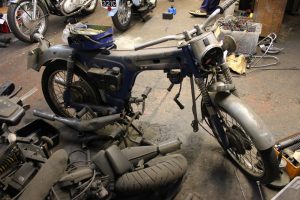
This blog was published on the 31 Oct 2017, and this is the final update on the 1st May 2025. Below are the pictures of it after its restoration.
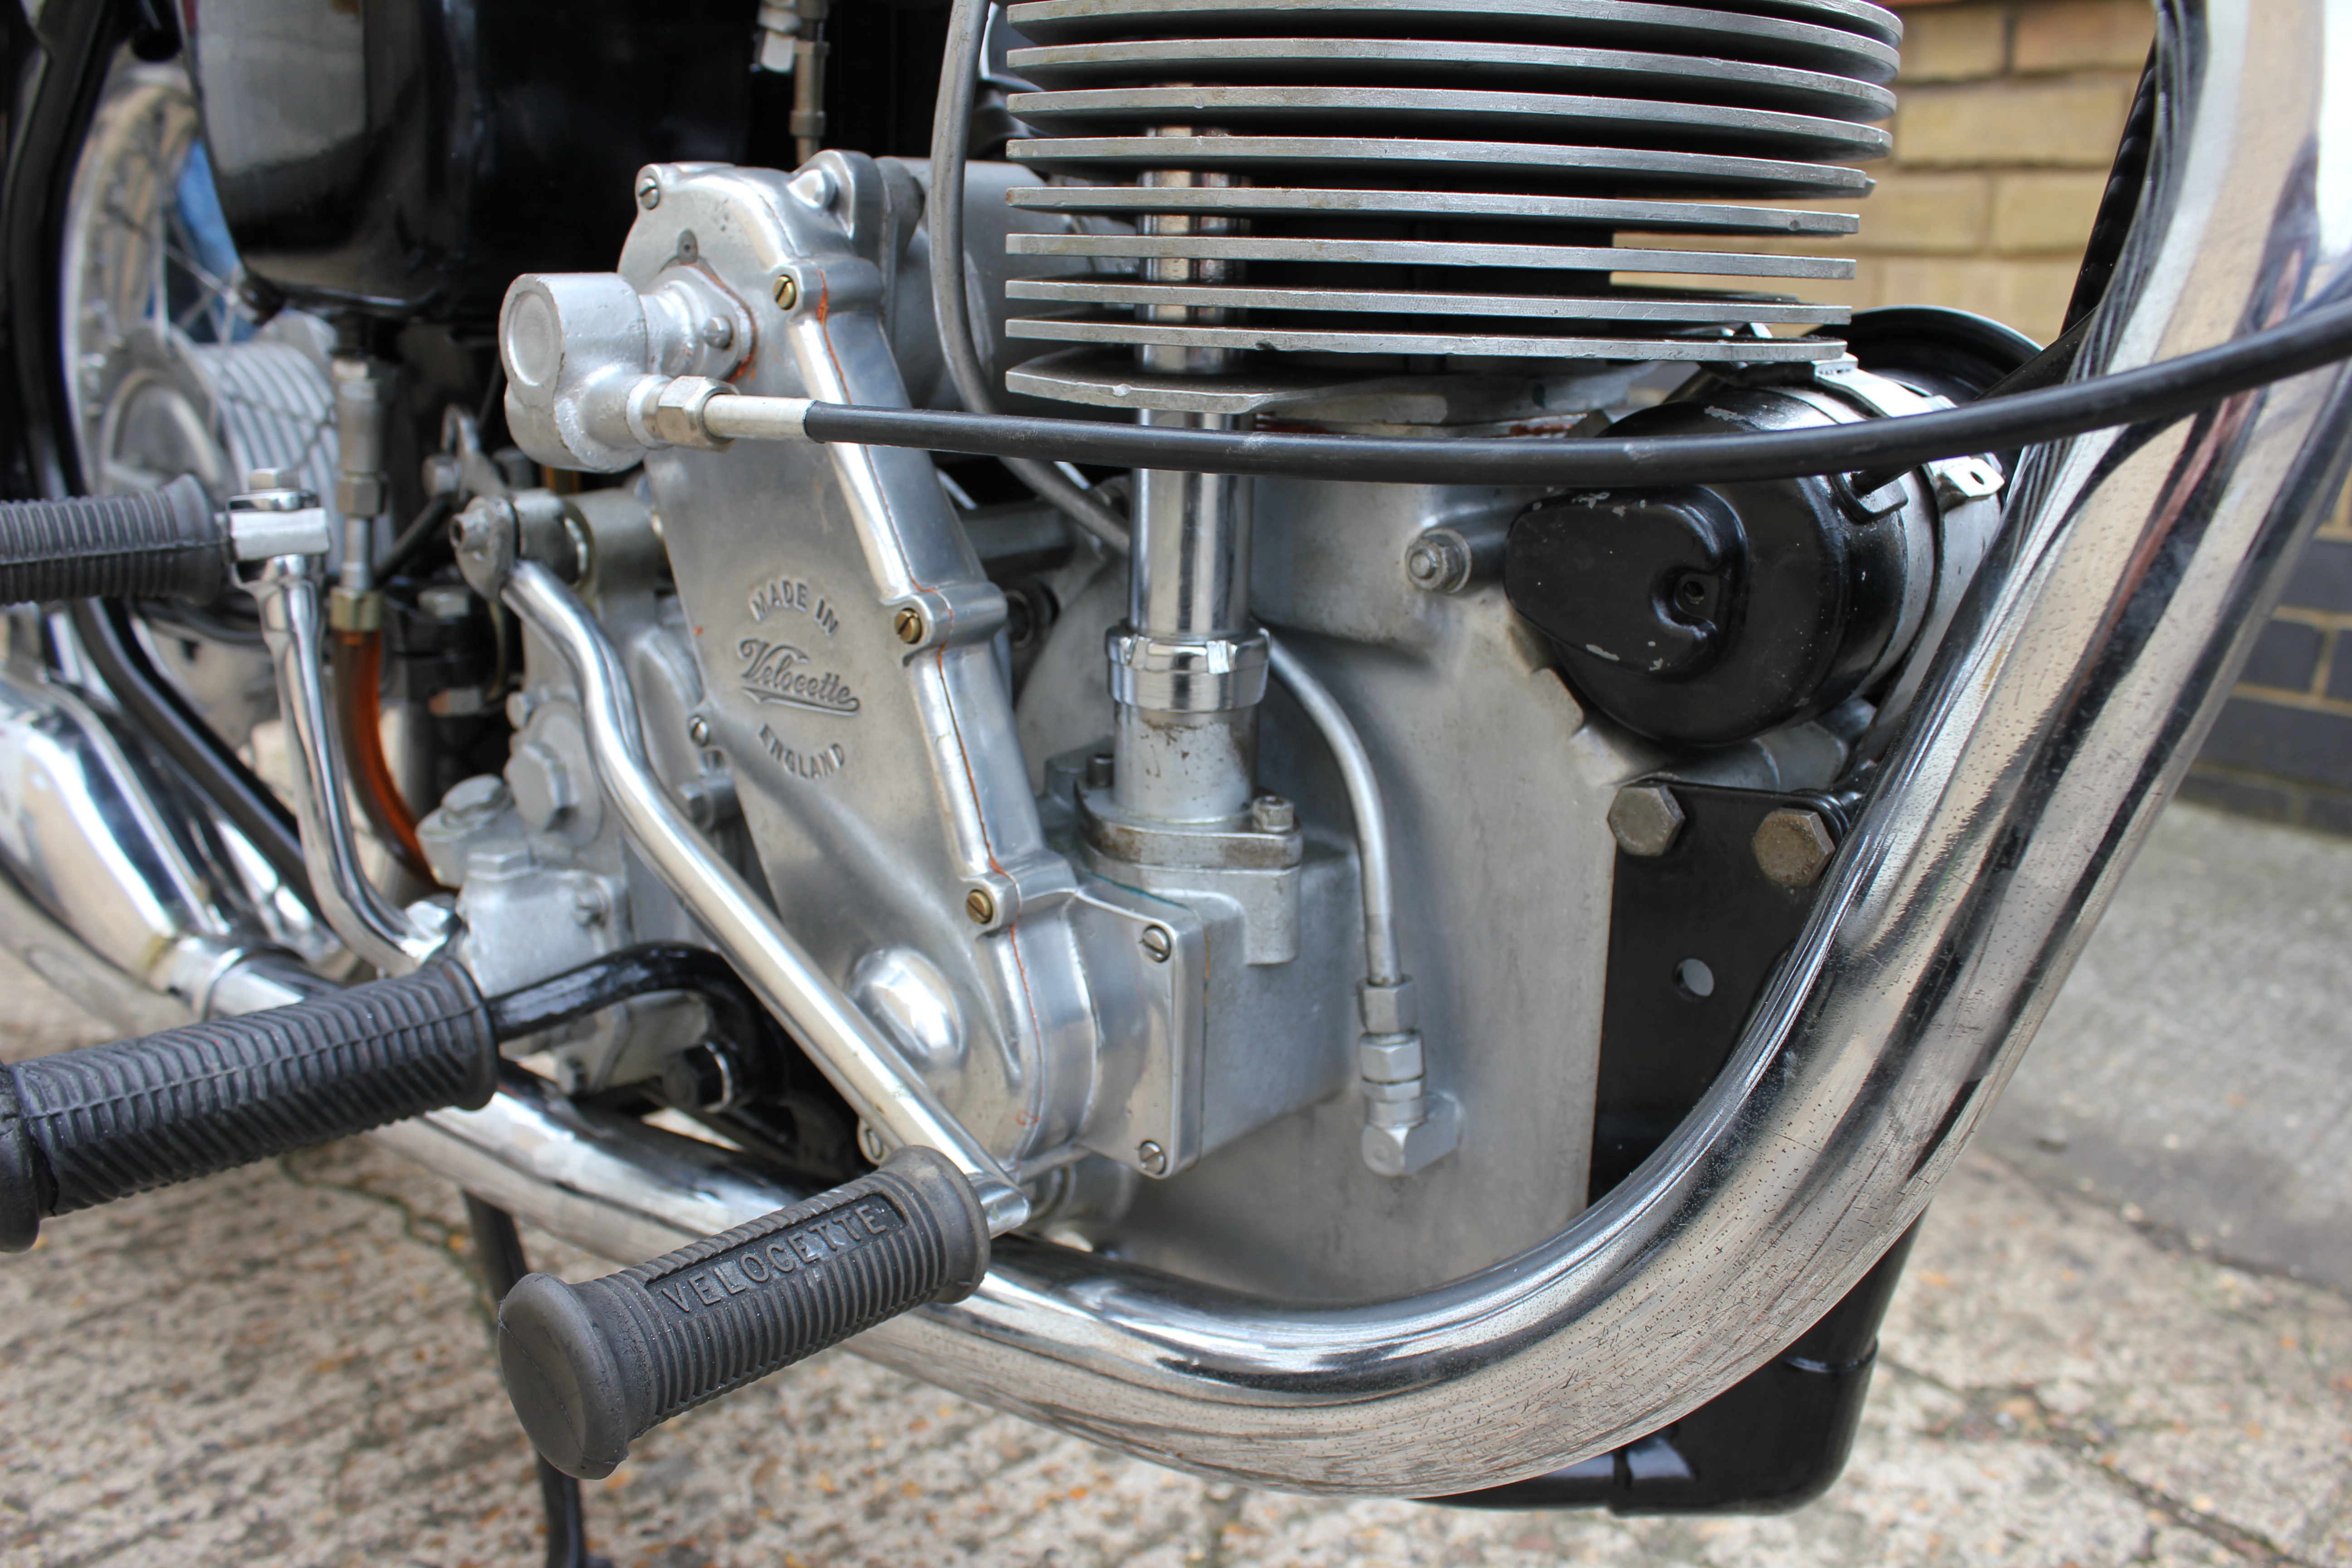
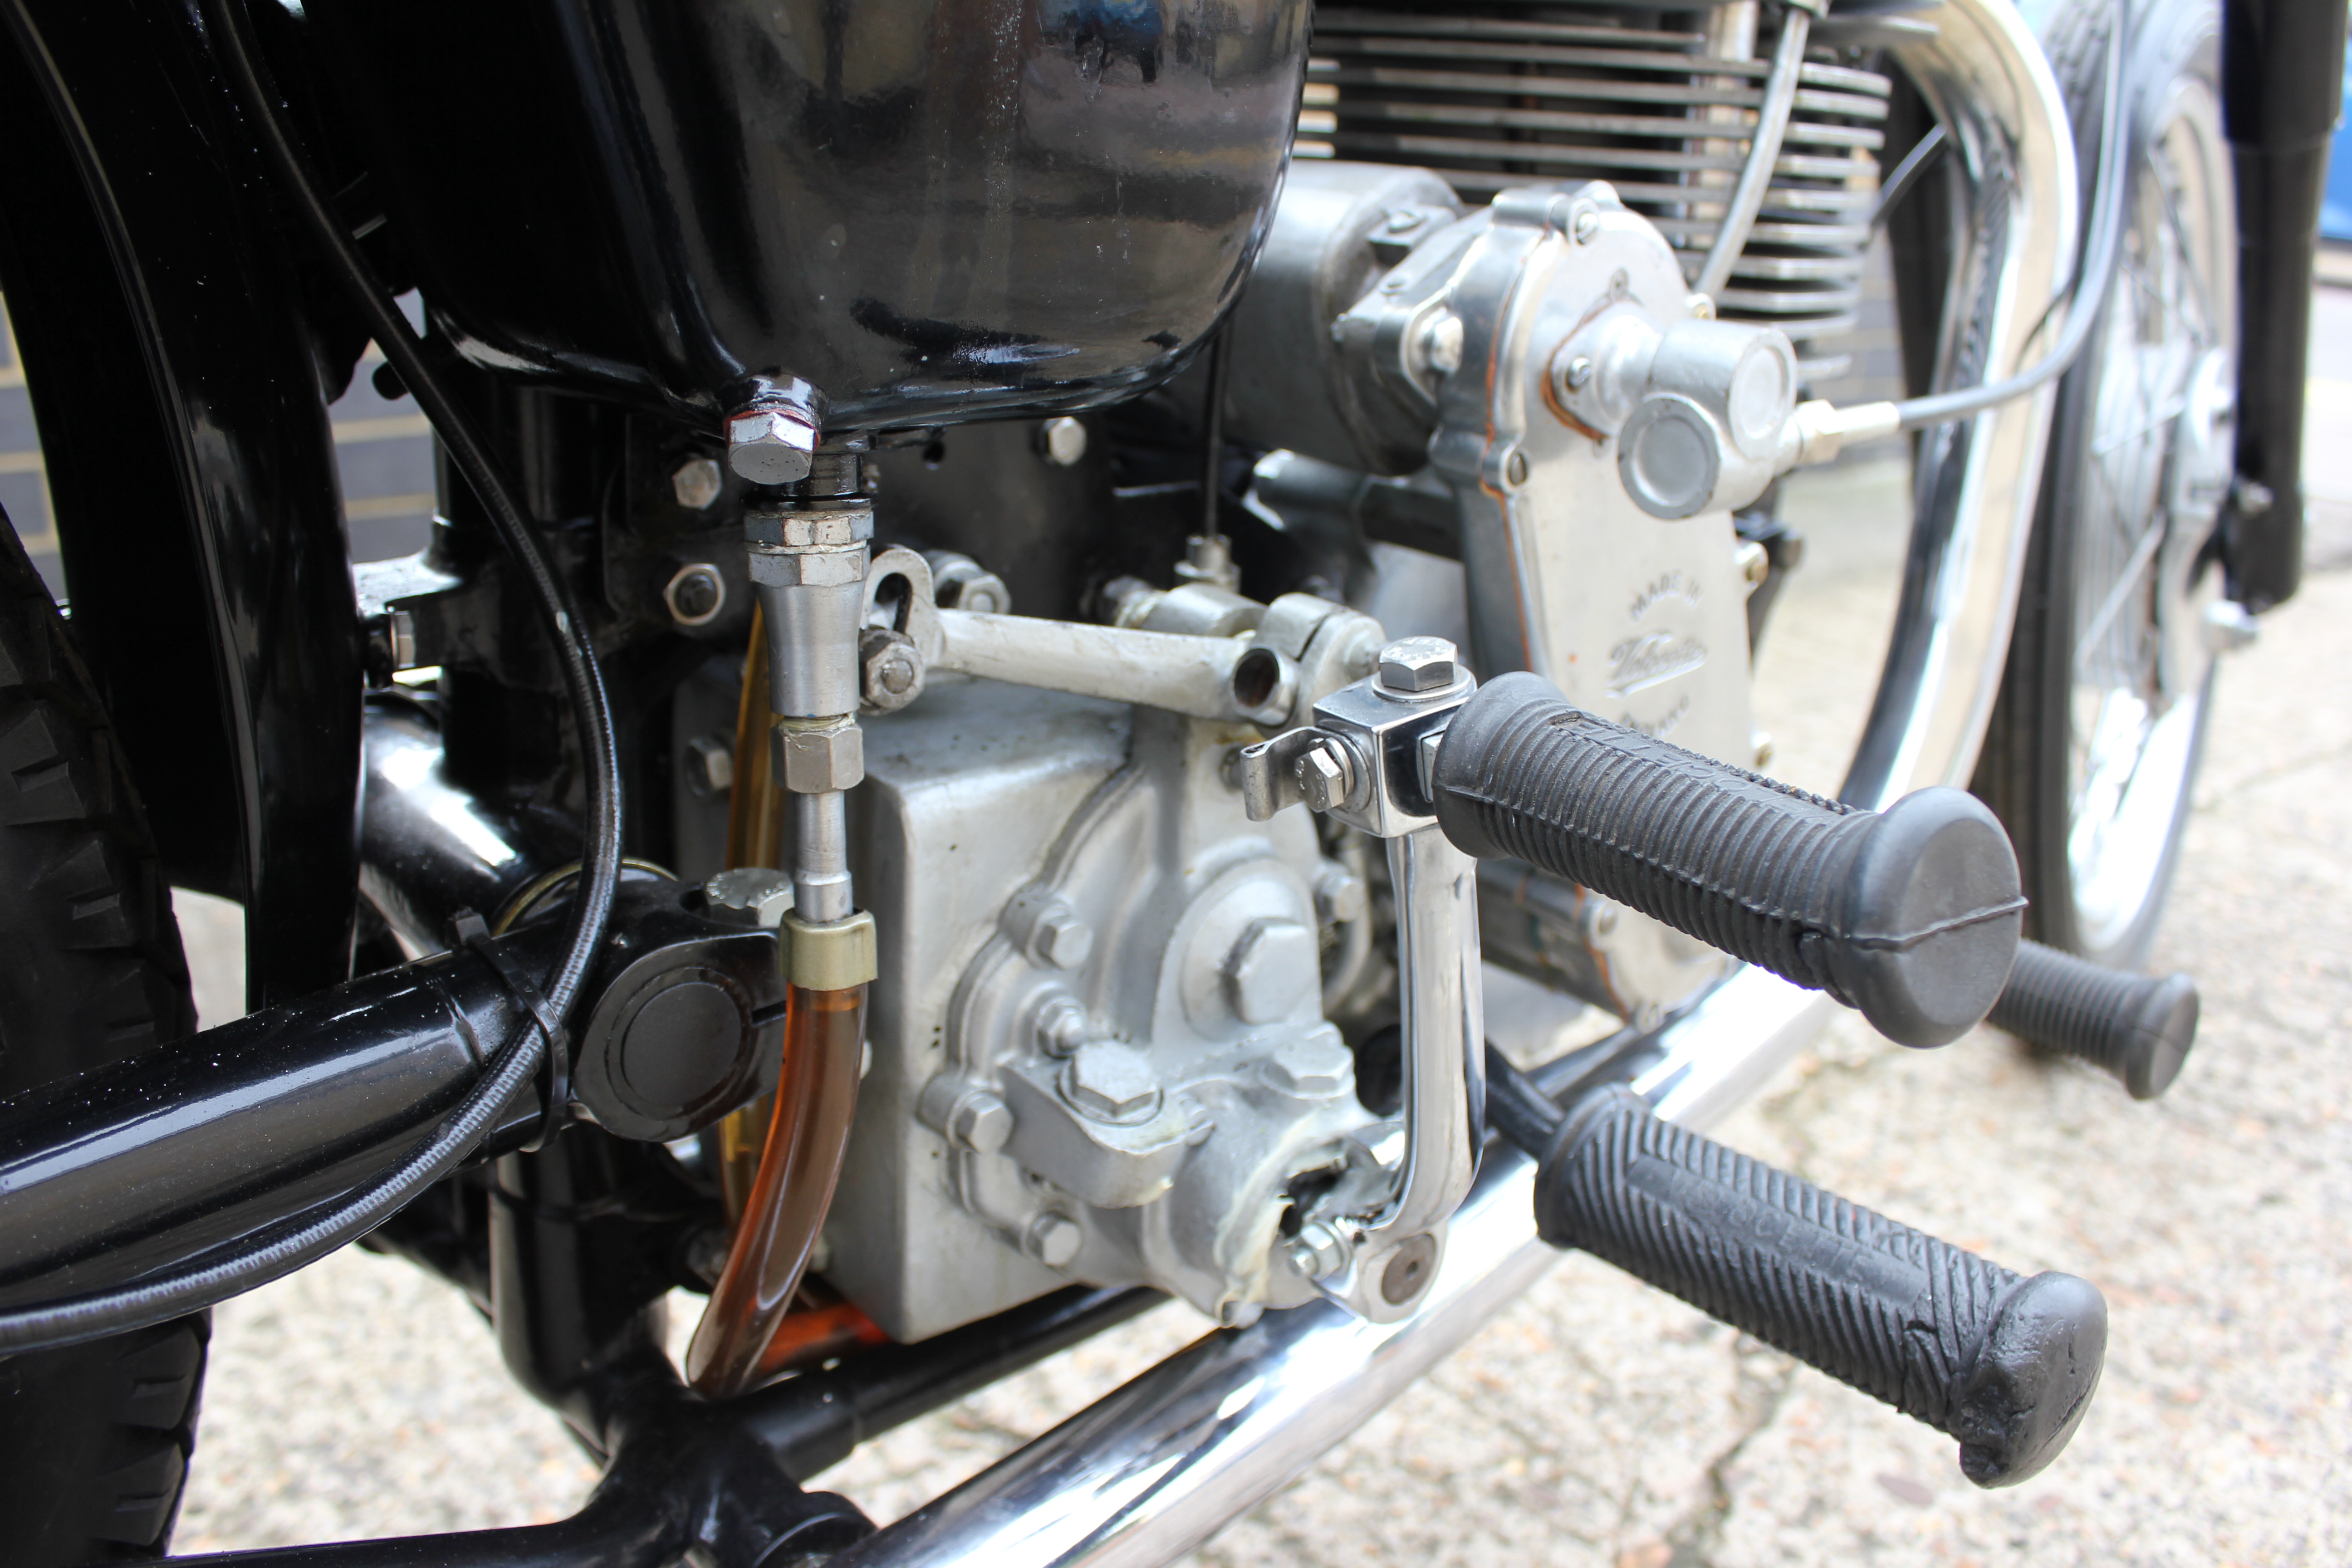
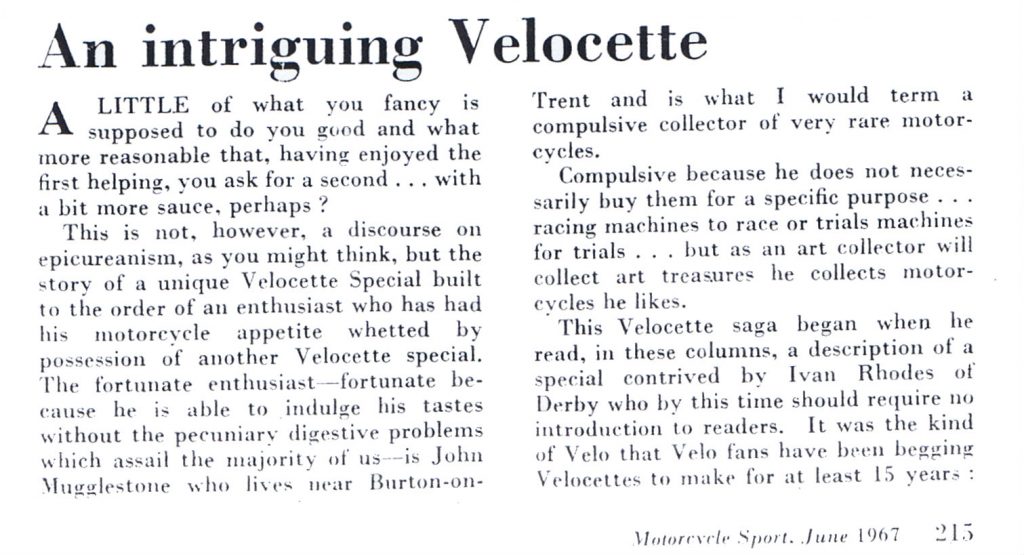
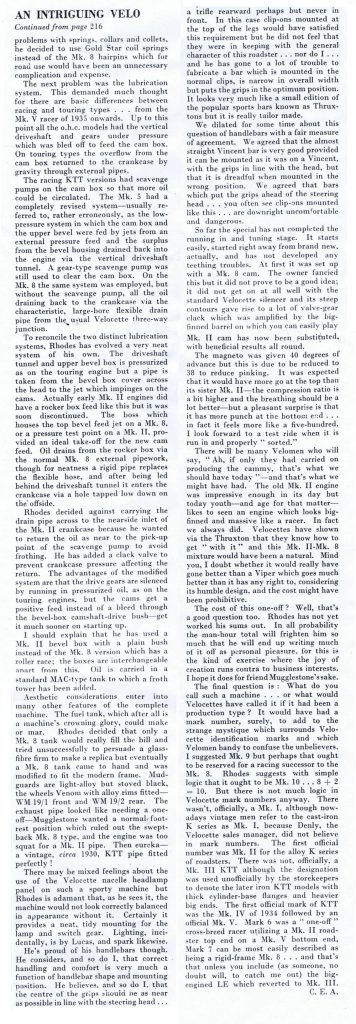
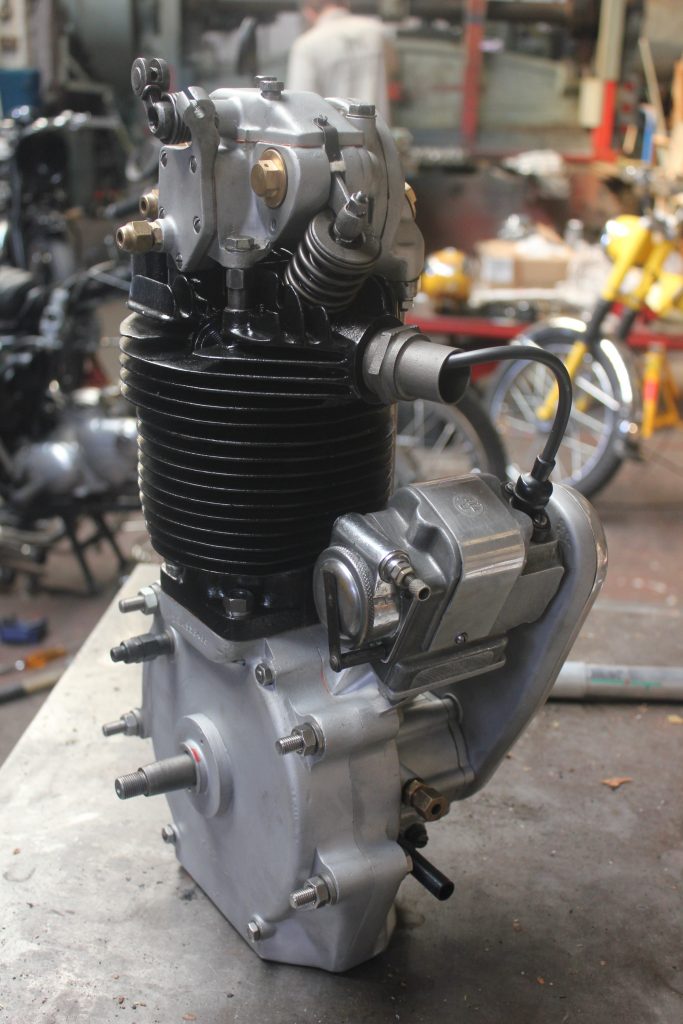
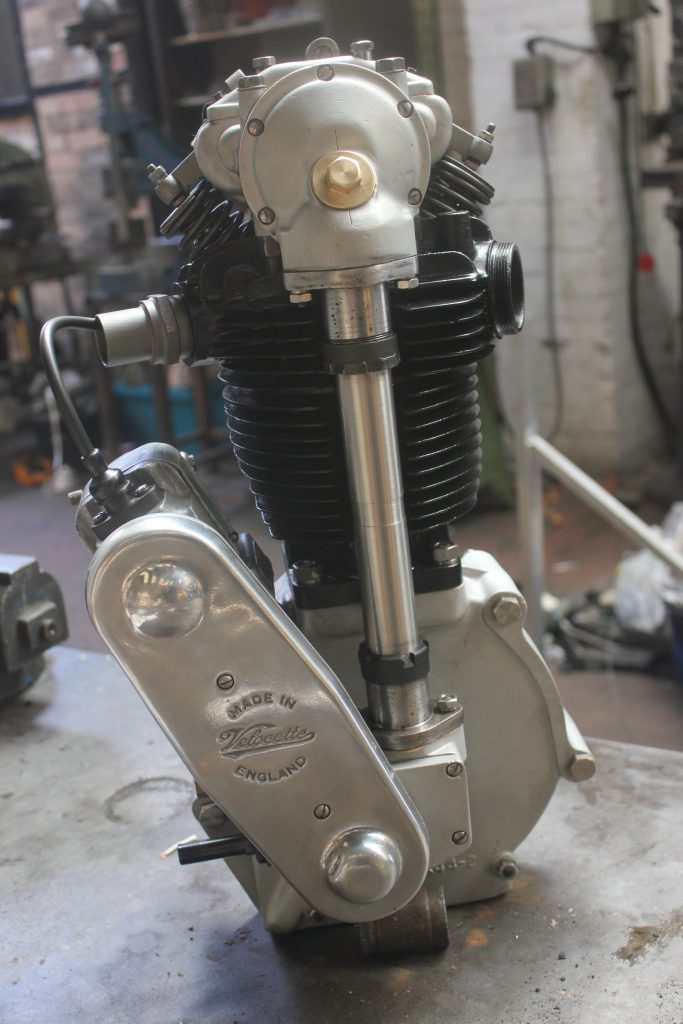
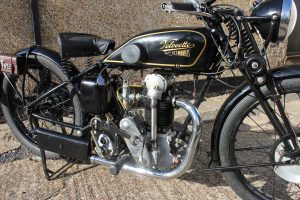
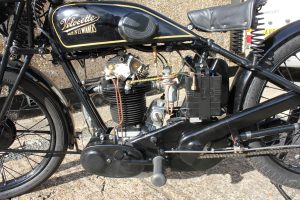
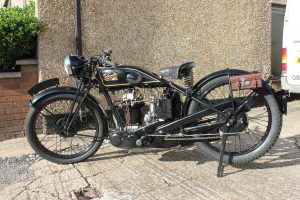
A Very Special Rhodes Velocette
Here we have a very special Velocette with stacks of provenance, and it was featured in the motorcycle sport magazine in 1967. The owner apparently has had a previously bad experience with another engineering company regarding work carried out on the engine. He found us on the web and read my blogs and decided I was his man.
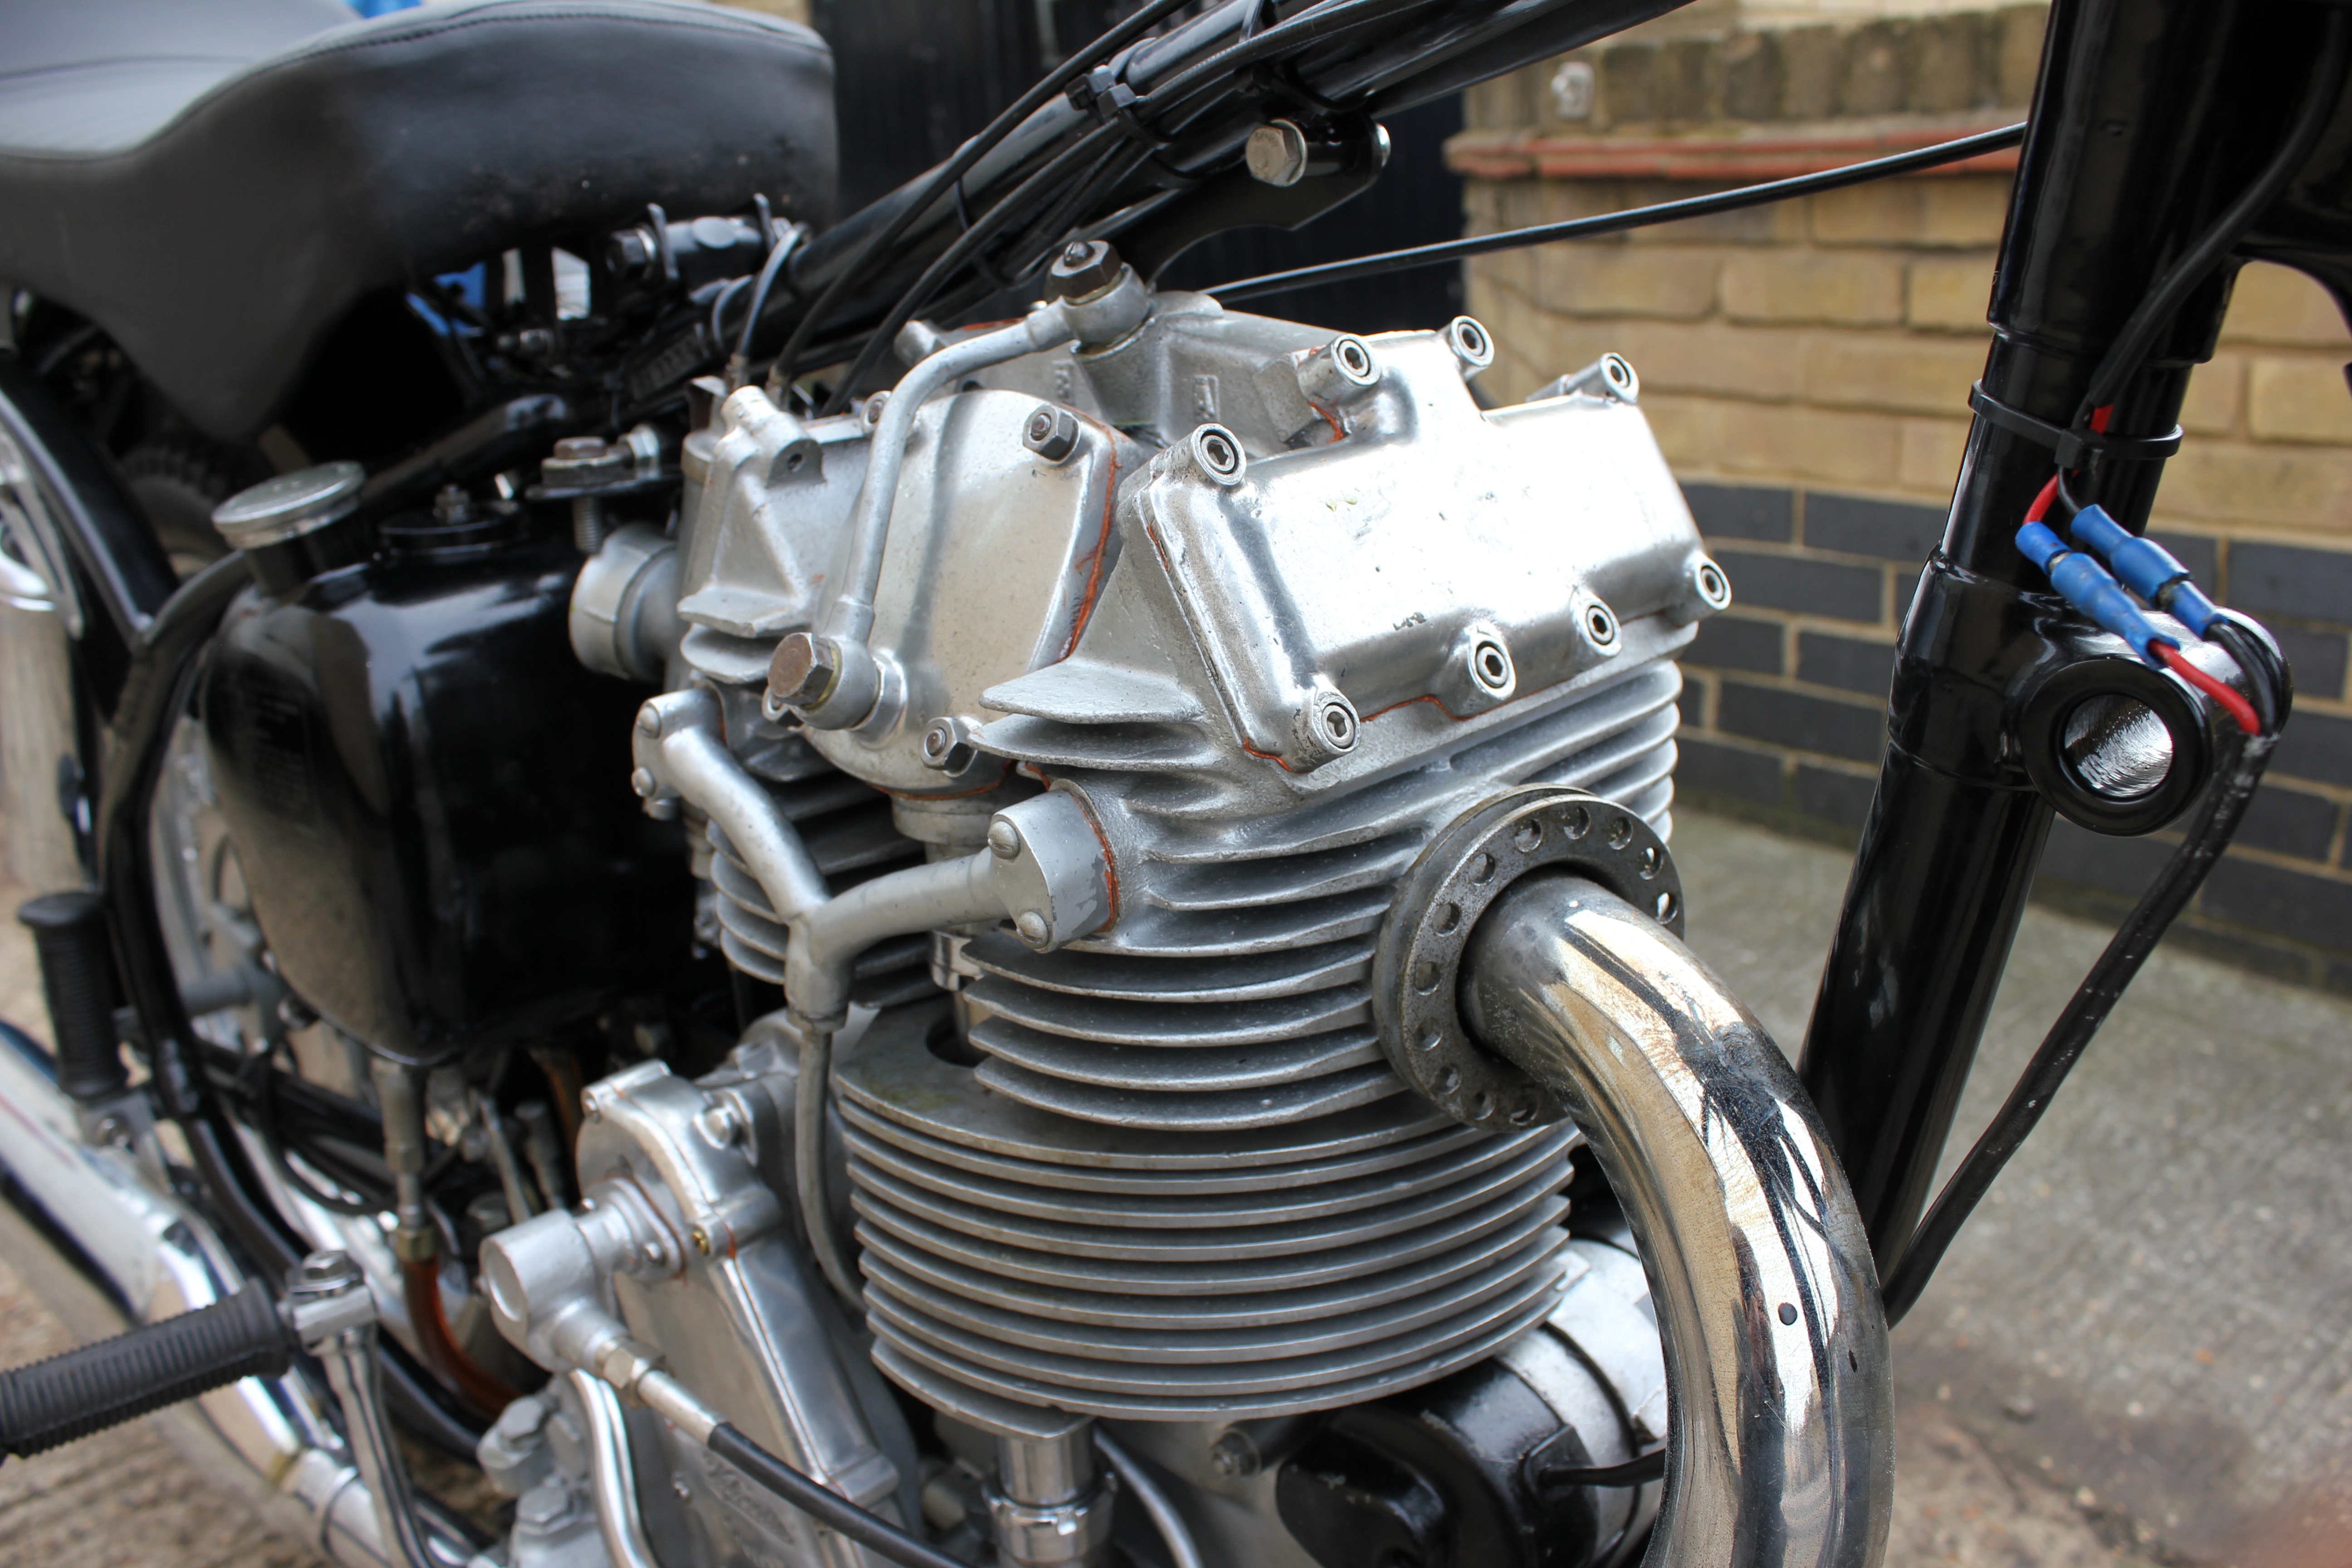
On delivery of the bike it was found that certain aspects of the engine work had been carried out competently IE, new extra big valves had been fitted held in place with a pair of new valve guides made out of phosphor bronze. The cylinder has been rebored out to plus .02” by the previous company who according to the machines owner shouldn’t have been done as the barrel and piston were perfect, he received the bike without an oversize piston or rings so he sourced some new ones.
The owner was most concerned with the clearance between the valves and piston, exhaust valves rarely cause problems as long as the bigger inlet valve has adequate clearance, there was a selection of shims and spacers made from aluminium to pack the base of the cylinder out to give the requisite clearances, essentially by raising the height of the barrel we are lowering the amount of piston protrusion in the cylinder head, obviously if we do this we are altering the compression ratio. The compression ratio is not of so much a concern but the cam timing, opening and closing times are the thing that counts as these are what decide how much fuel is going to be compressed. A true compression ratio is based on the swept volume being compressed. The swept volume is denoted by the amount of fuel let in by the inlet valve and squashed into the space during compression in the cylinder head just prior to the point of ignition. If you look at the compression ratios of a lot of old bikes in comparison to a lot of modern stuff you will find that they are quite low IE; 6-1 or 7-1 for example, these ratios were quite commonly found on racing machines. But if we take into consideration the fuel and air being compressed then we will get very much higher valves such as 6-1 being actually 11-1. The most important factor is valve to piston clearance, without the correct clearance the engine will be no good with bent valves as there will be no compression.
The gasket and shims were all gathered up and placed under the cylinder, it doesn’t matter what the amassed thickness is as we can always deduct shims or spacers to give our desired clearance for the inlet valve. Here is how I do it, get your piston about 20mm before top dead centre on the compression stroke with the barrel fitted, get some plasticine and roll it into a little snake so as it will lay the piston valve cut outs in the top of the piston. Put the cylinder head in place and bolt it down loosely. Turn the engine over gently and watch the opening and closing of the valves during a complete 4 stroke cycle. Remove the head and look at the thickness of the squished plasticine. If an engine of between 350cc and 500cc is being measured we will be looking at a thickness of .06” after being squished if we have a steel conrod fitted. If an alloy rod is fitted we will strive for .1”.
I am trying to keep my descriptions in a very understandable text, it is difficult to so without going into great detail and the many variable that will be met.
Anyway the thickness of the squashed stuff can be measured and certain gaskets and shims can be removed to give the desired clearances this process is what I had to do. Don’t start with no thin shim and put your plasticine snake in place because it is easier to measure and deduct a figure rather than measure a snake that has been squashed into nothing and find that the engine wont turn over due to the valves bottoming out on to the top of the piston only to find that more shims are needed to give the required clearances, keep your snake on the thick side and use the cheapest plasticine as it is devoid of any abrasive additives.
Previously I noticed that somebody had cut the exhaust valve pocket deeper and wider on the top of the piston marked with an “EX”, as the piston is a mirror image I found it prudent to turn the piston back to front and put the exhaust side valve pocket to the inlet side. This type of engineering smacks of ignorance from the previous engineer but on initial inspection I perceived this with the aid of a ruler. With my bad eyesight I can with experience read .01” by touch.
There are four nuts that screw onto some screw driver slotted studs that hold the head on, we had to make new high tensile steel studs as the threads were loose. The nuts are a bastard to fit unless you have a modified socket to drive them home with great care and vey gradual tightening to attain a cylinder head seal. The crankshaft when fitted into the crankcases will have a preload value of .003” I cannot ascertain this until the engine has been run and bought up to temperature.
A bone of contention regarding Velocette that hadn’t been attended to was the clutch. Need I say more if you’ve owned a Velocette? When set up correctly they are incredibly light in operation but they do need occasional adjustments. I noticed a bit of paper in the box of parts that came with the Velocette that the ignition timing should be set at 45 degrees BTDC. No way can this be so as anything above 43 degrees BTDC will knock the big ends out. I am going to play safe and plum for 38 degrees BTDC. The maximum advance that I have run on any of my bikes is 42 degrees BTDC and they need stripping worn and checking after every race. 38 degrees will be kind to the engine but will give punch, performance and reliability on the road. It should aid in the starting procedure that can be embarrassing when leaving a show. I must admit that I’m not a Velocette lover but I do understand the ethos behind the design. After a massive dose of vermouth I can see where the designer is coming from “let’s make something that nobody can understand and they will have to come back to the Velocette factory to have it fixed properly”.
When Velocettes were racing in the “TT” they had a factory member to check the vital clutches after practices, “hey what’s going on here” I vow to fit a modern Japanese clutch if someone can give me a donor engine and gearbox. All the above has been completed and I thought I would put a dummy tank in place to start her up. It started after 3 kicks and I hadn’t paid any attention to the choke or advance retard lever. Well she seems to start easily with no choke and no retard but a fully flooded carb and a little throttle and it idles beautifully.

Here is a magazine article on the bike

This is a light hearted conversation between me and the Zenith tank owner.
Forgot to say on the phone – could you ask your brother to send some photos so I can see the tank? (Zenith 680)
When I got your last email I told Tony I’d be down in the next couple of weeks – and that was two weeks ago! – so let me know asap. I don’t want to mess him around – he’s been such a good guy about lending it to me.
Also forgot to ask – is your ankle still knackered?
Get rid of the cursed tank before something else happens. Might be locusts next. Or blood out of the faucets
—-
Jon I will get pics to you asap. cheers terry
—-
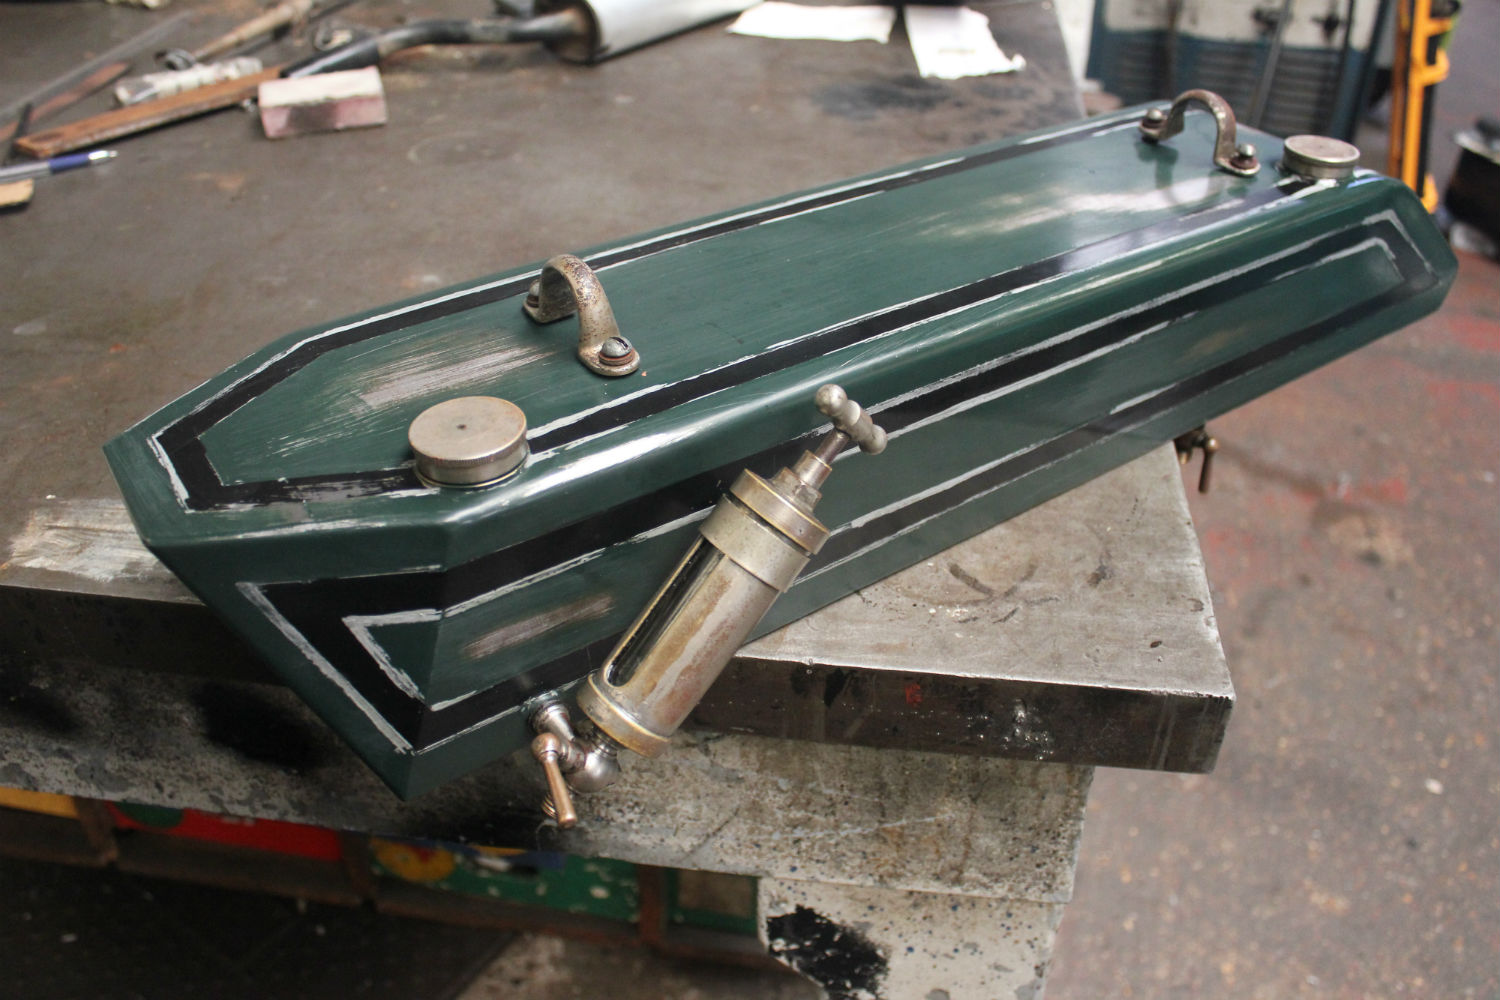
At last the tank is complete and resplendent with all the parts fitted including me making the oil pump leather seal . I also made stainless steel old fashioned AF nuts for the tank rubbers as they were not available off the shelf. I have fitted the rubbers and all the fittings have been tightened up with all the correct seals. the new tank is heavier than the master that was supplied by terry as I had doubled up on the thickness of a baked bean can. The total cost is £1880. I havnt finished the stand yet as one of the oval tubes has gone walkabout in the busy workshop. Kind regards terry
—-
That’s great news Terry. I’ll come up and collect it. How does Friday the 8th of September sound?
If you get a chance could you snap some photos with your phone?
I’d like you to make a toolbox for it too if you’re up for it. I have a simple wooden buck which shows where it attaches to the frame and some decent photos which show the design.
—
Jon my son will get pics to you from his Nikon camera tmorow as I do not use a mobile phone or a camera . is it possible for us to put your tank on our blog as it is the most difficult tank ive made to date. Friday the 8th is good. cheers terry
—-
Hello Terry,
Yeah stick it on the blog. It’ll be famous – women will hurl their undies at it as I ride by and there’ll be a lot of high pitched screaming: that’ll be me cos the brakes don’t work.
See you on the 8th.
Cheers,
—
Hello Terry,
The tank looks beautiful. You’ve done a terrific job with it. I can only imagine what a ball ache it was doing that oil reservoir and those shaped curves on the front are lovely.
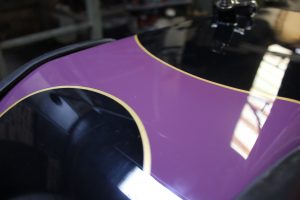
The only thing that worries me is the colour. I know when you photograph things with flash it can be misleading but it looks a bit…..well….pink. I’m as keen as the next man to get in touch with my feminine side but when I get it out into daylight is it going to be a similar colour to the Stafford bike?
Cheers, Jon
—-
The colour was taken from the codes you gave me and my son is using a flash when we have bright sun streaming through the skylight. cheers terry
—-
The paint shade darkens considerably with age. We also do brake lining upgrades. cheers terry
—-
Haha! Well mate forget the women I’m going to be mobbed by squealing gay men every time I kick it over. It looks like it’s the colour of Barbie’s clutch purse.
If that’s Victoria Plum someone at two pack can’t mix paint.
Does your brother want another go at it? I expect he’s probably sick of the sight of the bloody thing by now – he’s done it twice already I know.
Sorry to be a pain in the arse Terry.
Jon
—-
Sorry for delay. I kept the codes that you gave me and a set of codes went to dan the man my brother the painter. good job I kept the codes because when I looked at them last saturday on the pantone colour scale the colour was more than a thousand shades away from the code that was required. Dan has no arguments as he has admitted having the codes. im just wondering now whether he and his paint supplier are trying to get you into the Pink My Little Pony brigade. Not being a painter I wouldn’t know what the colour is or whether it was right or wrong. But your steely eyes spotted it was a rather unmasculine shade of gay pink. He is pissed off at having to do it again as his supplier has impossibly miss matched the colour with the code. I think at the end of the day there is no argument. cheers terry
—-
Hello Terry,
That’s great about the tank. I was imagining being mocked at classic bike rallies. “Here comes My Little Zenith!” “Where’s Ken? Did he fall off the back?”
I won’t come up on Friday then. When’s a date convenient for you?
Don’t suppose there’s any chance of me looking at the shade Dan chooses before he paints it is there? Maybe also he could use Tony’s tank that you worked from for reference – it still has some original paint on it I think.
Cheers,
—-
Jon im glad to say its nearly finished at last. All It needs to finish it off is a complete rework of the old bashed rusty metal. My brother got so annoyed with the paint colour mix up that he loaned the tank to the Royston rugby football club who had a sunday fixture on the heath as they were a ball short of a full sack. Boy, did it take a kicking and hours of filling in those dents. Mind you I would be lying if I said that he didn’t use copious amounts of corrugated cardboard to bulk out the filler. The oil and petrol capacity was reduced by 85 percent, bringing the holding capacity down to a lean pint and returning a respectable total of 4 miles of good solid head down full throttle motoring. The tank came back to me in perfect condition but I had to hire an electric forklift to get it back into the workshop for final detailing such as the hand finished gold pinstriping !! . I have a special extra long handled tar brush that gives the perfect finish as I like to load the paint on heavily to give it more of a 3D effect. I think my brother wanted to go down the authentic route regarding the paint finish so he,s gone for the walrus bristle brush and boiling hot enamel, I must say he,s done a grand job of it, its so thick. And to think he was a master grouter before he took on painting .I must make you aware that it is an extra 16 inches bigger on all dimensions due to the filler and all the paint layers and all of the layers of waterslide transfers but this problem can no doubt be sorted out from your end by purchasing a 1927 brough superior pendine as your tank fits it a treat and the bike is only £372,000 and going up in price every hour, so snap up a bargain and make massive savings. It could also be used for a small aircraft fuselage, all you need to do is fit the wings and your ready to go. Kind regards Vermouth, I mean terry
—
Terry I ran all this by the marque expert at the VMCC and he seems to think it checks out. He says when you’re painting the tank make sure to put an airbrushed blonde woman with her tits out down the side and the words “Too Fast To Live, Too Young To Die”. I’m going to need you to make a green fun fur saddle too. And a monkey metal and meccano rear stand that sheers off catastrophically.
Apparently they originally had a knobbly on the back, gorilla bars with tassels on the end, ten foot forks, a disc brake and a pair of white plastic stabilisers. I’ve still got some work to do.
He said he’d heard of your brother and that he was “to Isopon what Michelangelo was to Carrera marble.”
I bought the Brough like you said. Had to sell my house. I’m typing this to you from under the railway bridge in Exeter town centre. I can just about get the broadband from Maccy D’s from here.
Cheers,
Jon
—-
Jon I cant stop cross referencing your reply to my well healed statement and im so sorry for the hardships that I have put you through but you’ve surprised me at how fast a home can be shifted in todays stale housing market to get that brough. I cant stop laughing at your replies. But in all seriousness I went to Ar Davis in baldock where my brother gets his paint from and they mixed up the code that you gave me and it was exactly the same as you saw on the pics of your tank but the colour was miles out on the colour cards. What he has done is to pick out the colour on Tonys tank and apply it while I was there in his spray shop. So now I can confirm it is Victorias plums in Beckhams 2 pack. should be ready for pics this Thursday. cheers terry
—-
Hello Terry,
I’m still under the bridge. I’d forgotten how chilly these autumn nights are. The thought of the petrol tank ought to be keeping me warm, but the frostbite doesn’t lie. Well……fingers are overrated.
How’s it looking? Did you do the Cath Kidston polka dots like we said? When I shall I come and pick it up?
Cheers,
Jon
—-
all is done and inspected by me and im frenziedly happy , if not , overwhelmed. Ive got to send a doctored picture of the colour of the finished tank. My son will have to do it for me as he is a wizard at photo shop and colour changing. By the way I have pushed the boat out by celebrating the occasion by marrying a midget that I met at a local dwarf throwing contest. so I am not going to be free for you to collect at 3.14 am on sunday morning as arranged as I will be in the throws of fitting the long awaited fisher price kitchen with a full set of plastic pots and pans. sorry to here about the finger problem, if you havnt lost them down to the palm I cant be sympathetic for living it up while your suffering. very kind regards to you
—-
it is ready on monday midday with all the parts fitted but I will send pics to you for your perusal and I will post the real colours on my website,. only kidding. terry
—-
That sounds like a beautiful way to begin a relationship – you locked your hands round her ankles and just before you hurled her into the distance your eyes met and for a moment love blossomed.
If I were feeling more cynical I would say that describes most of my relationships – but ever since I’ve been living under the bridge I’ve seen more of the kinder more generous aspects of human nature. Someone bought me some Sainsbury’s sandwiches earlier. They weren’t the shitty ordinary ones either: they were Taste The Difference – locally sourced Ham hocks with Cherry glazed Manchego.
I don’t know why homeless people make such a fuss – it’s quite a laugh really. I start selling the Big Issue on Monday. Can I interest you in a copy sir? No? **** *** then you ******* dwarf ******* *******. I hope your **** falls off.
See you a week tomorrow?
—-
That looks superb. Really great.
Pictures can hide a lot but there is nothing hidden in the finished
article. it is a perfect paint finish but boy the black finish really
shows up any fingerprints. I have an old trick up my sleeves that my
great grand father passed on to me while he was in the double glazing
trade in its embryonic years when they used loads of cellotape and
plastic sheets. If you put layers of cellotape over the whole tank it
keeps those nasty finger prints at bay so you wont mind everyone running
there greasy fingers over it when you take it to shows and years later
when it peels off and leaves its encrusted finish all you have to do is
give it a good scrub down with cellulose thinners, make sure you use a
nylon rag, youll be surprised how the finished article will look. This
process also works well on plastic toilet cisterns and will leave the
same finish. Jon if you have got our past banter saved, it would be
great to attach it to the blog pictures. cheers terry
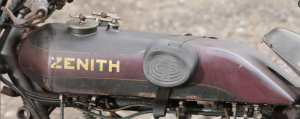
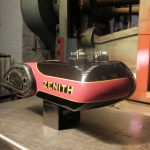
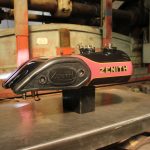
Original zenith tank copied from.
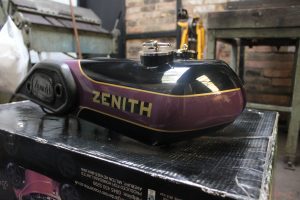
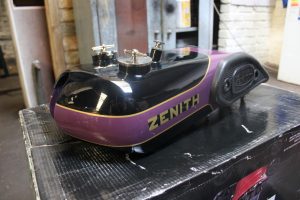
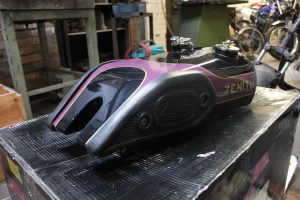
Original tank with fitting in the correct colour
Re-creation of the original tank in the wrong colour
Two stroke problems
This is a typical enquiry we get from time to time. We will help in any way we can. With years of two stroke tuning for customers as well as my own bikes I am able to draw on more than 30 years of knowledge.
Phil wrote
I came across your business when looking on the web for someone who can competently rebore two stroke cylinders. Many can but I’ve seen too many horror stories of where it goes wrong! Reading through your site gives me the confidence that I’m approaching the right company to carry out work. We’re looking at a rebore on a Suzuki TC200 “twin cylinder” from 1968. The cylinders have at some time prior to my acquisition and renovation had a rebore as the pistons are 1 stove size and marked as 0.5. I did measurements with pistons and rings prior to a rebuild and tolerances were in spec but strongly suggestive of wear. Now running and back on the road I’ve top-end noise and a serious loss of compression on any incline so am fairly certain of a need for a rebore and over size piston and rings. I will have a full set of NOS 3rd oversize piston and rings “1.5” soon, have all the technical details and tolerances in an original manual and wonder if you could rebore the cylinders to suit and what the cost might be. The cylinders are sleeved aluminium and I’ve gone for 3rd oversize to allow for any serious corrective machining as I’ve no history of the use/abuse that the bike has had prior to my acquisition. I hope you’re able to help. Cheers.
Terry replied.
Hi Phil we will have absolutely no problem doing them for you and we also do not leave razor sharp port edges as all other engine reconditoners so. Present turn around is up to one week. To bore and hone and radius ports is 50 per barrel. We will need a piston ideally. Kind regards.
-Deliver to Phil was one week late but would have been sooner as I needed some new honing stones-
Phil said.
Many thanks, they arrived this morning. No doubt the bank holiday weekend slowed delivery of the parcel. I’ll let you know how the engine runs/sounds once I have it built.
Terry replied.
Brilliant to hear that they arrived as we never had an incident yet of anything going astray. Remember to run them in on your fantastic bike. I just bought a 1965 registered Yamaha YL1 that I cant wait to get restored. Any feedback is much appreciated. Cheers.
Phil replied
Help needed! I got around to reassembling the engine, double checked everything – rings right way up, piston right way around, new small end bearings, pins, ect.- and then kicked it over (ignition off) and all ok. That was it for 2/3 months but getting around to firing it up properly I find myself getting nowhere and just flooding the engine – so fuel getting through and sparks all present and correct, I checked I’ve tested compression and kicking it over I’ve got what I think is bugger all on each cylinder – at best about 30 PSI after dozen kicks. The pressure builds up on successive kicks to a max of 30 PSI. Surely there should be more as the Clymer manual quotes 123 – 131 PSI at 1000 RPM . Am I right in expecting have more compression prior to the engine firing? Its only the top end that has been touched and all was running fine on the old barrels/pistons; albeit noisy/slappy, hence the rebore, any thoughts/help much appreciated. Cheers.
Terry wrote.
Hi Phil it is important that you do the pressure test with the petrol on and the throttle full open. If you do not get above 110 I doubt it will fire the fuel. The next thing to do for the second test is leave the fuel off and put about a teaspoon full of heavy oil such as hear oil into the cylinder you want to pressure test and see what reading you get . If it is still too low you will have to put the spark plugs back in and get a spray bottle with fairy liquid and water mixed. Spray the bottom of each barrel and turn the engine over slowly to complete about one revolution then the next thing is to spray the cylinder to barrel joint. What we are doing is trying to visually find a leak. If there are no leaks then I would suspect the bottom end seals. These are common tests that I do to my racing 2 stroke.
Phil said
Terry many thanks for such a prompt and detailed reply. It’s always food to get advice form an expert. Forgot to say I’d fitted new gaskets and everything torqued down as per specification but who knows. I’ll do the pressure test with some heavy oil in the cylinders first and then double check for gasket leaks After that it’s going to be a rebuild of the bottom end seals although where I’ll get these from I’m not sure as many spares for the TC200 are effectively obsolete given it’s relative rarity. Hey ho, such are the pleasures of owning a classic motorcycle. Cheers.
Terry said.
Almost all oil seals are available at bearing supplies as long as you give them a sample to measure. At least they will all be metric sizes. Cheers.
Phil said
Thanks for the advice. I’ll let you know what I find when I so the checks in the next couple of days. Cheers.
Phil said
Apologies for not getting back to you sooner with an update re the on going compression issue with the Suzuki TC200 after its rebore by your good selves. I subsequently had the crank professionally rebuilt with new bearing and seals. Having fitted, replaced all gaskets and torqueing down correctly I’ve got better compression by still not very good, With 5ml of SAE90 oil in each cylinder , air box filter fitted and throttle wide open (no fuel on) the best can get on either cylinder is 60 PSI. I appreciate I’ll not get what it should be with the engine running (120+PSI) but I’m at a loss to why it’s so low. Any further thoughts you might have will be much appreciated. Cheers.
Terry wrote
Hi Phil having raced and tuned my own bikes as well as customers racers it sounds like crankcase compression could be the issue. I have seen seals fitted the wrong way round as well as pistons. Aftermarket pistons can have the piston ring dowels in the wrong position. They all cause low PSI in the top end. Aftermarket top end gaskets can really lower compression . We rebuild and manufacture special cranks for all types of races and road machines. Low crankcase compression causes low pressure fuel transfer phases thus impairing low combustion pressure. These are some thoughts to ponder on. Cheers Terry.
Phil wrote.
After stripping and rebuiding the engine yet again the best I could get was 50/60 PSI in either cylinder, so no chance of it ever firing up even with easy start & aspen pre-mix. By chance I bought a box of bits late last year for a Suzuki T200 (exactly same engine as the TC) as a winter project – in fact it was six boxes , two frames, one and a half engines, two tanks and so on. None of it had been together since around 1985 as shown as shown of one of the news papers stuffed into one of the barrels! I’ve now rebuilt a T200 out of the best bits, fitting a set of original barrels (not rebored but clearly attacked by someone in the past with a file around the ports) and new standard pistons and rings which I found amongst the collection of bits. Getting 95/100 PSI compression I squirted in some easy start and using aspen pre-mix it started first time, Hurrah. I then put these barrels on the T200 and got 90/95 psi and with easy start ect. It started first time. Putting the +1.5 barrels and piston onto the T200 I’m back to 60/70 PSI so no starting. Looking like the problem now lies with the barrels restored by yourself and/or the piston/rings I fitted from the box of bits a set of well used +1.0 barrels and pistons (having first cleaned them up) to the T200, got 90/95 PSI and it fired up again first thing this morning. So I guess the conclusion I’m coming to is that the crankcase compression is not an issue. Having invested in getting the original TC barrels rebored by yourselves I’m reluctant to have to accept that I’m not going to be able to use them but at present am disinclined to fork out on another set of +1.5 pistons and rings on the off chance that the fault lies there. I could be chasing my tail here and getting no further forward. If you have any further thoughts on this matter I’d appreciate hearing back from you, cheers.
Terry wrote.
Lets not get too technical and look at the basics facts. If the barrel is worn by .001 thousandths of an inch this will equate to plus .003 on top of the standard ring gap clearance when using new rings. Like if the top ring gap as standard .004 it will be .008 if you fitted new rings in a .001 worn barrel. The latest literature tells me your engine will tolerate .005 of clearance on top rings, so it looks like you need some barrel work. Cheers terry.
Phil said
Terry, if you want to lean something new ask an expert! As you did the barrel work to +1.5 OS then we’ll assume that it’s just that. My +1.5 pistons are a very good fit but the ring end gaps are way out. My manual has 0.04 inch as a limit on end gap so even though the rings were got with the pistons as a set they are clearly pants. No wonder I have so little compression. I should have measured sooner but if you buy +1.5 that’s what you expect to get. I will source a new set of rings at +1.5 and see what transpires, cheers.
Terry said
Paul you can of course use 1.6 or 1.7 oversize rings and gap them to suit but it does take a keen eye and a steady hand and some food diamond needle files. Cheers.
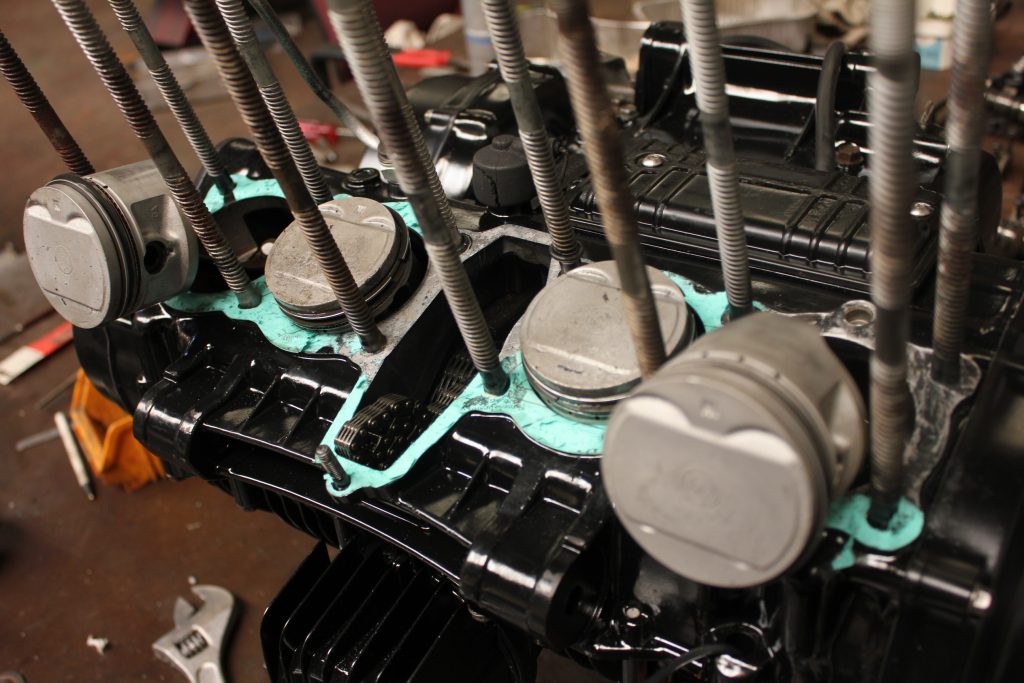
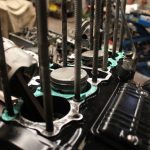
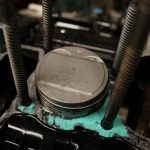
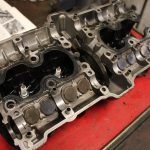
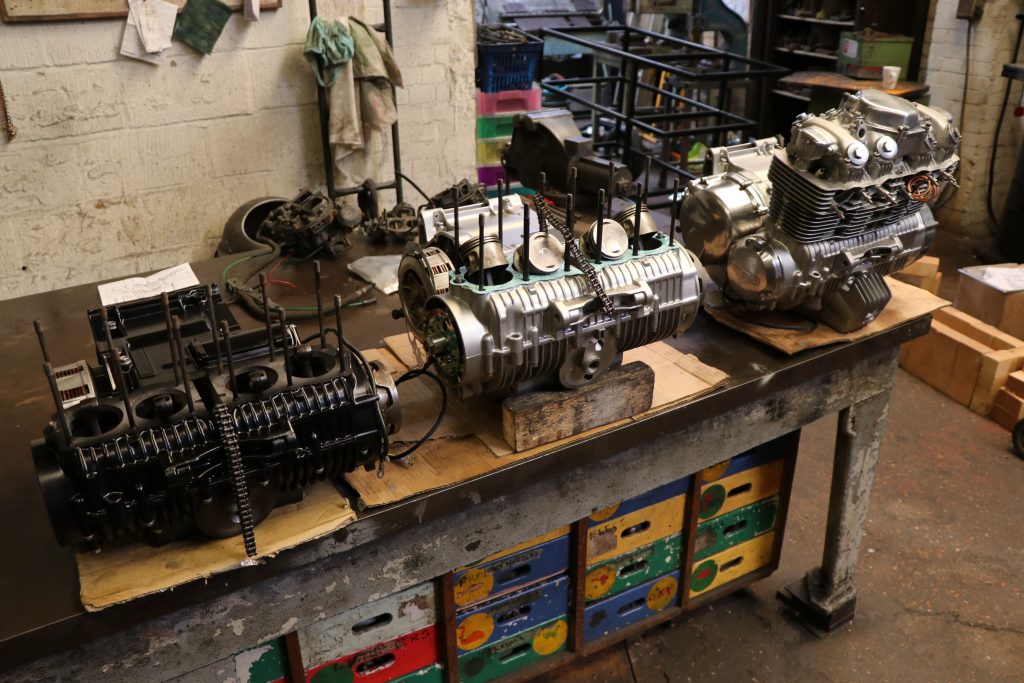
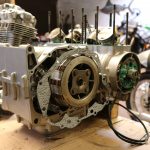
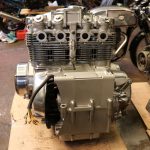
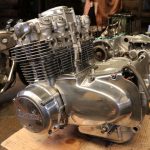
The CB 900 like all of the old CB range is like pulling a sandwich apart or if your given 2 engines to build one good one its like making a sandwich. Everything is made up of layers. The CB900 is an easy engine to work on because of these features. Gear clusters can be seen how they work together to select gears while laying in the bottom part of the crankcase. As one builds on one of these engines it will be notices that it is built in modules, IE the oil pump is a separate part within an aluminium casing and the cylinder head is a work of art with its 16 valves and double camshafts.

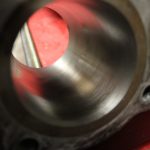
The Japanese motorcycle industry really got it sorted when they found that camshafts would quite happily run in plain aluminium. If the British had designed it they would have used a multitude of white metal shells. The bottom end like all CB’s is literally unbreakable as all the gears are so generously thick as are all of the shafts. The only week points on the CB900 engine is the gear selector on it but you would have to give it some brutal hardship to damage it. Another weak point is if you do not adhere to torque settings as threads in casings can easily be damaged. Crankshaft bearings often suffer from surface erosion particularly if the engine has been stored somewhere damp without or with old engine oil in it. The commutator on the right hand side of the engine can also suffer from damp conditions and will need cleaning.
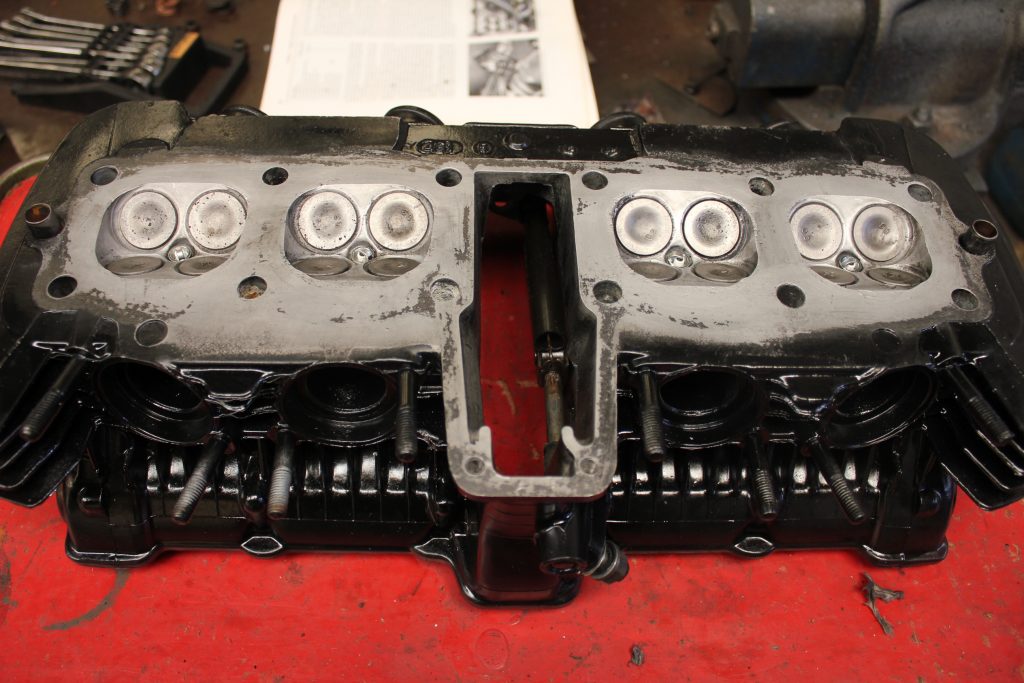

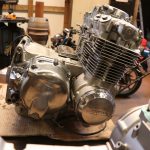
The engine that I rebuilt for a customer had to be made up from the best parts of 2 engines. Both engines were in excellent condition except for piston rings and mains bearings. I stripped both engines down and got out the micrometer and other measuring instruments find all the best parts. Some were like new and some were showing a tiny bit of wear. All the best parts were selected for the rebuild in the customers chosen crank case. Parts from one engine will be happily interchanged as all parts have been machined to such exacting dimensions, if you rebuild a CB Honda do not skimp on this as you will end up with a leaky bike.

The head gasket and barrel bottom gasket are expensive at about £80. I got the engine together with new top and bottom gasket and each valve reshimmed to Haynes manual spec when the customer insisted on pictures of the rebuild so all pictures in this blog were taken after. Boy what a piss off when they do this as it is not normal company protocol to do this as a report. On breakdown of what has been done to the engine is the norm. Our trade is engineering, not photography, maybe I should charge a rate for the rebuild and a rate for the engine pictures. I duly took all the top end off of the engine and destroyed the gasket amounting to £85. The customer must have had some bad experience regarding engine work or a shitty deal with a best friend. He also insisted that I give a warranty and that I was not to use any old gaskets as he would be even more furious that he already is as there were no photos.
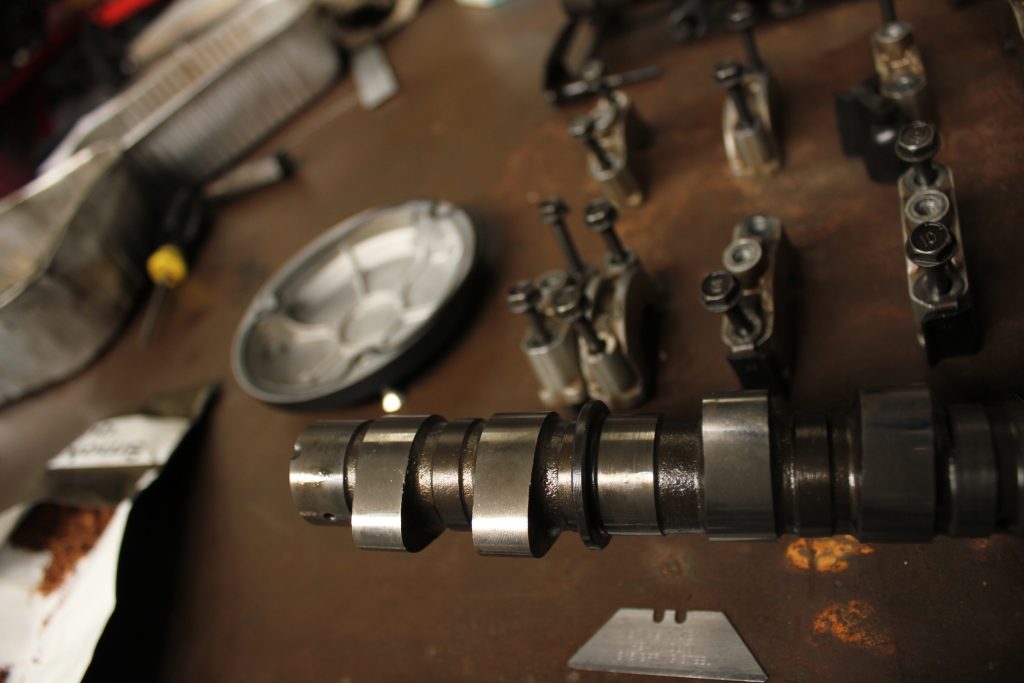
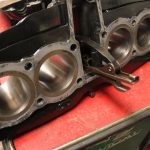
Reshimming the valves is no big problem but it takes time. There was a box of shims that came from both engines as the customer had dismantled the head. The inlet valves are set with closer clearances so I took all of the thinnest shims out of the box and fitted them to the inlets and got out the feeler gauges to measure the clearances, some shims had to be swapped around to make up the right clearances , as the valve clearances are quite open and not tied down to 100ths of a millimeter it is not so big of a task to get what is needed . In a lot of engines valve clearances are attained by adjusting a screw and locking it in position with a lock not. On the CB 900 Honda it is fitted with bucket type valves. If you imagine a valve that wants pushing open by the cam on the camshaft. Think of a valve with a precision hole cut above its stem and a bucket with straight sides on its outside diameter that runs up and down inside the precision hole above the valve stem and pushed the valve stem to open the valve when it is actuated by the cam on the camshaft.
Disturbing a rebuild is very annoying as the strip down and rebuild is wasted time and money and not a joy at all. I condone using a Haynes manual for CB rebuilds as there are loads of pictures. I find Clymer manuals very irritating as they are packed with too much script that can cause one to focus away from the donkey work.
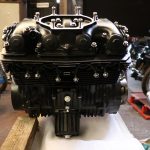
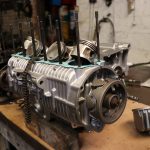
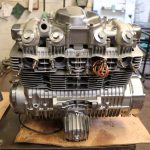
What isn’t irritating is the removal of the cylinder head as it does not upset the valve clearances neither does the gasket change to barrel and head, there are no silly push rods. If you grind the valves into there seats it will be a different matter as it will mean you will have to do lots of measuring and reshimming. Here is a picture of the spare set of cases that we accidentely painted at no cost to the owner
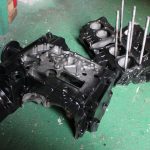
The paint we use is quite toxic and a high level of ventilation and filtration is needed in a spray booth. The paint is not very petrol proof until the engine is fitted and run up to temperature, then it becomes excellent. Unlike the expensive BJ1 fast black that does not need heat to make it petrol proof. Good paint costs a lot but ours is half the price of PJ1 fast black and that keeps our customers happy.
20th June 2018 note.
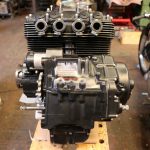
We received a message from the customer with a picture “below”.
“I see you have a blog about my engine, the CB 900 F2C. The bike is now finished, running very nicely. One or two little issues, but nothing I couldn’t fix.”
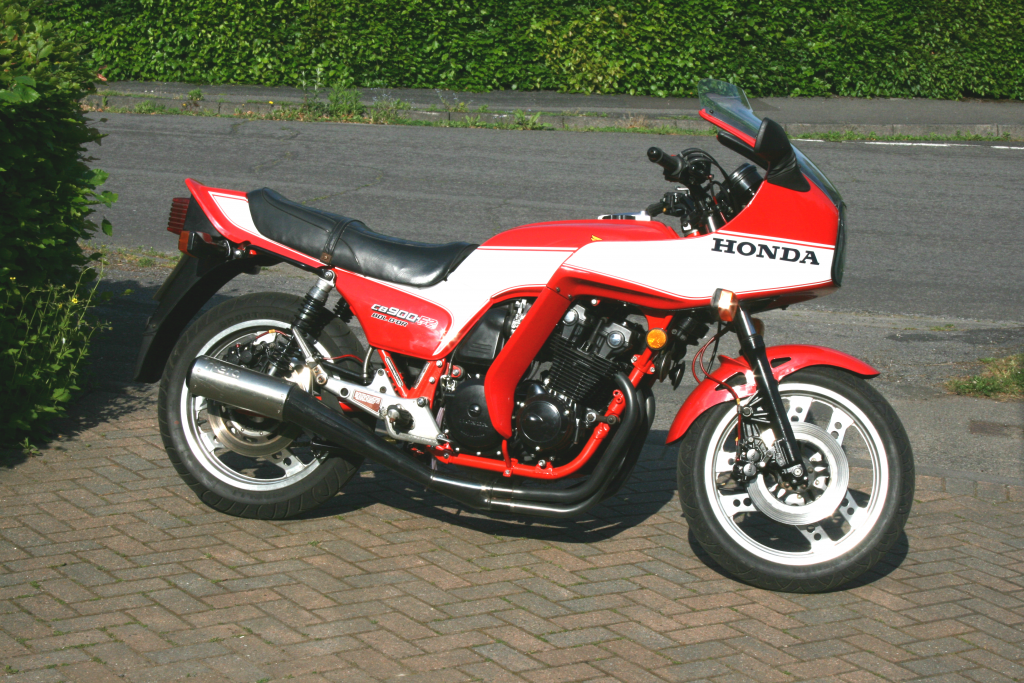
CB 900 F2C
Here are some unrelated Honda CB’s that I restored and would like to share with you, pictures below.
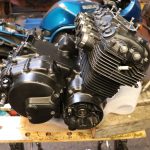


Thanks for reading.
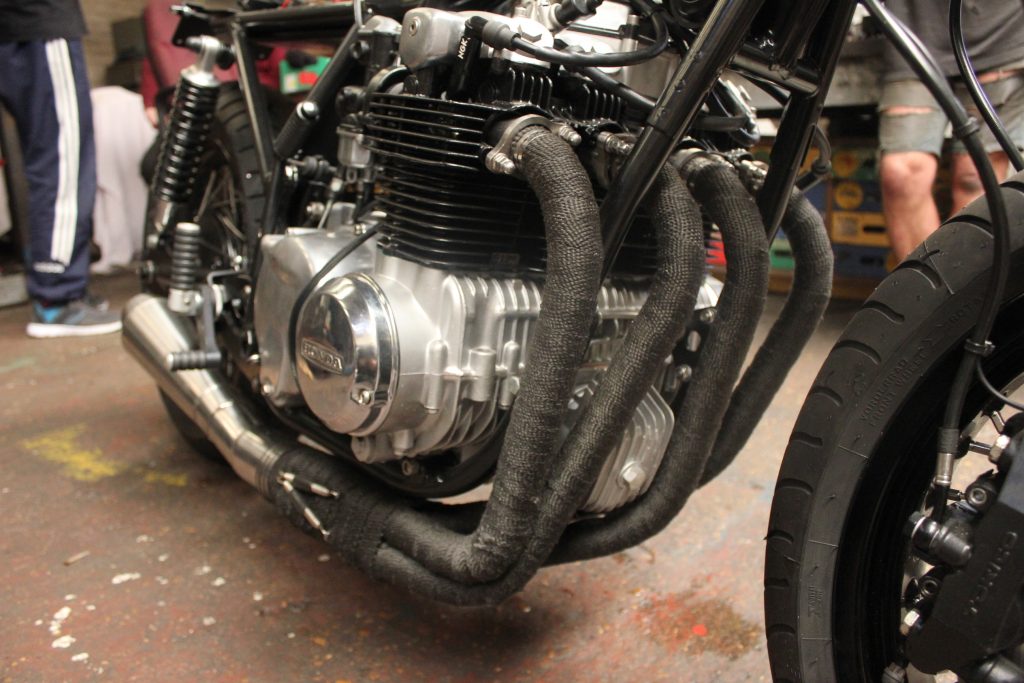
A customer approached us with an idea to modify his Honda CB550 four to a similar spec to one he saw on Google pictures but with some of his own personal ideas embedded into the finished creation .I was only too pleased to undertake the task as it was a step away from standard restoration work on vintage, veteran and classic machinery.
All bits for the bike were to be off the shelf parts that are commonly available. Hmmm! I bet I’m going to have a lot of input on how to make the off shelf parts marry up together with what’s going to be left of the original machine. It appears that the Americans like these bikes on the basis of some type of customization, IE; Bobbers, chop or desert sledge to name a few, I suppose it was the cast amount of sales from Japan to the USA of this particular model. So, many years later a cast amount of spares, new and used are still obtainable for engine and chassis restorations.
The customer wanted the engine to be a standard, as new restoration except for paintwork on the external casings and the carb bodies. The customer who I will call “Mat from now on was told to go shopping for parts such as forks, wheels, seat, exhaust, brakes, lights and any other gadgetry that he wanted to be fitted and I will somehow get it all to work together with the help of our vast array of machinery in the workshop. The engine was the first part to be tackled by me, and my son was told to start initial modifications to the frame.
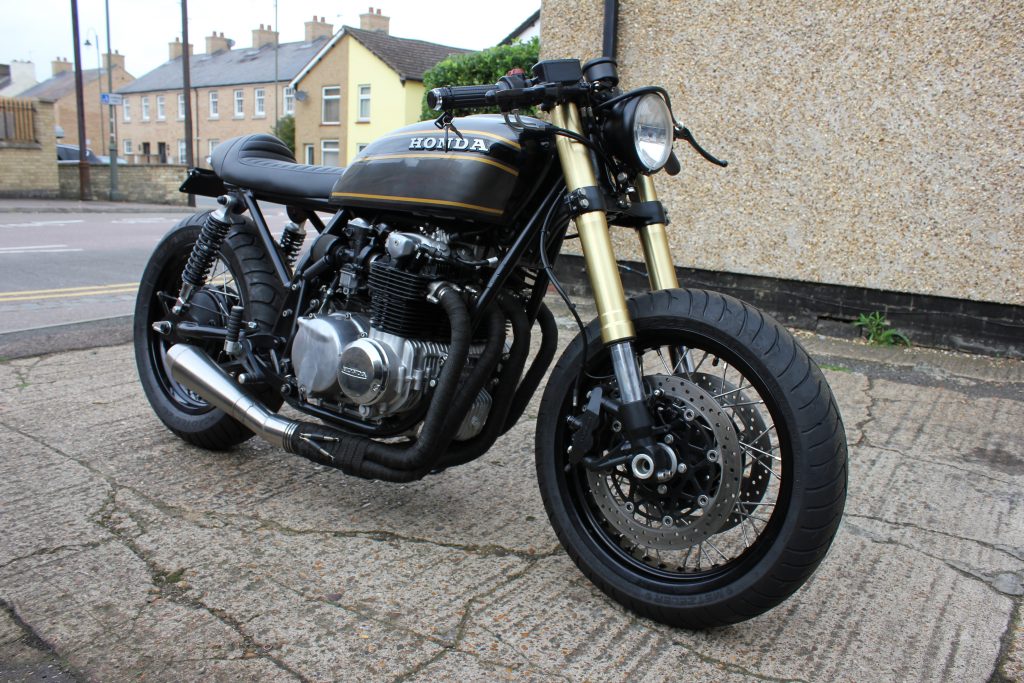
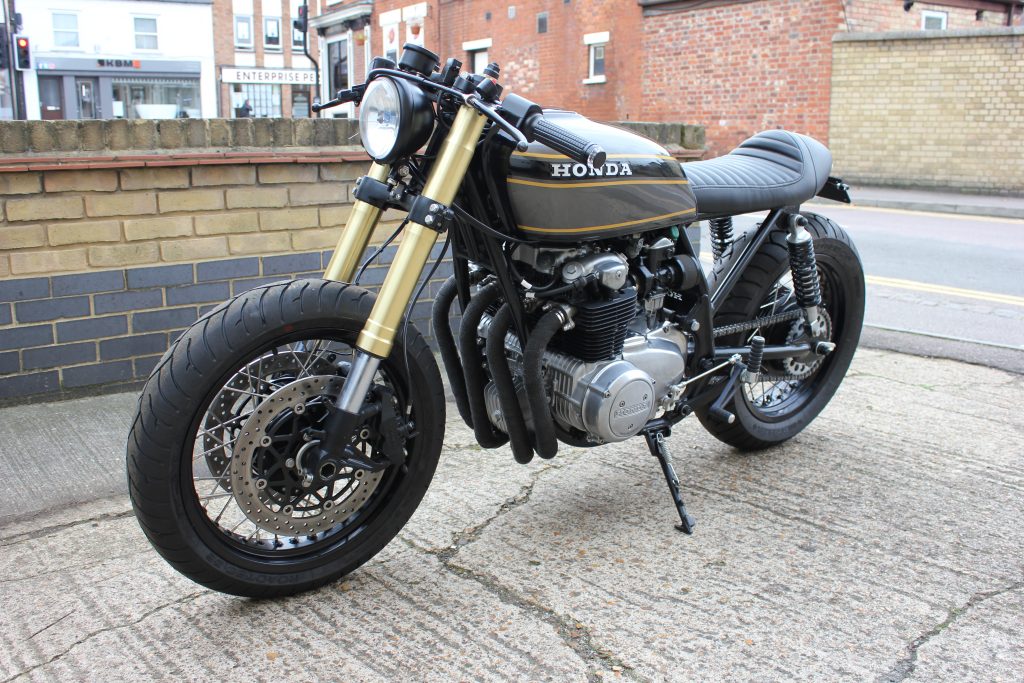
All pictures are of the finished bike.
The engine looked ghastly and the odometer reading of 17,000 miles was very suspect until I noticed that none of the engine screws or bolts had been tampered with. The engine came apart easily and showed minimal ware to all components but I thought it prudent to renew the piston rings. All of the engine cases were vapour blasted as well as the barrels and then we sprayed it with heat and ethanol proof paint “You will find a chart on heat proof paints and there properties on one of my older blogs”. Parts started to roll in from people who mat bought stuff either from ebay or suppliers of custom parts such as Moto gadget.
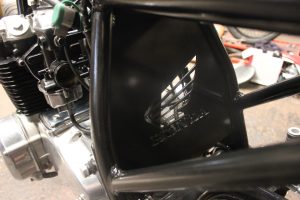
Mat told us how he wanted the frame tail end to look like and all of the electrical if possible were to be hidden under the seat unit. The seat was offered up to the bike and a few nips and tucks to the frame and a tray under the seat that could be removed if needed was all completed. I’m not going to go into all the template and pattern making to produce what has been achieved because it would be patently boring. The seat was a very low profile as was the tray that fitted beneath it. After the frame modifications has been completed I had to cut a sheet of metal for fitting in between the seat down tubes and laser cut the Honda motto in the centre.
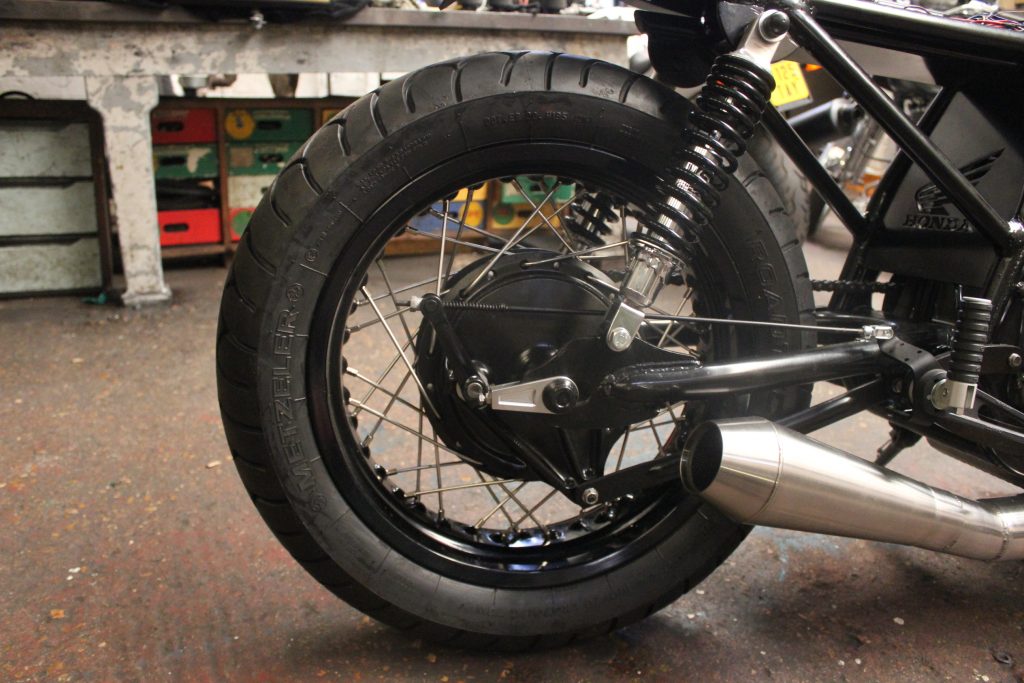
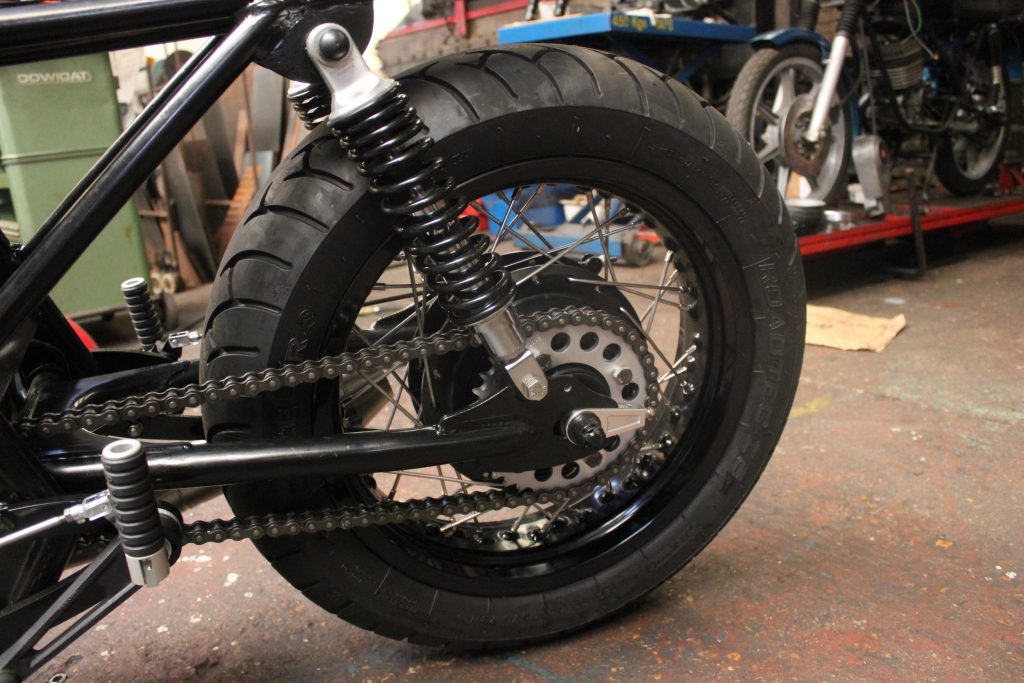
The forks provided are upside down forks and came with the top and bottom yolks. Little work was done to make them fit. The rims came in from central wheels, they are black anodised on aluminium and they show up marks such as scratches very easily as the anodising is only microns thick. I worked out the spoke lengths for both front and rear wheels and after they arrived from Hagon Wheels I rebuilt them in an evening. As you will see the rims are far from standard. The rear rim with tyre fitted and set up squarely in the swing arm only misses the chain by a couple of millimetres. Hagons shocks were fitted and the bottom mounts met with the standard CB550 hub.
The frame was a simple modification . The wheel builds were relatively easy. The electrical components tray underneath the seat was very awkward. The forks and headstock fitted beautifully with a couple of bearing modifications. Now comes the electrics that were a pain in the arse. The front and rear indicators and the electrical management system are supplied by Moto gadget. I’m not an electrics man but I’m sure that the Moto gadget stuff doubled the amount of wires that would have been needed on a standard wiring loom. The heart of the electrics is a hand operated control box that has loads of operational information regarding safety and absolution from all responsibility and a host of warranty clauses. My question is why the complications? If you want something classic, why have all the guff that does not fit the era? I would prefer an independent indicator relay. Independent starter relay and so on. The problem is with the unit if a circuit goes down that part of the unit has to be substituted with something more conversional and repairable. The Moto gadget unit has to be absolutely water proof as a friend of mine has had no end of problems with moisture ingress.
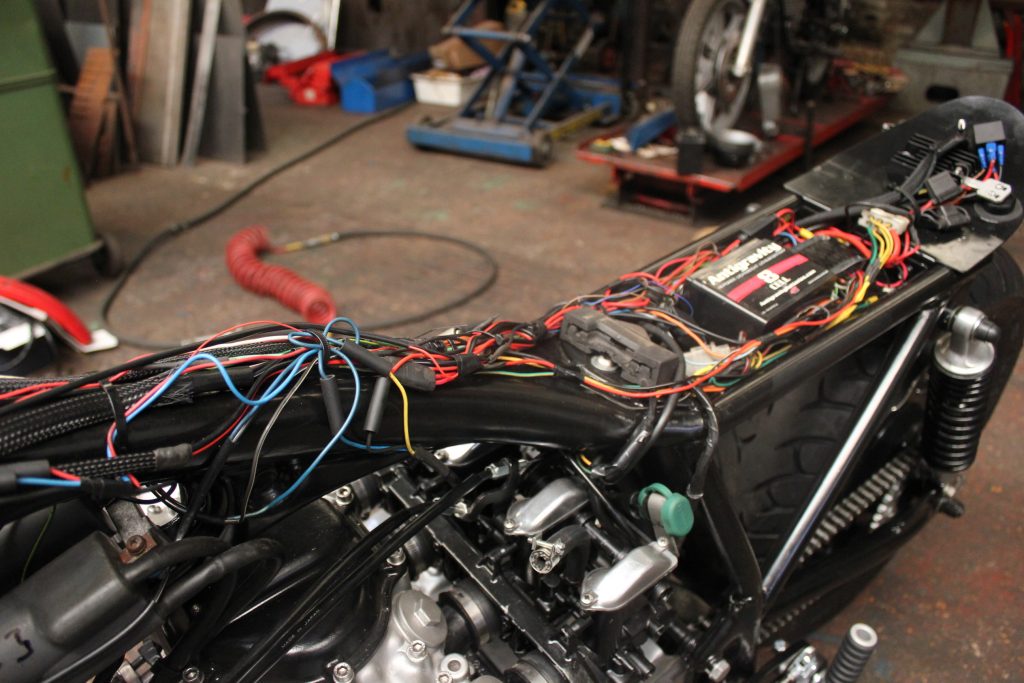
Maybe I’m a traditionalist and like to stick with old shit that I can fix. rather than a wrath of paperwork that comes with the black box exonerating the seller or manufacturer from any come back this system wont get you out of a fix if you break down on the motorway. An indicator that fits in the end of the handlebar sets you back to the tune of roughly £85. each, AGHhhh, if your engine fails to start and you keep pressing the start button look out for smoke from the melting wiring. The only battery that will turn the engine over is a lithium battery that sits within the given parameters that were given to me regarding seat base height and the restrictions on the depth of the electrical tray. I love solid state electrics as the offending component can be replaced at little expense. I’m not going to go on with electrics and I’m gladly moving onto the solid state stuff such as carbs.
When I build an engine I obviously set the cam shaft timing and statically set up the ignition knowing that when the engine is fitted that it will fire up with no probs except for remedial adjustments to the carbs that have been rebuilt to the book.
It is the day of the start up and all had been primed with lubricant and fresh fuel. Press the starter button after enabling the electrical system with its wand and nothing, not even a pop. Ohhh! What the f**k is going on here? Suspect carbs, even though I have rebuilt them to the book remove carbs and check all of it, ok. Check sparks, ok. Check ignition timing, ok. Getting paranoid and starting to doubt the cam timing, looked at it, ok. Looked deeper into NGK fake plugs. Turning the engine over on the starter produced the off gun shot from the exhaust.
Along time ago we has a similar problem with a CB750 and a CB400 they are both customized to customers specs. In the past I have fitted all sorts of filters including K and N filters to all sorts of engines with minimal tuning to the air/fuel screw. The aforesaid 750 and 400 would not run and showed the exact problems that I was now experiencing with mats CB550. As stated previously that every thing has checked out but due to customising there is very little scope to fir any other filters other than the sponge ones that mat supplied and we fitted. When the CB750 and CB 400 were fitted with there original air boxes they stated on the button, so now I’m wondering if this is one of those finicky engines.
The standard air box has an engine breather from on top of the camshaft cover. This breather circulates hot air and oil particles to the carbs. Honda chose this system to cut air pollution for the USA market particularly California. The oil particles also aid lubrication to the carb slides and then pass with the fuel and air mixture into the combustion chamber. Remember the air box is fitted with an air filter that has an impedance on air flow to a degree. If you remove this system some bikes will suffer and refuse to start. You may think that adding a set of bigger carbs may solve the problem by it does not as we have tried it.
Another item to look at is plug cap resistance and plug resistance, a typical plug that is marked with an “R” in its reference number, IE: DR7ES, denotes that its a resistor plug. If we look at the spark plug cap you may see a number followed with an ohms symbol. It may be marked with the value of 5 ohms or 10 ohms, the value of 5 ohms in fact times by 1000 equalling 5000 ohms. If we choose a plug cap with 5000 ohms resistance and an “NGK” plug marked with an “R” we can expect a combined value of between 9000-10000 ohms “9k-10k” resistance. Now I’m not an electronics expert but I have read much conflicting information tattled about on forums that could be fulfilling or totally misleading but when I put a now resistant plug of the correct value for the CB550, D7ES it gave a good fat spark. The correct value of 5000 ohms caps were retained. Maybe the electronics ignition system doesn’t like loads of resistance, the new plugs after fitting showed a good fat spark and good colour. I rechecked that the spark leads were fitted to the requisite pots. Honda have a firing pattern of 1243 from the left side of the machine when you are seated. Pots 1234 from the left of the bike is not the firing order and I can bet your bottom dollar this is how many confusing starting problems are met. Plugs in, push the starter button and bang, she chimed into life but sounded a little puffy from the exhaust but accelerated freely but not under load. Check the leads and found 1 and 2 had got mixed up “see!”, even I can make this mistake after how many engines I’ve built. Change the leads over “WOW!”, she runs as sweet as a nut.
Things to look out for when not starting is experienced is as follows; dirty carbs, blocked carb jets filters, spark plug grades, and most of all firing order if the numbers are missing off the leads.
There is a time when one needs to reconstitute a thread in a hole that has had its thread damaged either by dirt, over tightening or galling due to wrong screw or bolt being used.
There are ways to overcome the helicoiling process which should be the last port of call. There are basically four tools used for the helicoiling, these are a drill bit, a tap and inserting tool, a pin for breaking off the little peg that drives the helicoil into the hole “this is called a basic kit”, there are more sophisticated kits. A lot of people buy a kit on eBay and do a poor repair.
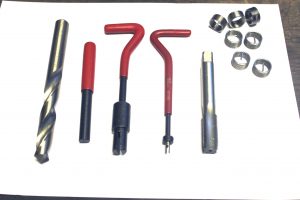
Standard helicoil set
There are several things to be aware of; they are depth of hole, length of helicoil insert and the stress that the helicoil hole is going to take. It is said that a helicoil insert is stronger than the original aluminium thread. If we coil a 25mm deep hole with a 6mm long helicoil it will not take the stress of the original thread there are several lengths of helicoil available but standard helicoil kits come with standard lengths.
As stated previously there are some tricks you can do to overcome helicoiling. Imagine you have a casing and its cover but several threaded holes have given up the ghost now If they were an original 3/16th whitworth you can assess the depth of the thread and choose a 5mm screw to fit into the full depth of hole after tapping. The cover will have clearance holes for 3/16th whitworth bolt or screw and this will be enough room for a 5mm too. 5/16th BSF hole can be tapped out to 8mm. I would only employ this practice on parts like primary chain-case covers, camshaft inspection covers, timing chain covers, essentially only normally loaded items that need the aid of a gasket or sealant to make a good seal.
Screw threaded holes in engine parts are always made deeper than the threaded screw or bolt, so quite often a longer screw could be used to get good purchase on the existing part of the thread that has not been used. Most Japanese engines have bolts that are about 10mm shorter than the tapped hole that it screws into, so there are some very useful threads to use.
Quite a lot of holes are partially tapped out and will tolerate being tapped out deeper without any drilling to make them deeper. If you want to drill holes deeper you will have to assess where the bottom of a tapped hole will come. If you select longer screws to employ an unused part of the thread at the bottom of a tapped hole you will have to be careful that there is no gasket goo in there as you will create a hydraulicing affect that can cause the tapped hole to break out and damage the casting or cover and such.
Prior to helicoils there were other ways to create an insert, IE, a threaded hole was drilled out to a given size and a piece of threaded bar was screwed into the tapped hole and then this was drilled and tapped to replace the original thread.
The problem with helicoiling is that the hole that has to be drilled to take the helicoil is rather on the big side and this can compromise the casting in certain situations to a disadvantageous way, hence I always use them as a last resort although it’s the easy way out, but not if they are badly fitted.
Here are a selection of petrol tanks that have gone through restoration. Some have had dent removal, cleaning and brazing done to the highest standard in 2K paint.

Triumph Bonneville One in poly-chromatic blue with white, the other in metallic off-white.
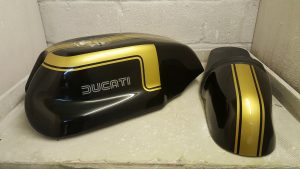
Aluminum Ducati tank and seat unit, with major dents removed.
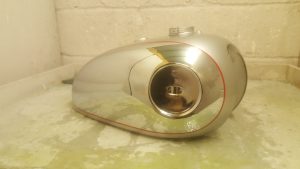
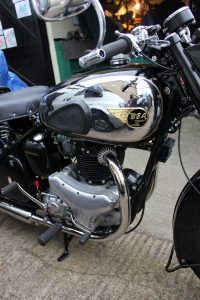
BSA Gold Star after lots of dents removed from the chrome areas.

Wall Auto-wheel petrol tanks in mild steel and etch primed with brass fittings.
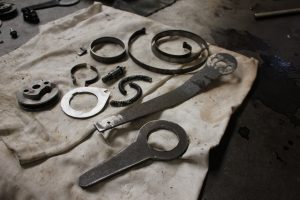
This post will show some parts we have manufactured for vintage Velocettes. We will be adding content continuously. We can make almost any part you may need for a Velocettes, feel free to contact us.
-
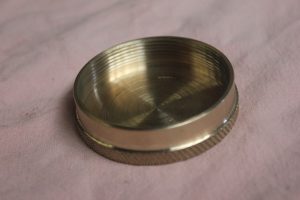
- Brass cap Prior to chroming
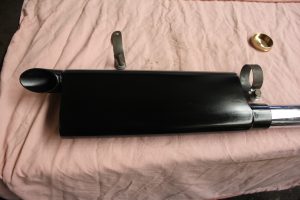
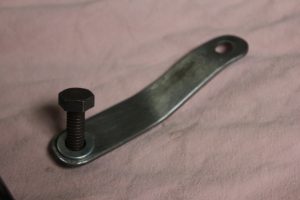
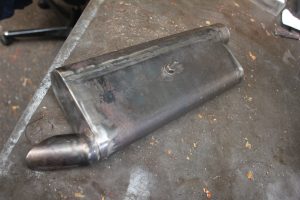
silencer, bracket, and oil tank cap fits the KNSS and KNS

Tool boxes to fit most vintage Velocette.
In 1930 there were a number of different “K” series such as the K, K.S., K.N.S., K.S.S., K.N., K.E.S., K.C.R., K.N.S.S., K.T.T., and the K.T.P. These were all basically the same except for subtle differences such as mudguard design, primary chain case, stay, oil tank and rear racks to name a few. One of the rarest “K” series machines of 1930 was the K.N.S.S. One such machine came to use in boxes of bits, on searching through all the parts we found rare bits for the K.T.T. and early K.S.S. After whittling everything down to what we needed for the rebuild, it was found there was innumerable parts missing that we would have to source from suppliers or make using loaned parts as templates.
Very few parts are available for early Velocette, the parts that are made by suppliers are all quite simple to make or are generic through other models. Parts being available are of course all the nuts and bolts in all forms of finish including stainless steel but not oil blacked.
Rear chain-guards in one or two forms are available as well as dynamo belt covers for those models that had lighting as standard such as the K.N.S.S., K.T.S. and the K.S.S. supplied with this was an unmachined raw aluminium casting for the primary chain case. The aluminium cases were used on many of 1920’s bikes but during the early 1930s they reverted to using pressed steel cases for cost saving, a few bikes up to 1932 were fitted with the aluminium cases to deplete old stocks left in the stores.
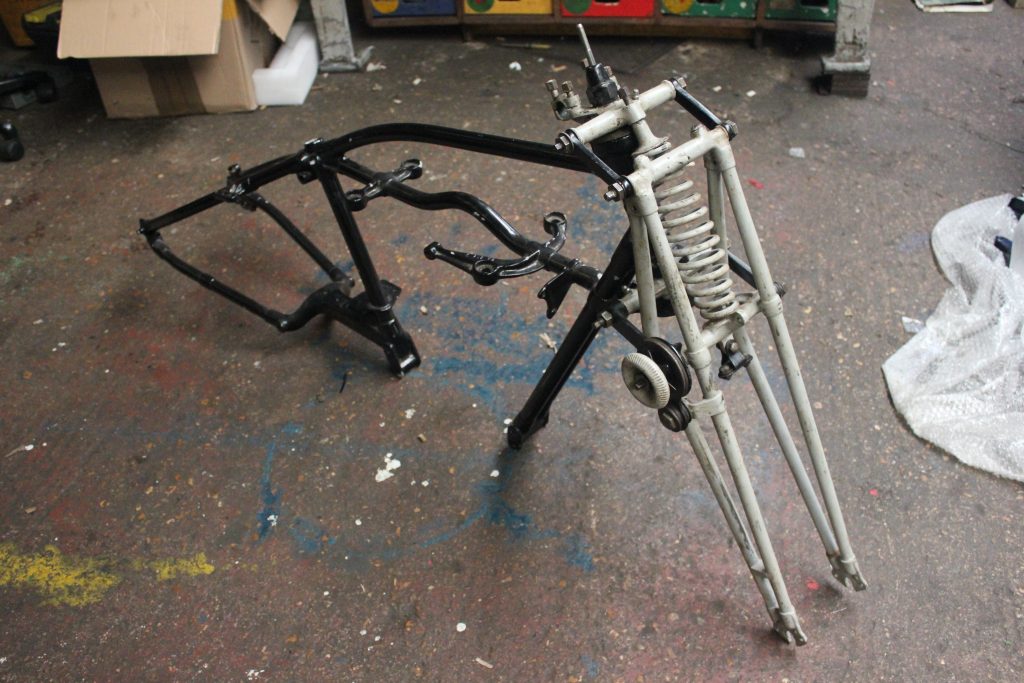
The only part that is not in keeping but is fitted to this K.N.S.S. are the forks, the bike had been crashed in 1940s and the forks were sent to the Velocette repairs department for repair or exchange. What came back in return were the K.S.S. forks. We have been told by the owner to keep the forks on the bike for historical provenance.
There were a host of parts that we had to make such as the bevel drive tube with new bronze bushes, Ohlins couplings, kick starter with return spring housing, all the positive stop gear change mechanism and levers as well as the Cheswick and wright water bottle silencer that was lent to us for copying.
One part that I hate making is rear tool box rack and stay units as so much is tied up to them and there is no compromise on accuracy as they are a visual part of the completed machine.
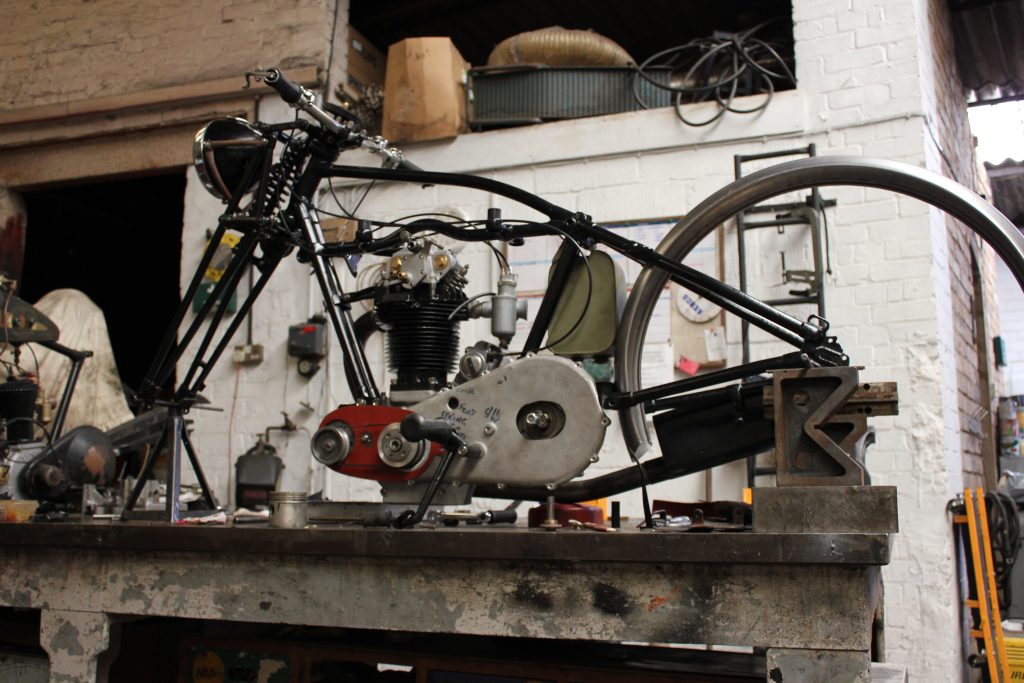
When ever I build a machine whether a Velocette or BSA I like to start with the engine rebuild and get everything perfect and finish the engine timing in all aspect so when the whole bike is restored and rebuilt all I have to do is put petrol and oil in the motor and it will start without touching the engine accept for a couple of plug checks and a oil pressure test in the top bevel housing with a pressure gauge.
The wheel rims were solid but fairly pitted by rust but no pinholes to fill. the hubs after shot blasting were in new condition and are apparently very collectible, so watch this space as I am going to produce exact replicas in limited numbers. I am not going to talk too much about the gear box as they seem to be indestructible unless diabolical gear-shifting is the order or the day and sheer neglect regarding oil replenishment.
The clutch was a challenge as they can be quite finicky if not set up correctly. Who would design a thing that would attack 4 or 5 pages on how to put together and set up the complicated thing with all its foibles. One thing about it that really needs attention is the fibrax inserts. In a well used clutch the fibre gets clogged with metal debris that is not really visible by eye. When ever you strip a clutch down I would recommend cleaning with cellulose thinners and a good scrubbing with a toothbrush.
Here is what I did to a badly slipping Velocette clutch.
- Remove clutch and check that fibers are a 1/32nd proud each side of plate if new.
- Separate plane plates from friction plates.
- Vapour blast plain plates and hand dry with tissue paper.
- Soak and scrub friction plate in thinners
- Remove from solution and blow dry with high pressure air “make sure not to blow the inserts out”.
- Put the clutch back together after a little grease has been put on the big ball bearing.
The fibre inserts can be a little worn but should give no problem as long as they are proud of the plates. When the clutch is in operation it should not get overly contaminated with primary chain case oil as the oil level will only be enough for the chain to pick up and lubricate the gear, the fibres are quite tolerant to oil ingress but dirt and metallic ingress will have a detrimental affect. You will find that a clutch that gave so much trouble with slipping and difficult adjustment will be revolutionised. I would suspect from reading on the web about many clutch problems with Velocette that 80 percent of troubles stem from using oil and dirty fibre inserts.
Take a look at the pictures to see what we have made and achieved. If you require unobtainable parts or well made spares for your running machine or stalled project please feel free to contact us.
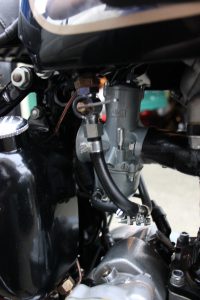
This is a message to the owner of the motorcycle regarding the starting procedure.
• Turn oil on, it is on when the slot of the screw is in line with the oil pipes, the screw is just behind the gear box in a brass block, a big screwdriver is needed to turn it on and off.
• The small lever on the right of the handlebar is the air level and this will need pushing away from you when seated on the bike.
• The small lever on the left of the handlebar is the advance lever it needs to be pushing away from the rider.
• turn on left side of tank
• Push button down on top of carb float bowl and hold down for 3 seconds, if it is done any longer than this then you will see petrol dripping from the carb, this can cause a wet spark plug.
• There is another trigger shaped small lever on the left bar, this will need to be pulled in and the engine will need to be gently kicked over 3 times with out touching the throttle.
• Let go of the throttle trigger, known as the valve lifter and give a good kick on the kick start.
• If it doesn’t fire you will have to pull trigger “valve lifter” and kick engine over again 3 times then try starting it again.
• If you get kickback or bang from exhaust it is due to inadvertently turning the throttle.
• When the engine starts, give it a little throttle but not to much as you need to gently warm the engine so you can turn the air lever by pulling towards you.
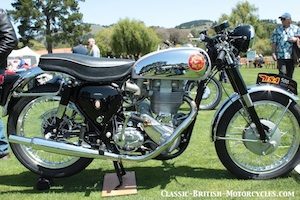
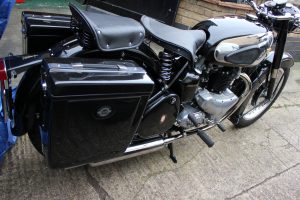
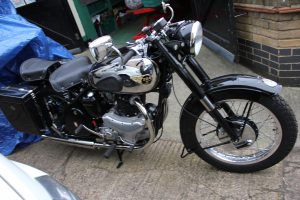
The BSA has spent its life in Switzerland and was delivered to the workshop in an amazingly un-mistreated condition.BSA A10’s are usually butchered or neglected in such a way that frame repairs due to corrosion need doing or engine parts need renewing rather then reconditioning.
It looked on strip down like most of the nuts and bolts hadn’t been touched by a spanner. All of the original paint was in place minus any primer finish as was the normal practice. Because this particular BSA A10 was in such original condition it was worthy to note that many of the nuts and bolts were finished in gold paint rather than being plated.
The petrol tank was beyond redemption due to corrosion in the chrome plated area of the tank. I have a good supplier of BSA tanks in India and they are pretty accurate in regards to the mounting brackets that need tweaking but the badge and rubber knee pad tapped holes are spot on. Petrol tap hole tapping are normally to the original sizes, IE 3/8th BSP rather than 1/4th BSP for the petrol taps that are normally available as an after market product. We have to make adaptors in brass to fit the aftermarket petrol taps.
Many petrol tanks from Indian suppliers have problems with them such as leaks in welded seams and badly fitted mounting brackets and petrol caps that crack the chrome finish when they are screwed up. Red oxide paint finishing is commonly found in petrol tanks internal faces, probably to hide a multitude of bad welds or rusty material. Remember that India has a rainy season that produces loads of moisture and condensation and that running a dehumidifier isn’t economical.
the tank is acceptable as an aftermarket product with a price to match. The rest of the tin work such as mudguards can easily be restored as they are a good gauge thickness thus rust holes or equipment mounting holes can be braze filled with little distortion to the tin ware.
Claude who owns the motorcycle gave me a photograph of a bike, basically black with alloy wheels. I thought, “hay ho”, he’s going to make it as BSA should have done in its hayday. My orders where to use stainless steel components wherever thought needed them and to bring electrical ignition system up to 12 volts and use LED’s for the lighting if possible.
It was nice to see a set of aluminium wheel rims and stainless steel spokes come through the post from “Hagons Wheels” for me to build. Claude knows exactly what he wants as he gave me a photo or another BSA A10 that he had seen at a classis bike run or show that set the seeds of thought in his mind on how he wanted the bike to look like.
The engines are fairly basic to work on but be carful to follow the service manual as you can meet a few pitfalls such as shoehorning the motor out of it’s close fitting cradle and what to remove from the bike before it can be taken out.
Workshop manuals such as Hanes can be a bit confusing because one manual may cover several models and may not give very clear instruction on particular components such as the clutch. We have built so many of these engines that the use of a manual is never needed.
The engine was stripped down so as to check all parts for were and what was needed for updating the odd component. In fact there are very few components made that would make the engine any better. SRM supply some stainless steel parts and different sump plate. throughout the whole machine the major update would be electronic ignition and a 12 Volt Alton dynamo. When rebuilding the engine it is imperative the gaskets are handled and fitted carefully to avoid oil leaks. Modern gaskets seem to be made from less resilient materials. If all has been fitted together properly the only oil leak you may find would be from the push on rubber tubes from the oil tank to oil pump.
I always like the frame to be full gloss powder coated as it is so resilient and not so prone to chipping or flaking when nuts and bolts are fitted. So many purists come into my factory and ask, “what is the paint finish on that bike”. I may say enamel when it has been power coated or I may say it has been powder coated when its enamelled. I haven’t had a customer who has noticed the difference. When powder coating is noticed is when it is sprayed on thin metal components like mudguards, engine plates and petrol tanks. Powder coating gives a thicker layer of paint that is good on some poor frames because it can hide imperfections such as braze and pitting by giving a smooth layer of paint over the top. Things to be aware of when powder coating is oil tanks and the threaded orifices that emanate from the tank. Frames and fittings with holes in them such as engine plate mounting studs and screw holes. Painters usually black thread holes off but don’t completely mask threads off. When you receive a powder coated frame it will need holes reaming out and threaded holes will need tapping out if you want to void difficulties in fitting. Typically a bolt fitted into the untapped hole will graunch to a halt no matter how much grease is applied. Also watch out for headlamp shells being powder coated as this will effect a tight headlamp rim that will be difficult to fit without butchering the paint finish with a file.
“anyway back to basics with the rebuild”, SRM do a neat ignition system that fits into the Lucus K2F magneto if you take some of it’s guts out, it leaves everything looking untouched and original. The dynamo can be rewound for 12 volt but Claude wanted to fit something more modern so he ordered an Alton dynamo that slots into place of the old Lucua dynamo with no modifications.A common mistake to make is to fit the completed engine into the frame and bolt it all up to find you haven’t fitted the dynamo strap. If forgot you will have to remove a lot of stuff off the timing side just get the strap retaining bolt into situ. There is no easy way around this problem unless you do a bodge job of taking the timing cover off and drilling an access hole in the rear timing cover. I have seen this plenty of times on BSA A10S and BSA A7s that have gone through an engine out job at home.
Just to side step a little, If your rear sprocket is worn and hooked you won’t have to wait a lift-time to find one as it is reparable. The sprocket is an integral part of the rear brake drum. The teeth can be machined away on a lathe so as to leave a plain flange to bolt a new sprocket ring on. There is not much I can say about standard rebuilds or restorations as the model engine is so well covered through hundreds of write up’s.
Claude wanted indicators and three micky mouse lights fitted in the head light shell, one to show indicators and the others for high and low beam. The headlamp shell was not designed to take so many wires, but with carful planning more than enough room was available. Micky mouse lights have to be carefully planned in there layout as the back of the headlight glass may clash with there bodies. The indicator micky mouse light needs diodes fitted to its feed wire so as not to produce a hazard warning light effect with all the indicators flashing at the same time. The headlight also comfortably accepted the indicator replay box.
Claude ordered some craven pannier boxes that I dreaded fitting. I have fitted many pannier boxes and top boxes to loads of old bikes and they are generally a pain in the arse. They need custom frames and fittings making. Most panniers are not accurate mirror image so are difficult to get looking right and even. Surprisingly the cravens weren’t to difficult to fit and some of the stainless steel brackets were usable that were supplied with the panniers. Craven panniers are very accurate making custom fitting that little bit easier at least on a 1950 BSA A10.
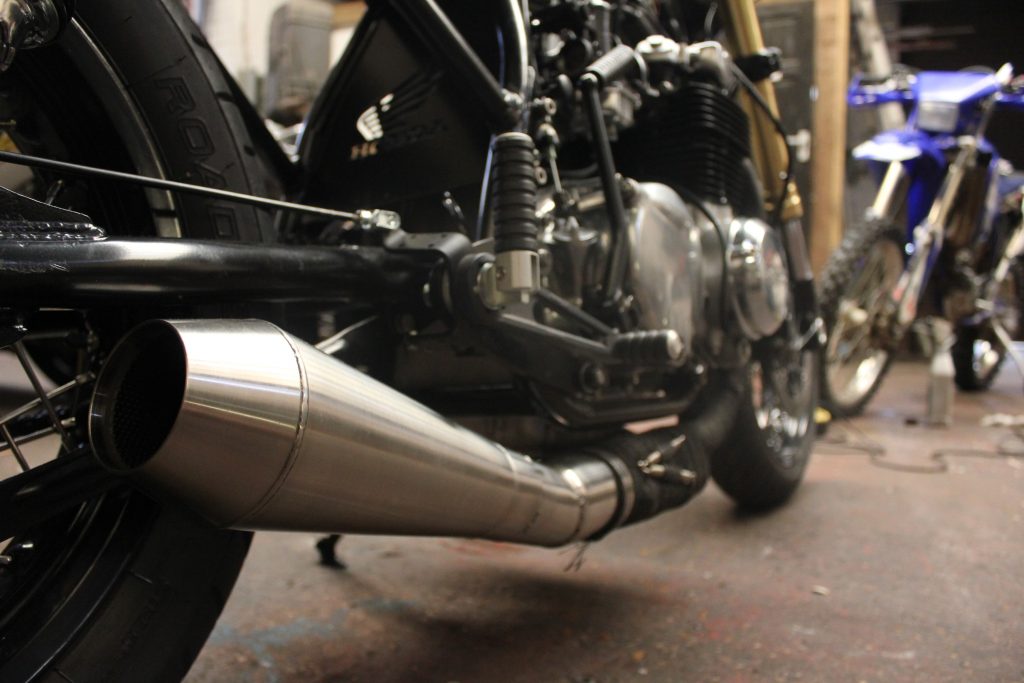
All dressed in black with aluminium rims and stainless steel spokes, electronic ignition system, LED lights, Alton dynamo and an Amal mono block carburettor that can be tricky to fit as well as the panniers, I think she looks great and well balanced. There is a line to be drawn when one has to decide whether to restore or replace certain items such as the exhaust system or the riders and passenger seats. Exhaust systems are as good as they are going to be, that’s as long as you don’t buy the cheapest. The aftermarket seats are so cheap that it is worth getting them recovered in better material as Claude wanted to. I admit they do look better and have that hand made signature attached to them. Here is a list of the parts purchased from the makers and suppliers to produce this lovely BSA A10 1950 Vintage.
-
- 1950 BSA A10 Golden Flash

- DragonFly Motorcycles
Levers
Rubbers
Chain guards
- Montys classic motorcycles
Alloy sump plate
- SRM
Electronic ignition kit
K2F twin magnetos
DVR2 negative earth 6V or 12V
- Bth components LTD
Alton BSA dynamo
- Hagons
Flangless alloy rims
1921540TC
1825040TC
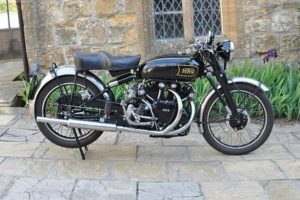
This is a new fuel tank made in mild steel with distressed paint work as requested by the customer to match the existing paint work on the rest of the bike. all of the original fittings and fixtures were removed from the old tank and fitted to the new one. This particular tank is for a 1913-1914 New Hotspur JAP single cylinder side valve model manufactured by Strutter and Abrey of Tottenham.

(from Alex)
Hi Terry
Please find attached as promised photo's of the petrol tank fitted to
my veteran motorcycle you made. It is a perfect fit and looks great.
It looks far better in real life than it does in the pictures. Thanks
very much.
Have a problem now 12 motorcycles all taxed/tested and running ok,
just one non runner, only bought a month ago and not used since 1970
but that should be going before the end of the year.
Did you hear again from the Irish? man who had the old V-twin
Indian/Harley, or was it someone just talking a load of crap as usual?
Merry Christmas
Alex
(from Terry)
Hi Alex sorry for any probs I caused you, I do try to do my best.
Amazingly the Irish gentleman was true to his word, he phoned me
exactly on the last day of the second month as promised and he said
he would meet me at the workshop in one hour as he was on his way
back from good old Ireland. Almost exactly one hour later he was
there banging on the factory door, his rather odd son was with him.
Have you seen one flew over the cuckoos nest, pick the weirdest one
out of the film and this fits the picture. Anyway he asks for a real
strong cup of coffee as this was my payment for the bikes as promised
on the first day we met on my forecourt. it all sounds a bit weird I
know, but bare with me. anyway we bundle into the van and go to Milton
Keynes as promised. true to his word there was a lovely but clearly
dilapidated and neglected old house that his 98 year old father had
left him in his will. you can imagine how excited I was that we had
got this far. I didn't want to show this to him or his son as they
might renage on there promise that what was in the home built wooden
slatted workshop at the back of the house was going to be free as
long as I got rid of what was in there. He decided to show me around
the internals of the house and then we went out into the grounds,
all 2.5 acres of it . He kept on moaning that his father had left him
a burdon of a house  to deal with in the uk as he had properties that
he was renting out and looking after in Ireland. I was sure he was
stretching things out as we slowly meandered across the overgrown
lawn. At Effing last  we were in front of the overgrown
parralelagramme of a shed, believe me it was leaning to one side.
He opened the door that was not even locked, this was surprising as
what he said was in there was in my mind worth a fortune but in his
mind was a load of rusty crap. The shed was jam packed with stuff,
I didn't know where to look first.as we made our way, me leading and
his old boy waiting outside on his old mans orders through what he
thought crap and I thought King Solomons mines. There it was as he
said Indian V twin 1912 engine number E171, the Harley Davidson as
he said, was a nickel plated tank brough, underneath all the shit,
old seats and belt drives, tucked or jammed underneath a bench was
a Henderson inline four. there was a complete bike with crocker
written on the tank. A garelli double piston racer from what I read
on the ticket tied to the throttle,  looked like this had been bought
in an auction many moons ago. His old man obviously had money and a
passion for collecting bikes but never doing them up. 8 pickups and
drop offs later and about 200 quids of petrol., ive got it and am
glad to share this message with you. its nice to get something for
lending an ear and a bit of time to a passing stranger who you think
is full of bull. what I have is premium stuff but at the right price
I will be willing to let some of it go except for the Henderson as
this was a dream find. I am glad to share this with you as you are
the only person who remembered the Irishman. cheers terry
(from Alex)
Hi Terry
Thanks for the long reply. Yes I would be very interested in
something, mostly I want an inline four but they are not cheap and as
you said, that is yours. Would it be possible to come and look
Christmas week please? I think I have to collect a Model T Ford from
Dartford one day that week, but not sure exactly what day. The boat
with it in landed on Friday and it has to clear customs first. Will
give you a call.
This is the first time I have ever heard of anyone actually getting
all the promised treasure. My friend who made a new fuel tank for his
flat tanker himself was absolutely amazed when he saw what you had
done, you cannot believe how pleased I am with it. It looked so
fantastic when I first picked it up and I was that overwhelmed with
the sight of it that I did not make sure it fitted correctly (all my
fault), we'll never mind all sorted perfectly now.
Regards
Alex
(From terry)
Hi Alex what do you think of the story, mouth watering isn't it?.
only a pipe dream as the guy was full of crap. have a good Christmas
and new year. cheers terry
(from Alex)
Hi Terry.
You rotten b#*+=! You had me all excited, I even showed the email to
the wife and looked how to call your way on the way back from Dartford
next week. I expect you have had a good laugh at me. Now I will tell
everyone now what a shit job you did of my petrol tank.
My friend saw the tank again this morning an said what a wonderful
job you had done of the tank. Thanks again for doing a good job.
Merry Christmas and Happy New Year to you
Alex
This is an email between me and a gentleman called Lauren who was enquiring about a Velocette.
Laurent sent on 2014/10/21
Hello Terence, We spoke on the phone about a Velocette that has been left behind in my house! I would like to know which model it is and roughly the cost of restoring it. My grandfather had one in the 1930s so it’d be extra special for my 82 year old mother to see! I attach lots of pictures of the bike in several emails
Many thanks, Laurent.
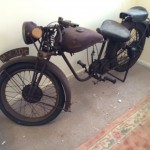
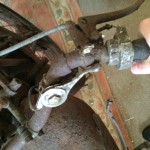
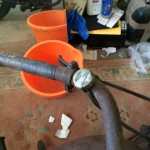
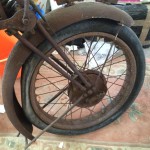
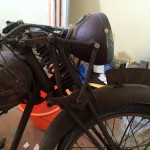
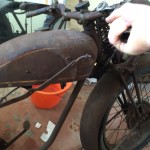
Terry sent On 2014/10/22
Hi Laurent, it looks you have a very rare model “U Velocette”. Your one is dated between 1927 to 1930. they were very fast for the era and were very expensive to buy. Velocette also subtly modified the model U for the TT races this became the GTP in 1930. Your pictures show a very rusty one. Just to put things in perspective if you were to get the forks rebuilt by a girder fork specialist, you would be looking at a £1000 plus delivery and VAT. Parts are available for this model but they are very difficult to source. Anything that is unobtainable, we can make. It is so difficult to put a price on your restoration as it is in such poor condition and so difficult to assess from pictures but I bet your bottom dollar any other restorer would be looking at between £8000 and £13000. Your model sold at Bonham’s auction for £4025 not including premiums and vat in 2008. Prices have been accumulating at 6% per year bringing a sale price on a reasonable restored one to about £9500. I would guess, if I were to point you in the right direction for spare parts and you were to supply them during the restoration you would be looking at a restoration cost of around £5500- £7500. I recon your outlay for parts would be in the order of £1000 to £1500. This is the best and most honest info I can give.
Very kind regards, Terry Ives.
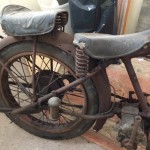

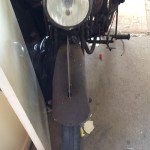
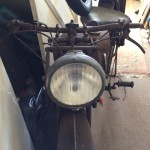
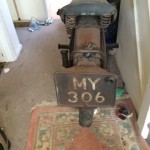
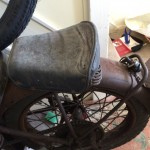
Laurent sent On 2014/10/22
Thank You Terry for your detailed and informative reply, which has given me plenty to think about. I’m sure that with my home renovation costs I won’t be able to afford A bike restoration project but I have a friend who can. If he takes it on I’ll send him your way for sure. I’ll share your email information with him and we will see what develops and I will keep you in the loop!
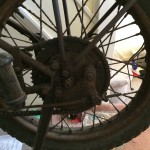
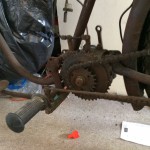

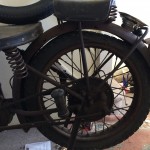

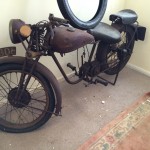
Here is a typical diagnosis case carried out through Emails for a customer.

Date: 2014-10-21 17:01, David wrote
regarding an engine rebuild on a Honda Goldwing limited edition GL1200 injection 1985, the problem was doing 80/90 mph smelled burning oil and blue smoke coming out the exhaust if that helps. If possible if you have any idea could you give me a price please?
Date: Tue, 21 Oct 2014 22:46:51, Terry wrote
hi David you may have heard the saying, “sounds like rings have gone”. I think this is the problem. But before you go any further check that all of the engine breathers are perfectly free of dirt or oil. I have seen gummy oil in breather pipes that will cause this problem on many bikes and most engine restorers will be happy not to tell you this so that they can make a fortune. Did the smoke sort of suddenly come on or has it been getting slightly smellier and smokey over a period. This is important for me to know so I can give an accurate diagnosis.
Date: 2014-10-22 14:57, David wrote
Hi, there checked the breather pipes they are all clean and dry, the plugs all look fine. No smoke when starting up, smelled the smoke and burning smell it only happened the once when doing between 80/90 mph. Haven’t been up to that speed again to see if it happens again. The oil temperature and the water temperature went high at the time. There is no oil in the water and no water in the oil. I would like to sort the problem as im taking the engine out to do the alternator and clutch and do it all at once while the engine is out.
Grateful for your help, Dave.
Date: Wed, 22 Oct 2014 21:32:17 Terry wrote
Dave check your air filter for over oiliness. These bikes do not like being overfilled with oil at anytime. when the engine has too much oil in it, it will pass a certain amount back to the air filter, an oiled filter will not produce smoke at low revs as the air intake velocity is low, when the revs are higher smoke will be produced as the air velocity is a lot higher, this will cause oil molecules to be drawn away from the filter and into the carb intakes. Check it out and report back.
Cheers ,terry

Date: 2014-10-23 13:04, David wrote
Hello checked the air filter its clean and dry looks like new. Had
the bike about 12 month done 3000 miles on it the air filter was I
when got the bike so don’t know how long it’s been in hope that helps
many thanks ,David
Date: Sat, 25 Oct 2014 23:24:39 terry wrote
Dave the next thing to do is compression test it when the engine is
cold, if this checks out to be ok I can be quite sure that it will be
the valve guides that need looking at. What grade of oil are you using,
is it to the correct spec. I am leading you in the right direction for
you to get the most cost effective solution. Cheers terry
Date: 2014-10-30 15:58 David wrote
Hiya terry do not know what oil was in it as it was freshly changed when I got it did the compression test cold reading was 60 psi on all cylinders on second turn was 65 psi on all cylinders many thanks dave
Dave never got back to me with any feed back so I think in this case that the valve guides were worn.
Copyright © 2020 Stotfold Engineering Company Limited. All rights reserved.