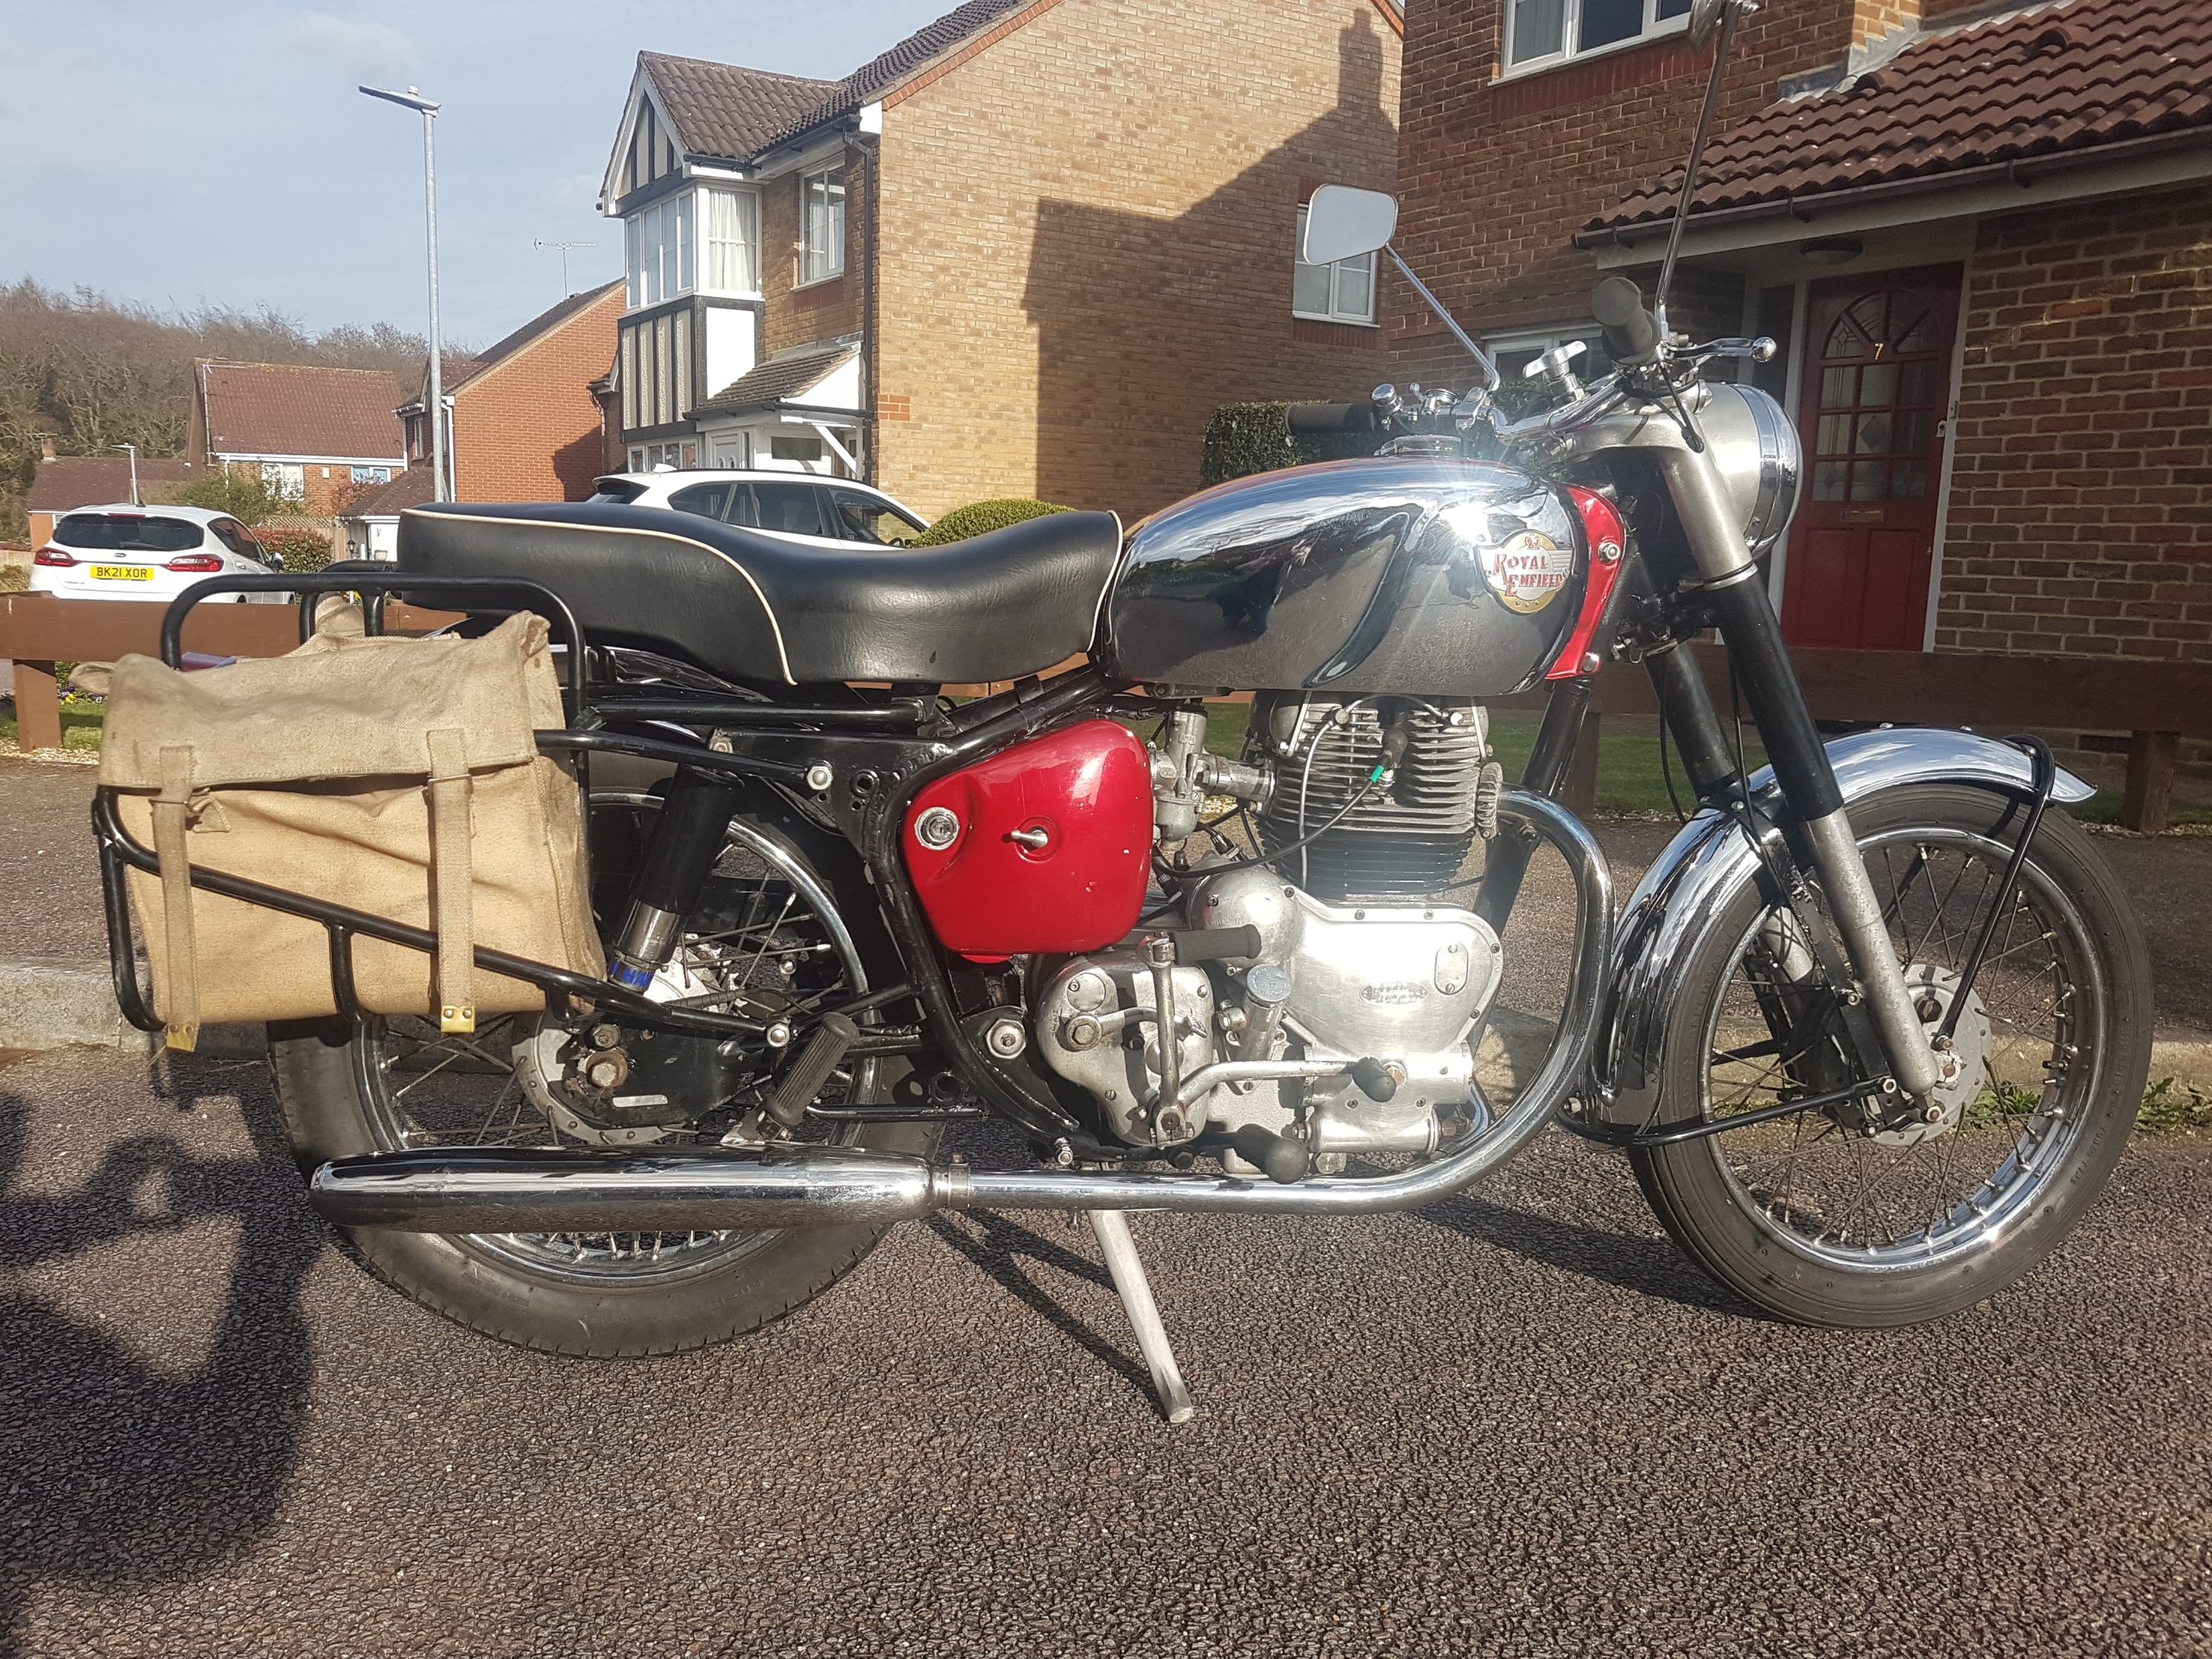
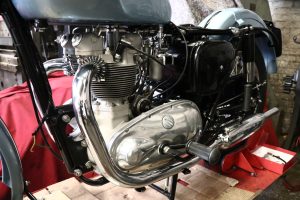
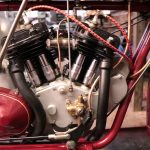
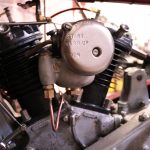
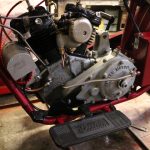
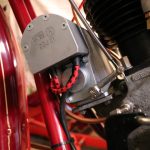
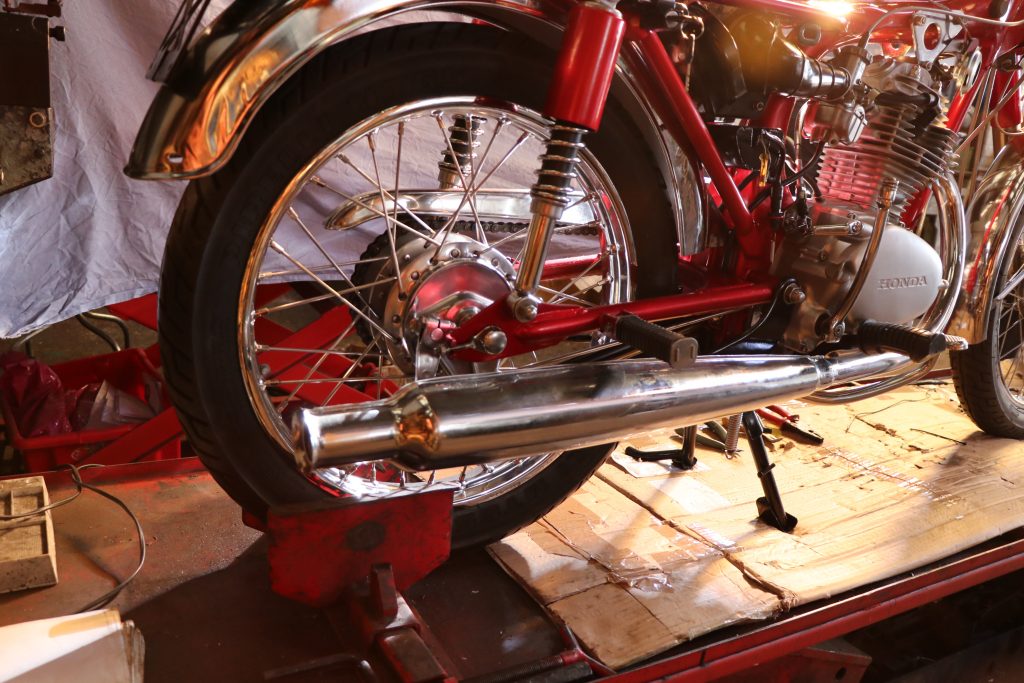
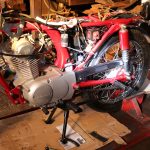
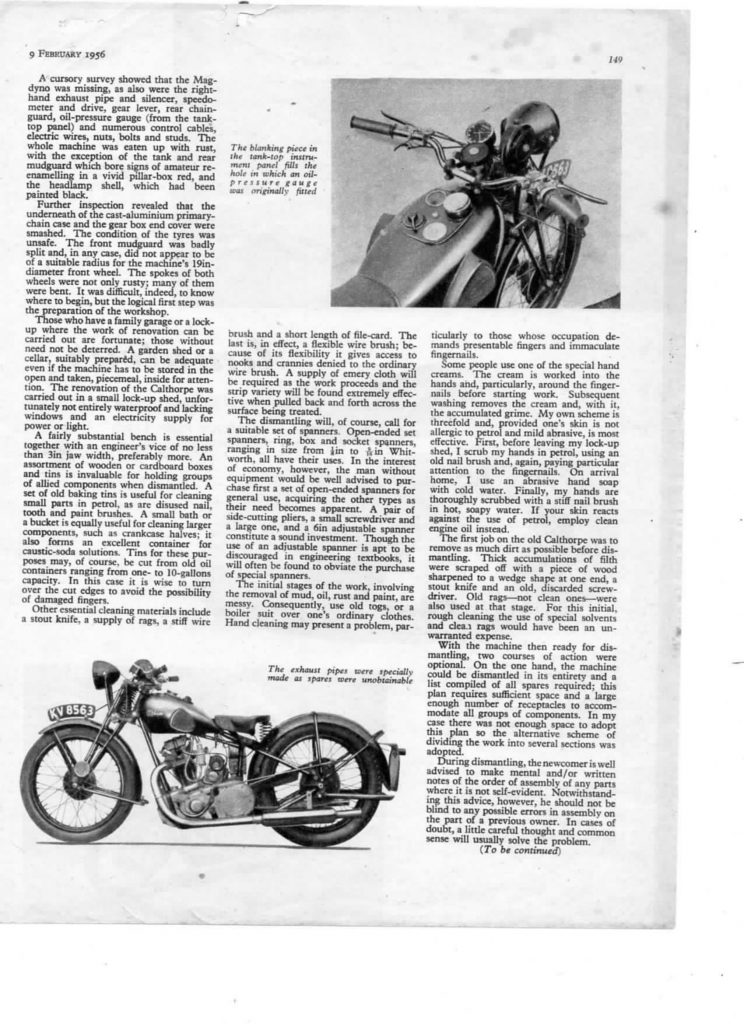
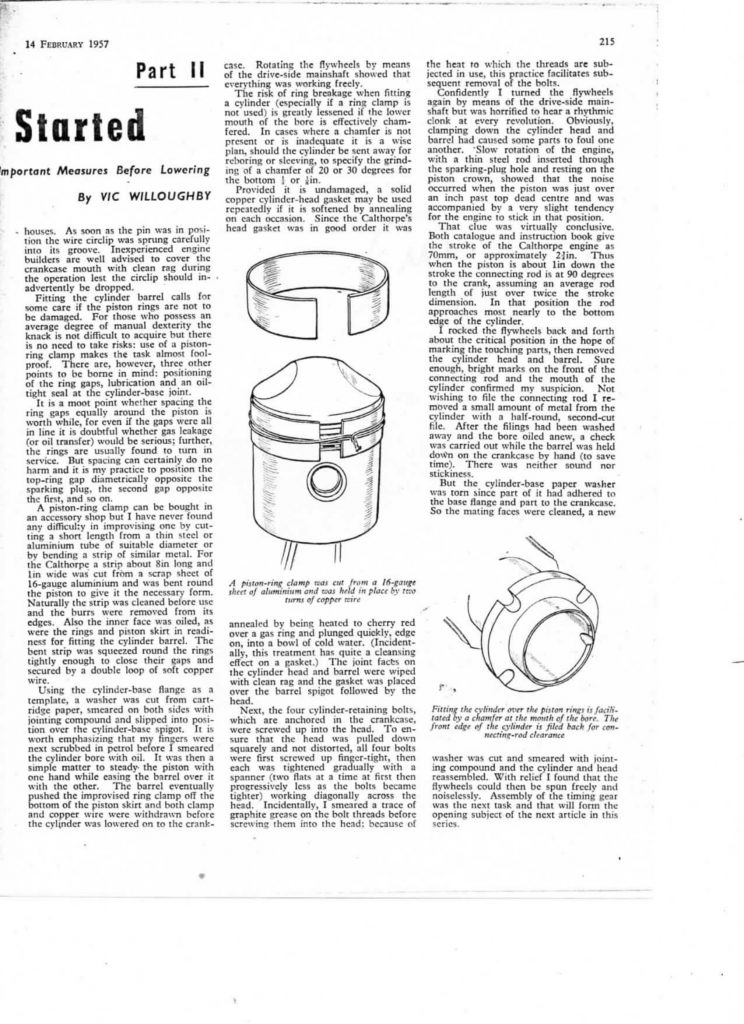
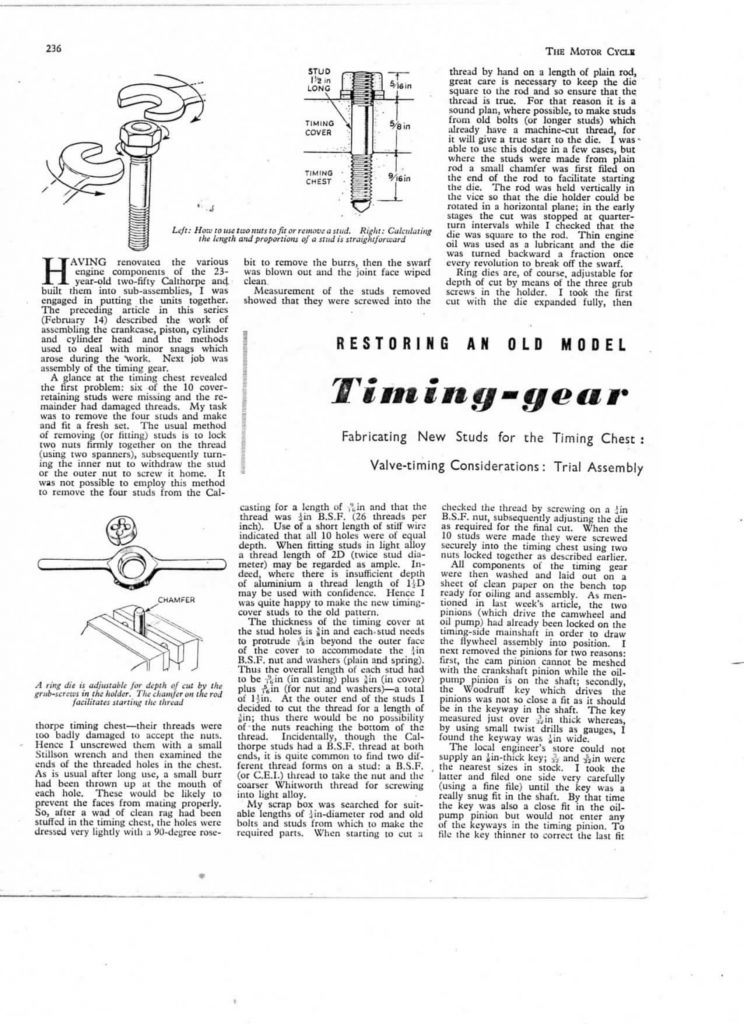
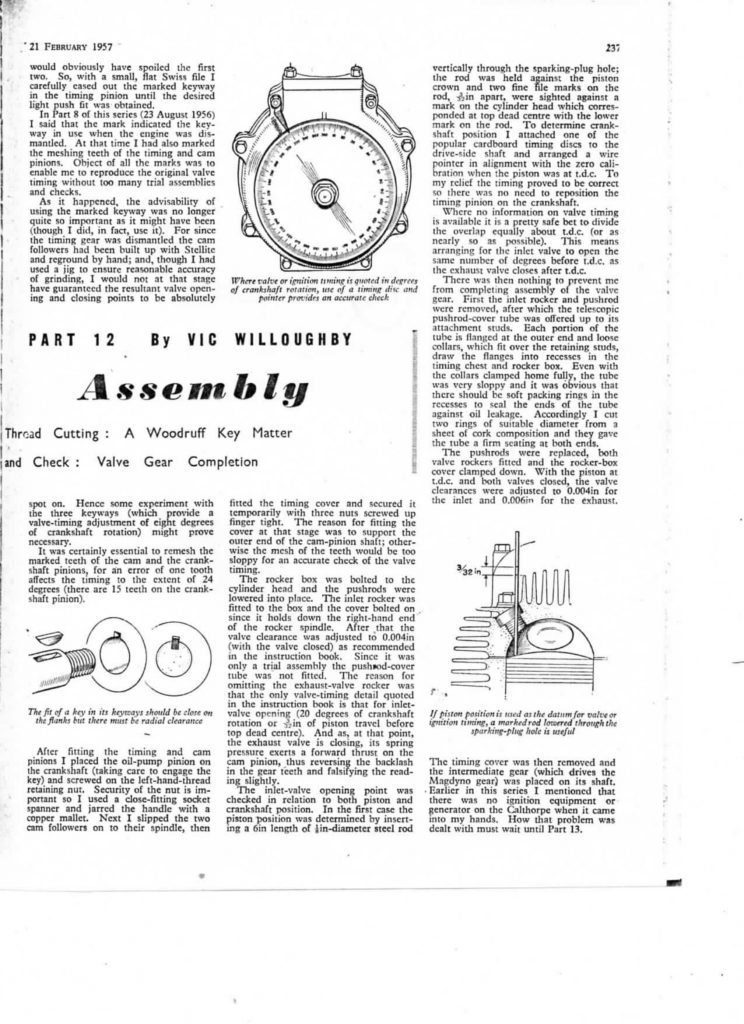
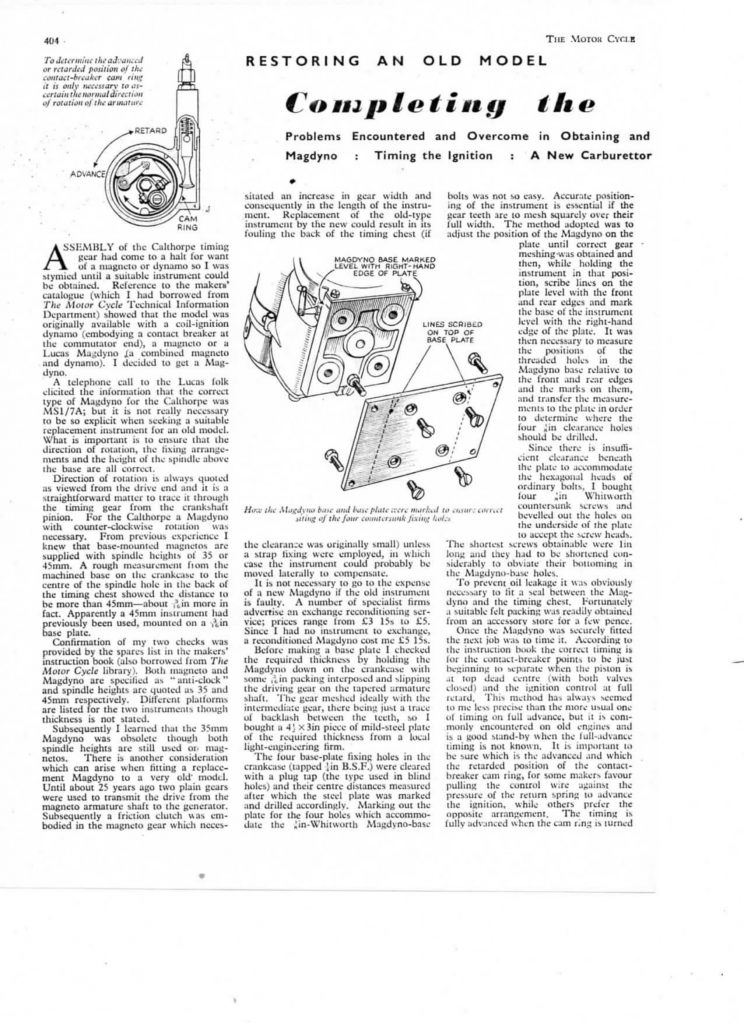
Royal Enfield Constellation 1959
Restored in red. Bought 6 years ago as a restoration project from Hitchcocks. Rebuilt engine with balanced crank and conrods. Uprated oil pump. New mag, carb, pistons, barrels valves and guides etc. Lots of new parts from Hitchcocks including cables, brakes, chains and tyres. New loom, 12v conversion. V5. Lots of bills etc. Starts and runs sweetly.
Ride away for £4250 or near offer.
Looking for next project so P/X or swap considered. Call Gino on 07952721416 for details.


On the 18th Oct Terry wrote:
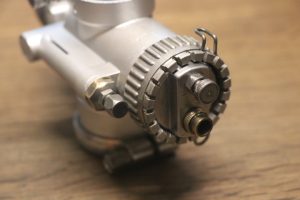
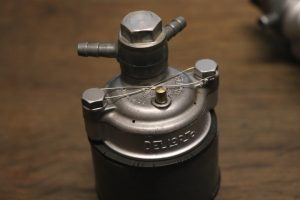
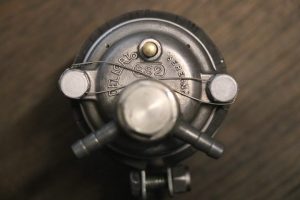
Pictures and invoice are attached.
On 18th Oct Julian wrote:
Wow that was quick! Any observations on the internal slide clearance or any concerns ?
On the 19th Oct Terry wrote:
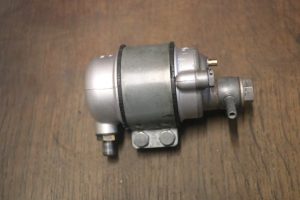
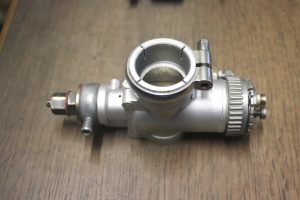
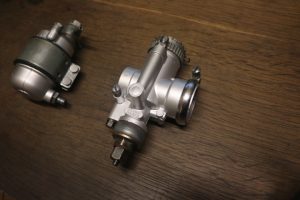
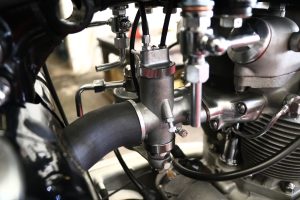
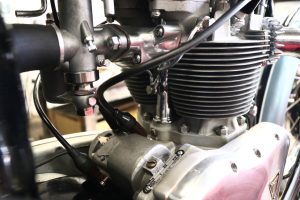
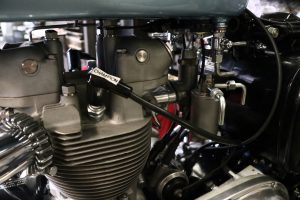
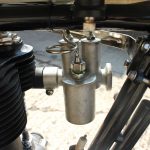
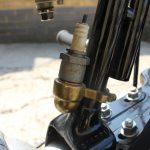
The only thing I found was the slide has nominal wear on the diameter but of no concern as this will not upset the jetting in any way or the carbs overall performance. I have won races with a very badly worn ss in the past, they are quite forgiving. The corresponding slide bore has no wear at all. The needle has normal wear on the upper part where it bares inside the slide, this is completely normal and has no bearing on performance. The body of the carb and the float chamber have been vapour blasted and then painted with the correct shade of silver that was used in the day. the paint is as petrol proof as it can be. i have meticulously cleaned every part and very carefully cleaned and stoned all sealing faces. for your reference all external brass fittings and steal screws would have originally been dull zinc plated if you wanted it to be concourse. i dont know if you have adjustable float chamber mounts, the reason why i mention this is because float chamber height is fairly fussy. dimensions can be found on the web, there is lots of info. I have set the needle position in the position that it was given to me and set the air screw 2 and 3/4 out.
On 19th Oct Julian wrote
More than helpful and concise in your analysis. I will check on the web for float height information and once again, many thanks for your work.


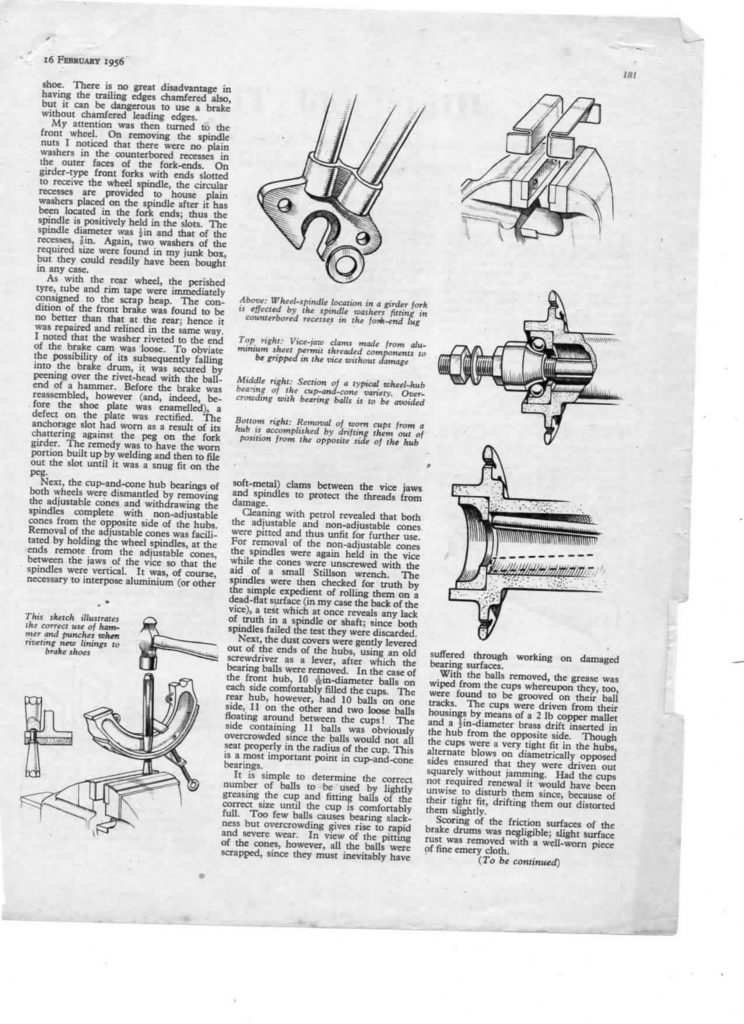
Historic MOT and Tax exempt vehicle. Number plates not included.
Price = £2500
Reg = KHH 410C
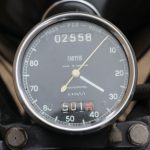
Miles = 9682
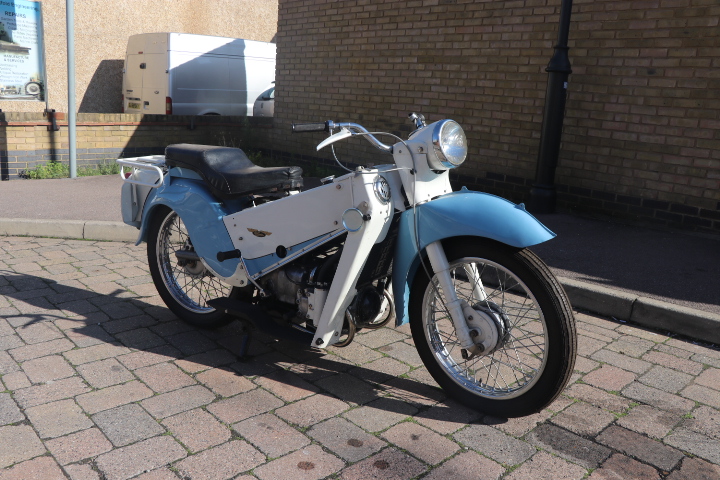
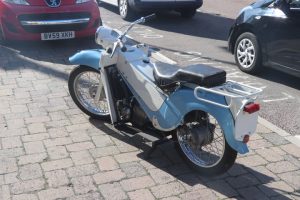
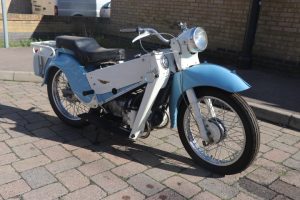
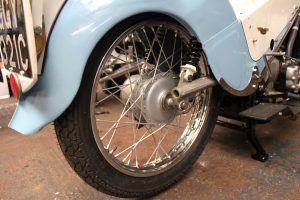
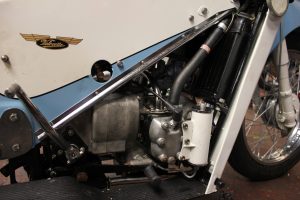
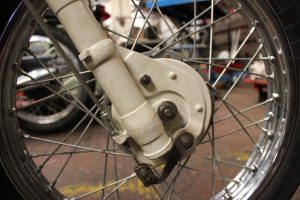
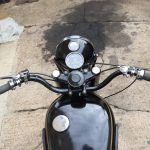
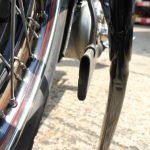
Make and model = L. E. Velocette MK 3
Year = 1965
Colour = Cream And Blue
Fully restored, tested and ready to ride.


 More pictures below.
On 14 Aug 2022 at 8:03pm, Jonathan wrote:
Here is a rough outline of the job that I would love you to do on the Velocette.
My goal: a reliable, oily-rag bike for everyday use. Not worried about originality. Usability and reliability are more important. Not too shiny so it doesn’t get nicked. Light, easy and fun for central London.
- Motor: Please strip to be able to check bottom end, ring gaps, valves (and seats?) and resolve head gasket leak.
- Clutch: Please strip/clean/check/adjust and renew parts as necessary.
- Gearbox: Fairly bullet-proof, but see how you think it is?
- Wheel bearings/head bearings: Please check/adjust/grease/renew as necessary.
- Mag/dyno: Please inspect and clean/renew consumables as required.
- Sprockets/chains: Please assess and adjust/renew as required.
- Rear mudguard: It looks like it’s had a bad filling job done. Please mend/renew as required.
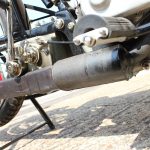
- Exhaust pipe: Bit of a bodge on join with exhaust port. Can this be remedied without too much of a headache? I would hate it to fail one dark night!
- Battery: Are you able to source a dry-cell 6v replacement? Not worried about appearance
- LED bulbs: Are you able to source straight-swap replacements?
- Consumables/fasteners: If in doubt about serviceability/lifespan, please replace/renew on the way through. I’d much rather sort them out now than get caught out later.
I hope that’s ok and not too much to ask? Perhaps when you have had an initial look you will have a rough idea of the overall cost and you could update me by email or I can telephone at a time that is convenient to you?
On 16 Aug 2022 at 12:54 am, Terry wrote:
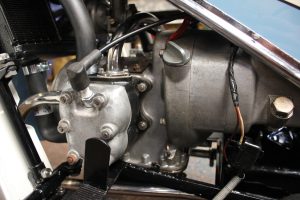
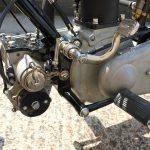
I have removed the rocker box, head and barrel. The engine has been flushed out and the bearings have been checked for play and there is no discernable wear from standard. The barrel bottom gasket had completely destroyed itself as it had not been made from gasket paper. there is no wear in the barrel bore and the ring gaps read a little on the lower side of the standard limits, ie a bit on the tight side, so lots of miles to go on them. The head has been decarbonised and the valves have been recut as the faces were pitted and the valve seats have been cut. All has been built back up and compression is strong. The clutch has been stripped and cleaned and put back together, there was no wear or any parts that needed changing. I have removed the cover on the side of the gearbox and found that the kick start spindle was tight due to lack of lubrication and the bronze bearing a little on the tight side. All other parts internally are generally bullet proof and yours has no wear. The rear mudguard has been removed and restored with metal and a very small layer of dolphin glaze prior to painting to give a good surface. The dynamo is giving all of the right readings as well as the magneto. It looks like the engine and gearbox has gone through a complete overhaul some years ago and has had very little use since.
On 16 Aug 2022 at 1:48pm, Jonathan wrote:
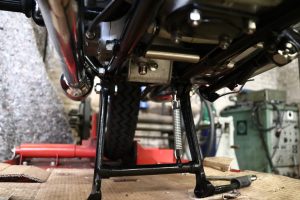
That’s great to hear. Thank you for progress report. It sounds as though you are making good progress, and following in the footsteps of someone who has done good work in the past. All exciting! One small detail I forgot to ask about: could you supply some sort of spring clips for the rear stand, to make it quicker and easier to use? No problem if not. It’s just a bit slow to use as it is….
On 16 Aug 2022 at 3:17 pm, Terry wrote:
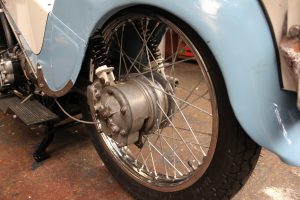
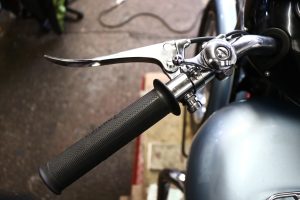
The steering damper was a real bodge as a home made friction plate made from aluminium was used and a metal steady plate was missing from the unit. This has all been rectified as you will need a working damper as when used it will transform the feel of the ride. I have fitted one of my Vellocette racing pipes as it has all the right sizes and fits your bike perfectly with a bracket welded to the down pipe. The chrome is not fresh on it but if you wanted to get it chromed in the future it will admirably take it. I have fitted a new twist grip rubber. Wheel bearings front and back have been removed and cleaned and refitted, they were perfect and looked new. Rear brake drum nuts were dangerously loose, they have been retightened and Locktighted for piece of mind as they will not take a lock washer. The front brakes are as good as you will get on a Vellocette so many years service left in them. I will fit a clip to the rear stand.
On 16 Aug 2022 at 9:27 pm, Jonathan wrote:
That all sounds most encouraging and exciting. Please do ask if there is any further clarification needed.
On 18 Aug 2022 at 10:26pm, Jonathan wrote:
I’m not at all sure how the oleomatic forks work but would you be willing to check them over and ensure that seals etc are in good order?
On 19 Aug 2022 at 12:21 am, Terry wrote:
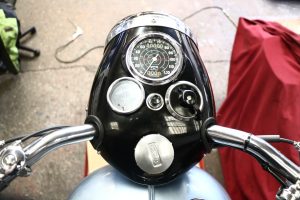
Latest on what has been done. Ignition timing was 4 degrees retarded so I have set it to standard. I think it was set like this to aid starting as the choke cable was too short and only partially closing the choke, I have rectified the cable and now the choke works perfectly and the bike should start easily. The brake light was not working as the brake switch was being operated by a long stretchy spring, I have replaced the spring with a wire attachment. There was also an electrical short in the tail light and a bad earth on the horn. The rear mudguard has been painted and fitted but the rear stand acts as the rear stay for the mudguard so spring mounting is not advisable. I have made a couple of knurled knobs with spring washers to tighten the stand to the mud guard as they can easily be operated by hand. It has to be born in mind that the rear stand was only used for work to be done on the rear wheel. The headlight lens was annoying me so I straightened it up. The battery box needs changing so I would advise getting a replica one on eBay, don’t get a rubber one as it will distort when the battery strap is tightened, get a hard plastic one. Your existing battery is fine to use. Will do forks tomorrow morning and start the bike and tune the carb.
On 19 Aug 2022 at 11:06am, Jonathan wrote:
Thanks, Terry. I really appreciate the thorough updates, with the care that is taken to explain the reasoning behind it all. I’m no mechanic but I’m mechanically-minded and get great enjoyment from learning more about how things work and am most grateful to you. I wonder if the carb slide is within its wear limits and not too rattly? And carb seals/gaskets ok? HT lead/spark plug ditto? Sprockets and chains ditto? Would you also please renew oils and advise on modern grades for future topping up and changing?
On 20 Aug 2022 at 12:21 am, Terry wrote:
Done the forks this morning, all they needed was a little air bleeding from them as they were a little hard for todays potholes. With hard forks you will get vibrations through the whole machine that can start to loosen parts such and nuts and bolts and tin ware. The carb has been cleaned internally as it was dirty and the float needle was not seating and shutting the fuel off properly, there is no ware on any internal parts. All of the ignition side has been inspected and is all in good order including plug. All chains have been inspected and adjusted and there is no ware to any of the sprockets. I have flushed all of the oiling system out and replenished it with Halfords 20/50 classic oil. The filters have been cleaned also the non return valve. The gearbox oil was very low so I put a heavier 50 weight Castrol oil in, I always prefer a little bit more oil stiction on gears that have a limited amount of oil to play with. Only use straight oils, not anything synthetic or partly synthetic. Halfords 20/50 for engine and any non synthetic 50 weight oil. I started her up on 3rd kick and she sounds sweet as a peach. I just need to fine tune the carb. You can order off eBay a couple of champion L82c spark plugs for any future changes.
On 20 Aug 2022 at 1:55 pm, Jonathan wrote:
That’s all good to hear and helpful to have your advice on the oils.
On 23 Aug 2022 at 2:16pm, Jonathan wrote:
When all is done, would you let me know what the bill is please? It sounds as though you aren’t far off being finished!
On 24 Aug 2022 at 12:15 am, Terry wrote:
Hi Jonathan just a little addendum to the work I carried out directly after cleaning and refitting the clutch. It will be noticed in the riders manual that the clutch cable has a very tight tolerance on the amount of end play in it, ie no more than an 1/8 of an inch and no less than 3/32 of an inch. Unknown to most Velo owners this tight set up is so when the clutch is operated it does not hit the inside of the clutch cover, also known as the primary side cover. This is a very common fault on old Velos as the primary cover is only made out of pressed steel and is quite liable to denting in the area that directly covers the clutch. The dents usually occur due to the owner removing the primary sprocket with levers or screwdrivers. The sprocket is just under the removable dome that is held on with 2 small screws. Also on your machine it was missing the gasket that had been replaced with copious amounts of silicone seal. If the correct thickness cork gasket is not used the clutch will touch the primary cover when the clutch lever is pulled in. The giveaway that all is not well is when the clutch is operated you will see the primary cover distorting as the clutch tries to push on the inside of the cover. I have fitted the correct hand made cork gasket to your bike and all is well. I will mail you tomorrow regarding collection and does.
On 25 Aug 2022 at 08:59am, Jonathan wrote:
Thanks, Terry. All most helpful! I will admit, up front, to having an irrational fear of Vellocette clutches and their set-up. Perhaps, one quiet day, I can book a session with you to learn the dos and don’ts properly. I look forward to hearing from you about dues/collection.
On 27 Aug 2022 at 10:52 pm, Terry wrote:
There is an irritating leak from the kick start spindle which is very well known on Velocette gearboxes no matter how good a fit the bearing is on the shaft. Normally the gearbox is filled to the correct level which is too high in my opinion until it stops leaking from the spindle and finds its own level leaving an ample amount of oil for the lower gear cluster to throw it up onto the upper gears. I don’t know why Vellocettes do this over filling. There is a mod that I and many others have done in the past that is a pain to do, and it is to fit a seal inside the gearbox housing. The only other mod is to fit a drip tray under the Vellocette as most owners do.
On 29 Aug 2022 at 6:39pm, Jonathan wrote:
Thanks, Terry. Is it worth doing the mod with the seal? What would the approx cost be? Otherwise a drip tray is fine.
On 29 Aug 2022 at 10:18 pm, Terry wrote:
I will let the gearbox find its level and make you a dipstick with oil level markings to fit in the oil level screw hole. I am out tomorrow on site work so will do this on Wednesday.


There will be more images at the end of the blog.
I write my blogs when ever I get a bit of spare time and this is not often as will be seen by the previous date of the last blog, so here we go.
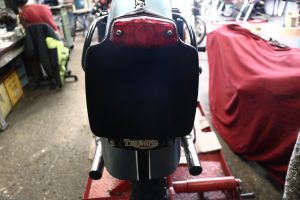
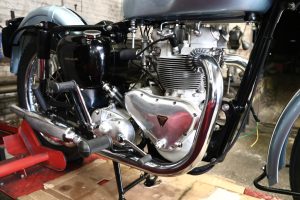
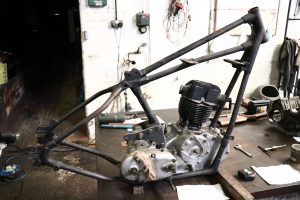
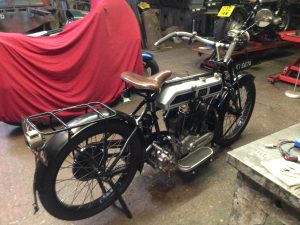
In the 1970s dad bought a triumph café racer as was the norm in the day, riders did not want something bog standard from the early 50s as it had to have that go faster look. Dressed up to the nines with an old Dunstall seat and tank unit and AMC heavyweight forks and hub surrounded with genuine alloy Dunlop rims, you get the picture.
It was the first bike I had ever been on and I hold Fond memories such as getting a belting shock off the magneto and a greatest of leg burns off of the Dunstall silencers. I had sensitive skin at the age of 8 years old.
Dad raced the bike in the classic motorcycle racing club in the early 80s when I started racing on my Benelli and Itom, he did really well on it as the engine was very well cared for as well as all the peripheral parts that adorned it. A big crash at Mallory park put an end to racing and the Triumph duly found it’s place in the workshop having been eventually taken apart in big lumps to find out what the problem was that caused the accident as dad and I was sure that his riding was not at fault. Dad never crashed out of a race unlike me, allways pushing the bikes past there road holding limits. The bike sat there for several years before dad passed away with a damaged heart valve that was likely caused by one of the seven broken ribs that were sustained during the incident.
The bike languished and gathered dust and spiders until mum decided who was going to get the bike. Unfortunately it didn’t come my way as it went to one of my bothers who showed nothing but a financial interest in it. Several months ensued and I found it advertised locally for sale, I only discovered it by accident while perusing a site for another bike that I couldn’t afford to buy, I call it wishful shopping. I duly phoned the advertised number and found it was my brother who was selling it. £300 procured it without, oddly the crankshaft, but hey the crank was swapped out years ago and found its place at the heart of a dragster when dad used to sprint the triumph in its cafe guise.
Having now got the bike still in lumps I had to try and find time to work on it, impossiblity ensued as I was always overrun with work at the factory making money to pay the bills. My passion has always been working on and building engines rather than all of the tin bashing and chroming and painting and such. So I dedicated as much time as I could in between jobs and in the evenings while the wife was busy doing her own stuff. I knew I was going to find it hard to do all the other stuff to complete the bike. The only major part to complete the engine was the crank. I had only just got a computer and learned how to do eBay in 1998 when I saw a crank advertised in Chile of all places and it found its way back into the Tiger 100 engine for the cost of £50 all in.
I thought if I built the engine with all stainless steel fittings it would still look as fresh as a daisy when I had time to find all of the other parts that I needed. The engine was then put away resplendent in its many stainless steel parts and fittings. The stainless steel grade that I used was 316 food grades as there was an abundance of it in the work shop as we were doing work for the medical and food industries. Parts such as exhaust stubs, screws, buts, bolts, studs and oil pressure tell tale unit were all made from stainless steel all exactly to original sizes.
The engine languished in our store rooms and was forgotten as I found whenever I had a break in the work schedule I would be getting on with some of my easier and less time consuming projects. After 4 of, what was meant to be retirement projects were completed I remembered the triumph, maybe a calling card from my dad saying don’t forget my bike. Dad used to say how lovely the paintwork colour was on an original bike. I found some free time on my hands after 2 divorces and the kids finding there own roots and me hitting nearly 60 years old and the engine 24 years older since its restoration and having no mortgage so the free time was going into the rest of the restoration.
Where do I begin as there are so many original parts that I had to shop for, I wasn’t worried about the cost as I was going to dedicate input to what I would think Dad would want at the end of the day.
The first thing to do was sit down and write a list of what I needed and then where to find the parts avoiding the pit falls of bad aftermarket garbage that doesn’t fit properly as I have found on the many triumph restorations we have built in the past for customers. A good way to start was to go online and get a free parts manual and go through the pictures of parts and list their part numbers. Certain parts for the 1954 Triumph Tiger 100 and the Tiger 110 were only fitted for a couple of years such as the pie crust front hub and the tank with no chrome centre strip down the middle.
I was going all out on originality except for the stainless parts I made and was going to make on the restoration journey. I went on Google and punched a few part numbers in and found they were listed on Ace Classics. I put my first order in and while I waited for the parts to come in I decided to strip the frame down and get it painted. On stripping the frame I found that the swing arm pin was loose in the cast frame lug. When the swing arm was fitted there was 12 mm side to side play at the tail end, I think this was the cause of Dads accident.
“Now”, we run into our first dilemma, the hole in the casting was .006″ oversize and bellmouthed to .008″ , the pin wasn’t worn in the area that it fitted into the cast lug but the pin was worn where it went into the swing arm bushes. Oversize pins were not going to properly solve the problem of putting things back to standard plus it would break through the bearing surface finish of the swing arm bushes when reamed out to take the oversize pin and it seems plus size pins are not available, this seams like a common conundrum and looking up about it on the forums there does not seam to be any clear and concise answer to the dilemma, “Sod it”, I will attend to the problem in my own way that is correct the correct way.
Mark my words, the only way is to set the frame up on the big milling machine and block everything up so everything is really level and square to the head stock bearings and bore and ream the frame casting out ¼” or 6mm to take a press fit liner with a .003” press fit, this then will need machining out to give a .0005” press fit for the new standard size pin. Swing arm pin castings usually wear between 4 to 8 thou and also they bell mouth at each end. I feel that this design is not good practice by Triumph and it is probably one of the worst designs I have seen regarding swing arms on a big bike. My way of dealing with the problem is the only way but it is time consuming and cannot be carried out while the bike is together, it is a major job but it will be better than original as the pin is meant to be size for size fit as standard in the frame casting. I made the bearings for the swing arm pin from aluminium bronze with an oiling groove. It all fitted together perfectly on the dry build. I am a great advocator on dry building when dealing with aftermarket parts as I want to build the bike to better than new with some subtle not visible modifications except the stainless parts.
The frame came back from the powder coaters as this is one of the original specs I will overlook. I don’t care what people’s ideas about powder coating are as it is better and longer lasting than stove enamel and is resilient where stone chipping is involved and dry building doesn’t readily mark it as easily as stove enamelling or wet spray and lacquer finishing. Powder coating done well and in full gloss is the best you can get.
I rebuilt the hubs and upgraded the brake linings to modern non asbestos stuff and bonded them onto the 8 inch brake shoes at the front end. I fit oversize thickness linings onto the shoes as this allows me to machine the absolute minimum out of the drum to just clean and then fit the shoes to the brake plate and machine them to the exact diameter to the drum bore.
The method I employ with brake shoe machining is the only way to get 100 percent braking from any drum brake. We do hundreds a month in the factory. First I reline the shoes by resin bonding as riveting reduces braking area and it also impedes heat transference as the fit between lining and the shoe always leaves little gaps in between the rivets even when perfectly fitted and run in. I then mount the shoes to the brake plate with all its working parts and in between the brake actuating cam I put a .015” shim either side of the brake actuating cam and then I machine a mandrel true to the lathe chuck and then mount the complete brake plate onto the mandrel and machine the shoe linings to the exact bore of the brake drum. After removing the .015” shims you will find that the linings make a 100 percent contact with the machined drum bore. The .015 shims mimic the brake partially pulled on. I have used .010″ shims and find the brake linings on the brake plate snag and cockle a bit when the shoes enter the brake drum bore and it dosnt leave enough lever movement at the handle bar. Do your brakes this way and there is no running in and no hotspots or glazing on the pads. I completed this upgrade on the restored front and rear drum.
The wheel spindles front and back were made from 316 steel and were buggers to machine as the material is so tough. Most stainless nut and bolt kits are made from free cutting stainless steel and it is much easier to machine and will stain a brownish colour over time and does not have the shear or ductile strength that 316 has. But you wouldn’t want to pay the cost of the much added agro of machining 316.
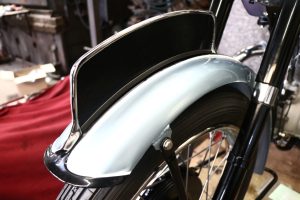
I wanted stainless rims and spokes to adorn the hubs so I procured some from the Devon Rim Company Rolltru Dunlop Profile rims and stainless spokes were costly but they are the best and no future rust to fret about. The wheels were fitted and Ace Classics mudguards were fitted prior to painting. The rear guard didn’t line up quite right with the top suspension bolt holes that also have to accommodate the lifting handle frame and seat brackets. I loosened the mudguard bottom bracket and lined the top mounting bolt holes up and then retightened the bottom bracket. When final fitting of the rear guard commences I will have to remember this sequence as we do not want any chips to the paintwork or any struggling. Building a Triumph in this way is very time consuming as you are essentially building it twice. The front guard was fitted properly, no loose fitting as you wont get the full picture. When the front guard was fitted it was found that the radius was wrong and the front stand was longer than the outside radius by 32mm, the guard needs stress releasing and a firm tug on the front stand mounting end pulled things into shape perfectly. Even though Ace Classics say that all their parts are British made this is nothing to go by as I have seen some pretty crude parts made in the UK. Ace Classics parts supplied to me haven’t disappointed in any way.
Back to the front wheel and hub, this came from a seller in Holland. The odd brake drum that I saw in the USA or the UK looked in pretty poor condition albeit they are rare being of the piecrust design. I decided to go and meet Mark at Triumph Twin Spares and after driving there I found his knowledge of triumphs in general, astounding. Mark is very helpful and down to earth and his products are cost effective in the long run. He doesn’t deal in rubbish but will sell you a really good second hand part if new is not available to keep your restoration on the boil.
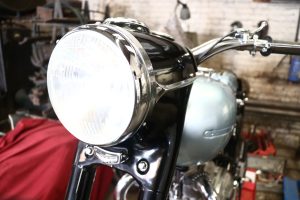
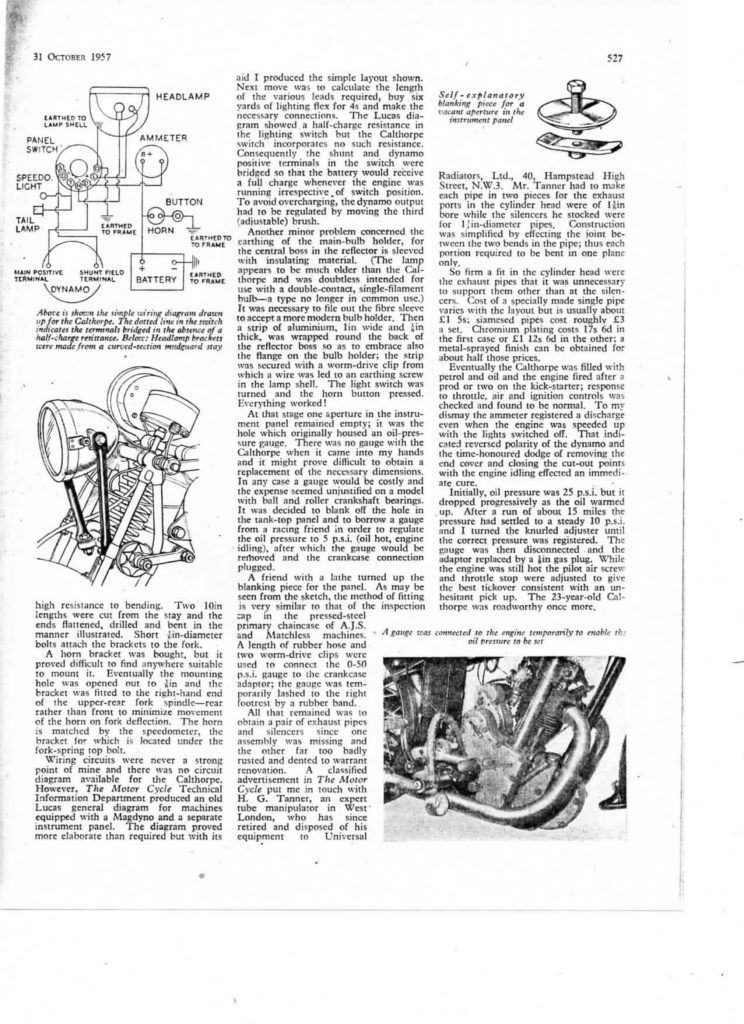
A really nice set of fork nacelles were procured from Marks company. Ace Classics also supply the nacelles as well as a few other companies. I am sure that batch runs are made when demand grows and they are made by one or two makers. Top nacelles for the 1954 Tiger 100 are not available so I purchased one from India knowing that from the EBay picture that it would only be an image of what I wanted but most of the work would be done for me before modifying it to fit. It fitted admirably well to the fork nacelles but the chrome flash embellishment holes needed filling and shifting about a 1/16 of an inch one way or another and the lighting switch hole wanted moving away from the speedometer hole, the ammeter hole was good. The steering damper orifice also needed remodelling. 4 ½ hours work in the evening with no disturbances and full focus had them shaped up and ready for painting. For me to make one from scratch would take about 14 hours as there are compound curves to contend with.
The Triumph headlight switch was astronomically priced if you could get one. Classic Bike Parts Cheshire had a Lucas replica U39 lighting switch for £26.95. To get a replica 1954 Triumph nacelle switch to look correct I made a stainless steel surround copied from a damaged Original one, you will never spot the difference as it has been mirror polished to mimic the chrome finish of the original. The correct 6 volt 2” ammeter to fit the nacelle came from Fast Eddies Motorcycle Spares, it was the original face markings for the Triumph of 1954 as listed in the 1954 Lucas parts book. When you buy a lighting switch it does not come with a retaining clip so I had to make one in stainless of course, copied from the Lucas parts book.
I bought all of the fork internals and the stanchions and lower nacelle from Mark at Triumph Twin Spares, the fork tubes were fine used. When dry building the forks I found one of the fork tubes had a little dent in it. If I didn’t have a proper tool room and manufacturing facility it would have been a major problem as it would have taken hours of mucking about to produce a half baked job. Nothing that a big long series reamer could not fix but still awkward to say the least as it has to be done by hand as it needs human input to get the feel of the control of the cut. A host of parts for the bike were bought from Mark at Triumph Twin Spares.
Ace Classics supplied brackets, stands, correct handlebars with the horn button hole. Levers, grips, throttle, number plate, tank embellishments, front pilot light, tail light, headlamp rims, shock absorbers and a host of other parts came from Ace Classics. Some parts came with a bit of printed paper with handy hints on parts that may be problematical to fit , this all adds up to good thoughtful service. The whole front end was dry built, cables and such were fitted also, as they need to enter the headlight nacelle rubbers nicely. Do not dry fit the horn button as this job done more than once will wring the soldered wire away from the fitting. When you fit it eventually you will ideally have to beef up the soldered joint and prewind the wire before screwing the horn button into the handlebar. If you don’t do this you will usually find that the horn will not sound. The horn was found on eBay and was not working but as long as they can be taken apart and are serviceable I can fix them and tune them. I proved it in front of one of my customers who was amazed at how many things we can renovate. The horn cost £25 and working ones are going for £120 but need restoration to bring them up to thespecifications that I adhere to.
I wanted to stick to original electronics so I bought a Lucas wiring loom. These are advertised as genuine but probably made in India or china but they are to spec but the bullet fittings style are suspect as they don’t freely enter the bullet housings without easing the housing out a little with a round bit of rod. The bulbs I bought from Paul Goff are fantastic and they all have the correct British fittings. I bought a 12 V set as my dynamo will easily cope with LED’s. You will need to state positive earth or negative earth. Paul Goff’s website is www.norbsa02.freeuk.com . Feked.com supplied clutch cable and magneto control cable and the correct expensive carburettor exactly to spec. The throttle cable was difficult to find using the original part number D224, there are plenty in the USA but I found one supplier in the UK, M Compton in Bolton at £9.90. Andys Motorcycles has a few good bits as well as Montys Classic Motorcyles.
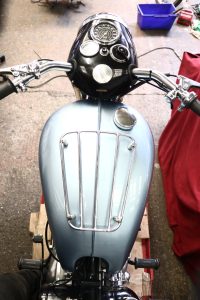
I want to harp back to the front hub from Holland, the reason why I bought it from Holland is because they are very particular in what they buy and sell and how they look after there bikes, they are also honest about how they describe the article for sale. it came from British Only Austria. What I bought was true to form but not the piecrust drum I wanted so a bit of a modification was in order. The drum itself was the correct casting and the part numbers were correct so all that was needed was to mount the drum onto the dividing rotary table and cut the scallops onto the flange of the drum and then finish the outer edges of the scallops carefully with a file. The only giveaway is that the hub looks too fresh to be from 1954 but try to prove it. The dry build now complete it was time to get parts to the painters and get a show room job done. While the painting was being done by my friend who works on paint jobs on luxury cars and collection pieces, so no worries there on quality and expertise, i thought it prudent to try and source two parts that are very difficult to procure, these being a seat and tank. Seats are very thin on the ground to date but I did find one on Google pictures at Ownes Motorcycles In Wales allbeit the wrong year and a different shape. Also the tank came from a one man band company down south who said it has been professionally relined, Hmm!. The tank undoubtedly wanted the lining removing and shot blasting and brazing up and the dents filling. When I got the tank it was as bad as I thought but not incurably bad. The tank lining was stripped using Dichloromethane; you have to have a licence to use this stuff. The tank after washing and then shot blasting and the few pin holes filled with braze proved it was indeed now a fuel receptical. Shot blasting is done because it is aggressive and will show up any weak points in the metal, ie, thinness of material that will want attending to. I then centre punched each pinhole and filled it with braze. This allows me to dress the brazed area to be flush with the tank surface so minimising the filling process. A lot of 1954 Triumph Tiger 100s and 110s are fitted with the wrong tanks as the original tanks did not have a fitting near the seat cut out to secure the chrome centre strap on. On the top of the tank there is also a made in England decal measuring 45mm x6mm in black with a black border placed opposite the filler cap on the other side of the tank centre seam. These are available from Classic Transfers.
I have looked at a lot of 1954 Triumph Tigers and have found a host of wrong parts on bikes that report to be original. Some of these parts are wrong carb fittings and taps, air lever in the wrong position, IE on the handlebar instead of left hand tube under the edge of the seat. Wrong headlamp as it should not have a pilot bulb hole. Wrong gearbox filler cap. Wrong tyres, but hey! Stainless rims and spokes and every nut, bolt and washer all with correct AF head and British standard cycle thread and led lights to boot, boy Triumph would have loved to have afforded to do this. the magneto also came from British Only in Austria and i have just restored it. Mind out for after market dynamo brushes as the carbon brushes brake down very quickly. R.K. Leighton do the best seat covers and sponges you can get. Final post to come.

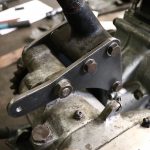
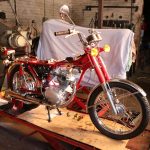
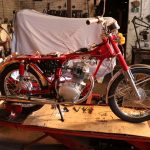
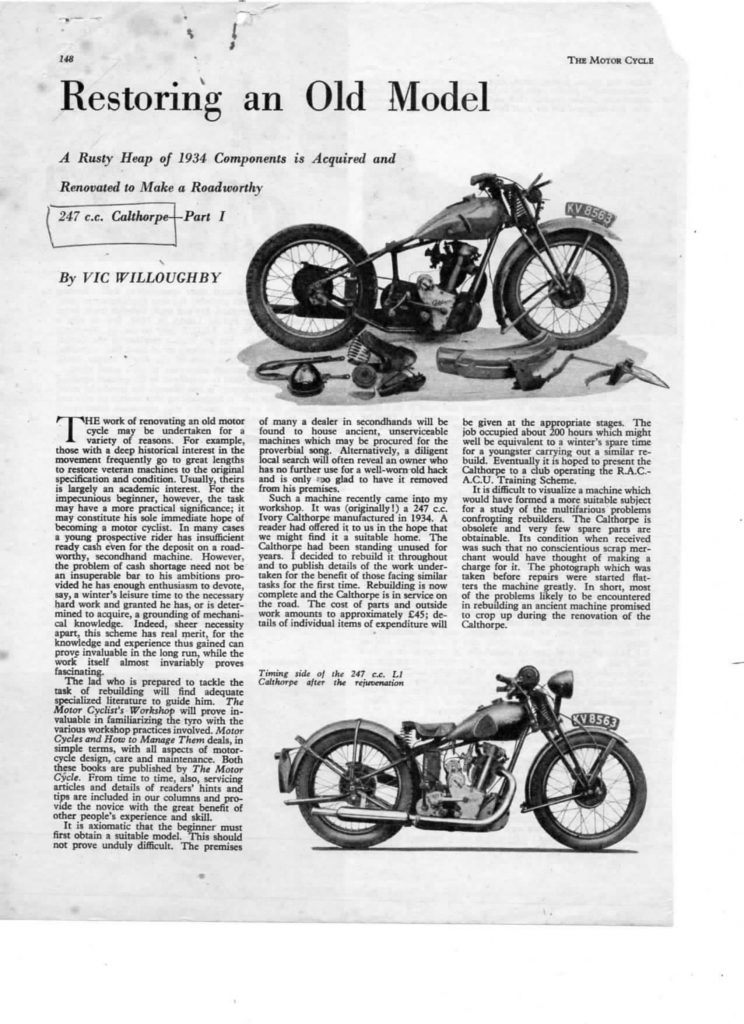
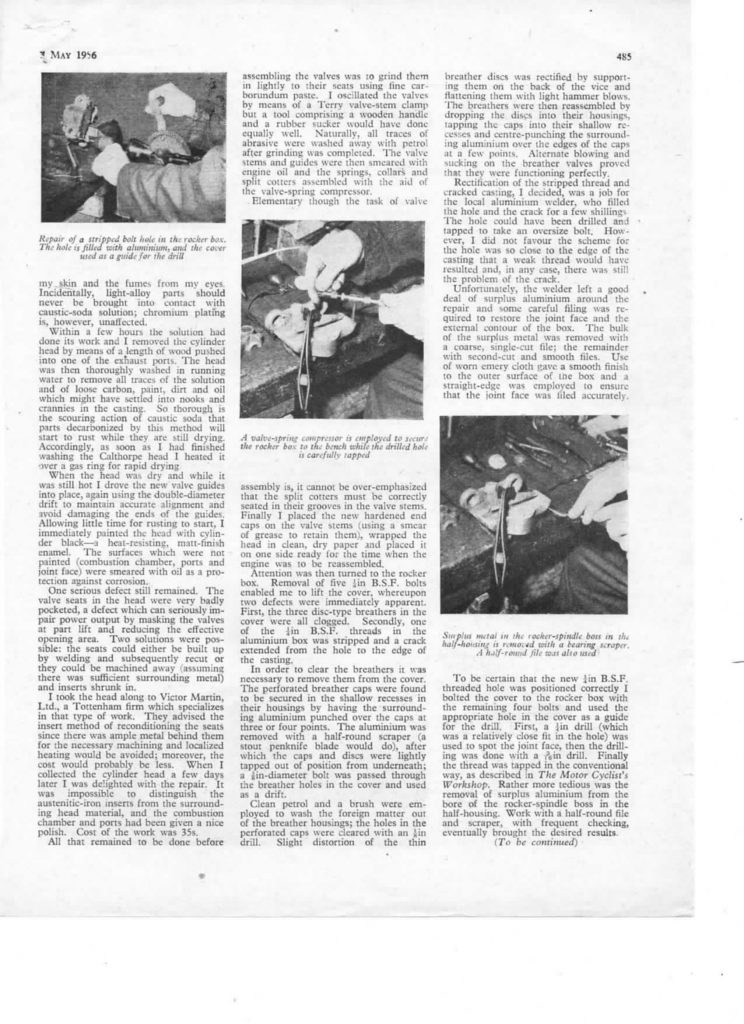
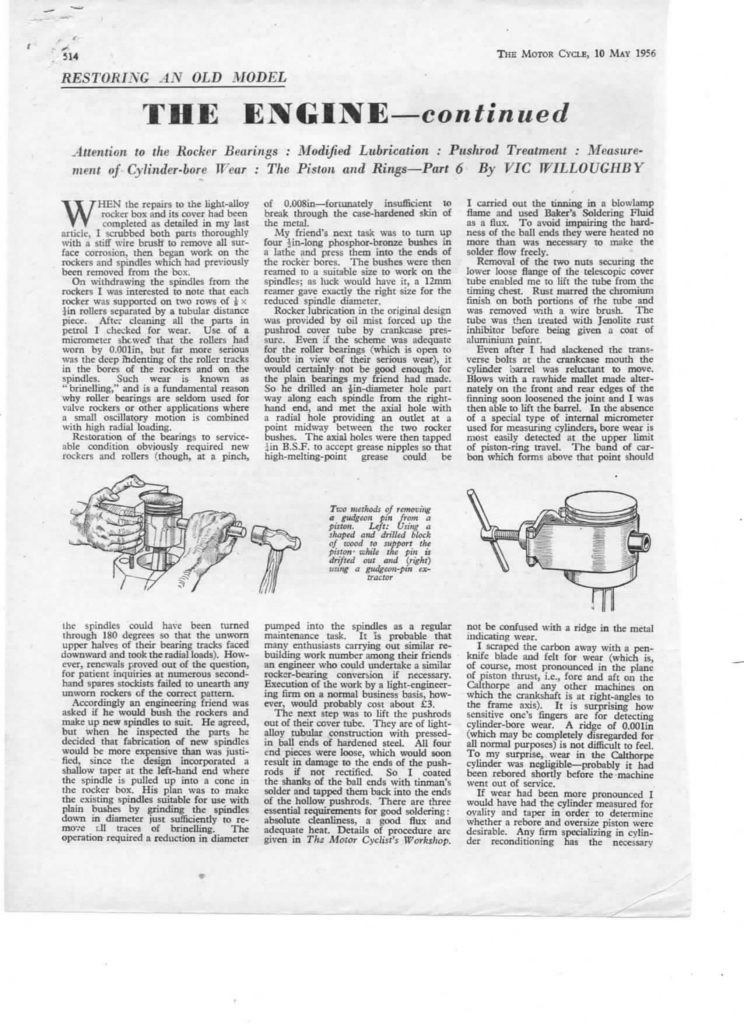
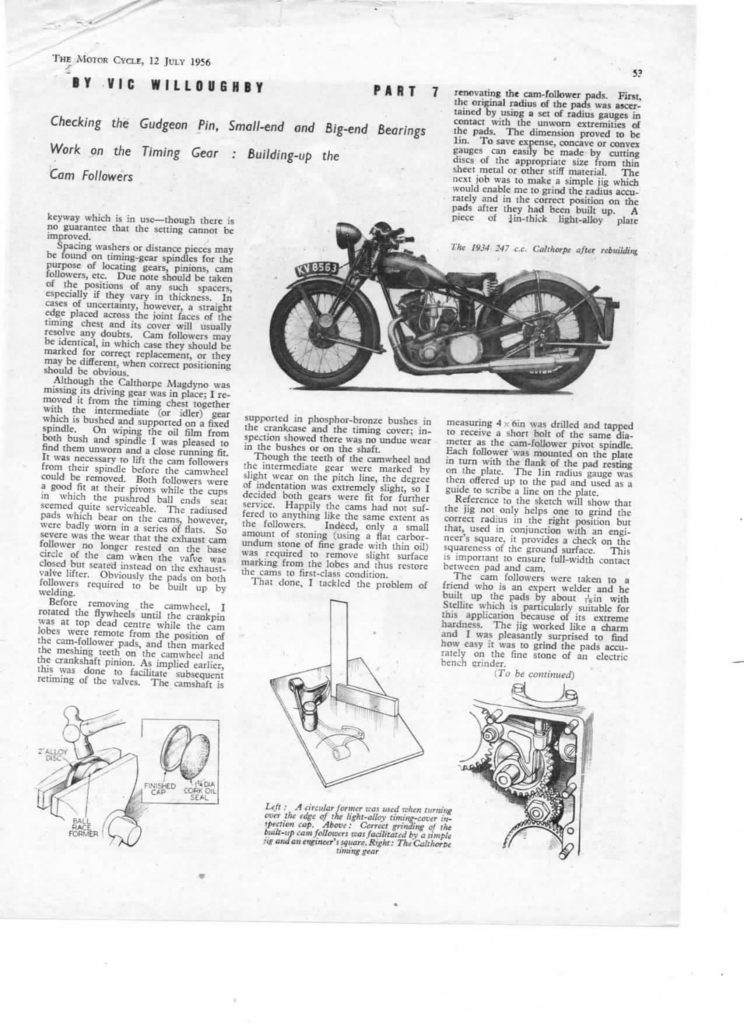
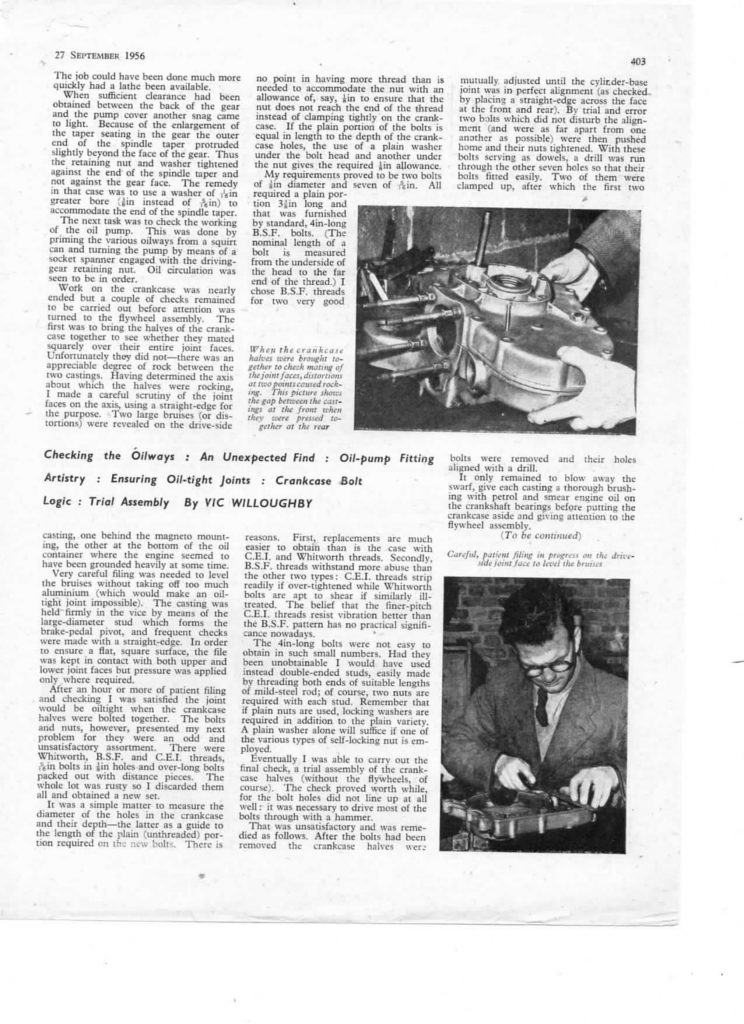
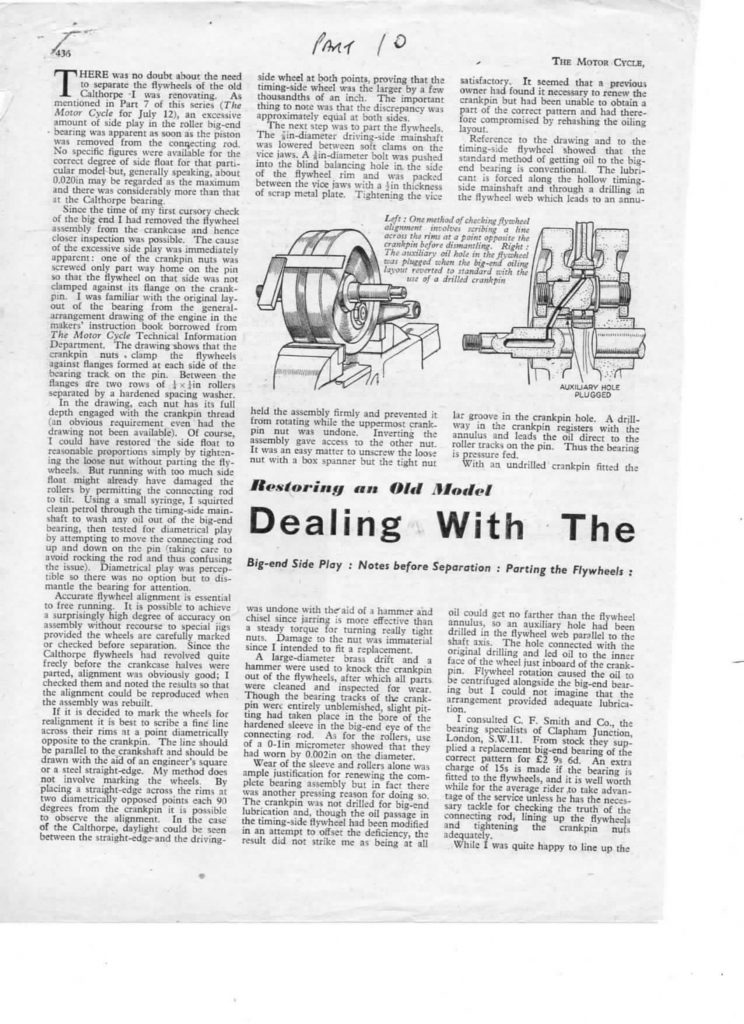
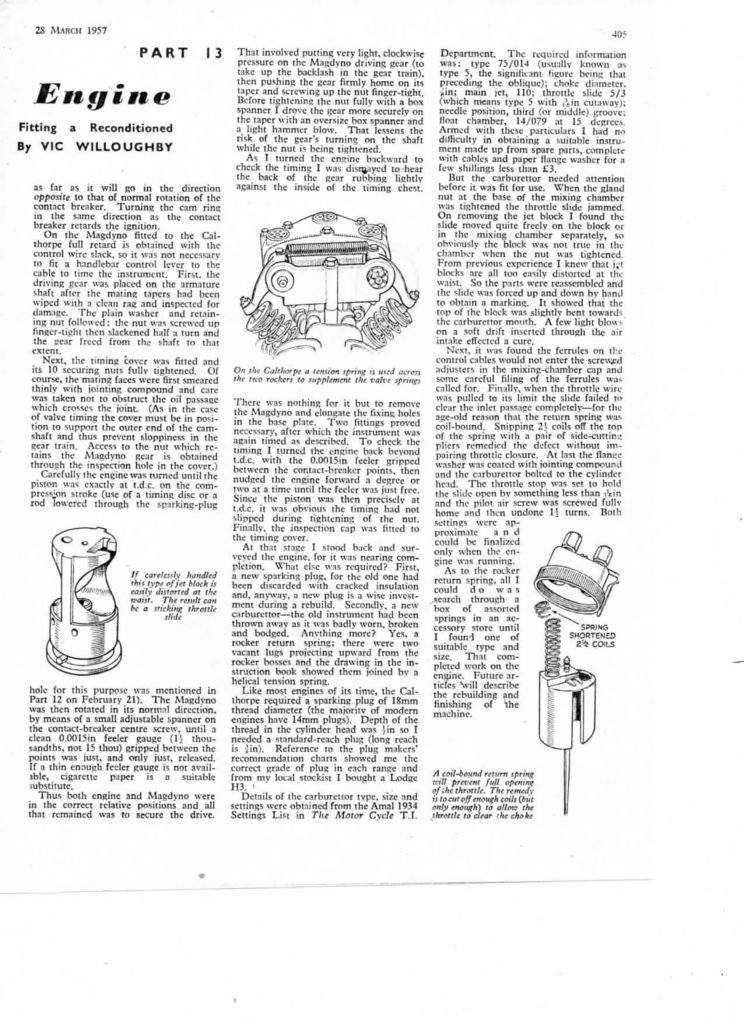
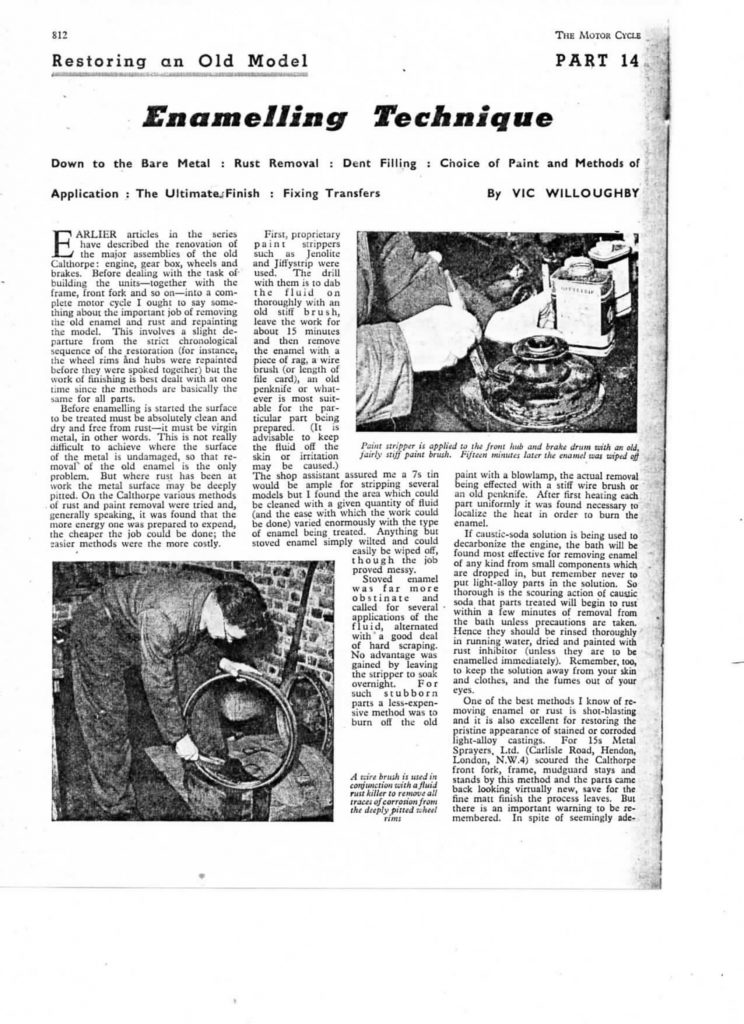
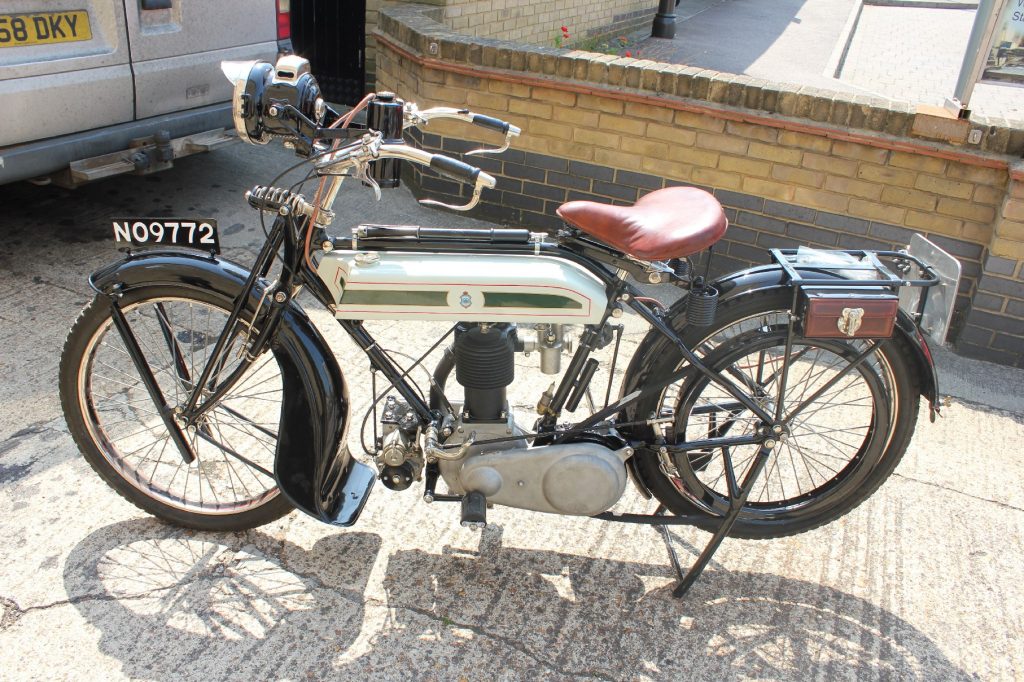
Sugundo works in Holland and London, he was looking for someone in the UK that new about restoring unusual motorcycles. We have done several motorcycle restorations for him in the past like a 1920s FN and a 1930s square Arial square four among others. The Calthorp in this blog is a 1930s production machine. There wasn’t many manufactured as they were quite costly. The calthorp came to us as it had been languishing with another company that didn’t seem to know what to do or where to start with the work. This was a long wait for him as it had been four years with nothing being done.When me and Segundo spoke to discuss the necessary work to be carried out on the Calthorp he specified that the frame fixtures needed replacing and he wanted all of the engine and gearbox plates manufacturing from raw materials. Also he wanted the Girder fork stem and bottom yolk replicated as the old one was beyond repair.
What follows is an email conversation with one my customers, I asked him if it would be okay to share this blog with the internet, he thankfully agreed.
On 2 Feb 2022, at 16:44, Segundo wrote:
Could you specify what work you did on the Calthopre please. Thanks. I can
be in your workshop on Monday morning with the wheel from the
Netherlands.
On 5 Feb 2022, at 01:45, Terry wrote:
Hi Segundo sorry about the costing of the Calthorp jobs. Here is what we did.
Jig the frame up on the bench and then measure and make the rear stand fittings as they were so worn that they were unusable. These had to be made so as we could fit a dummy stand so the frame would sit square on our big bench. Now the frame was square and sitting on the rear stand we had to support the front end so as the frame would sit parallel to the work bench surface.
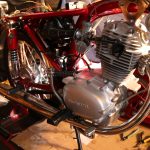
The engine was blocked up into a position that would allow us to mark out and make the front engine mountings that had to be welded to the frame down tubes. The engine was mounted onto the front mountings and put into a position that would allow us to mark out a wooden template and cut it to shape and mark the holes out. Each template was very time consuming to make as each hole had to be drilled separately and then tried onto the engine until all of the holes tied up to the engine holes. Once the wooden templates were made we had to set the gearbox into position and start drilling each hole separately but not after making dummy spacers to get everything to sit squarely and allow the gearbox to be adjusted.
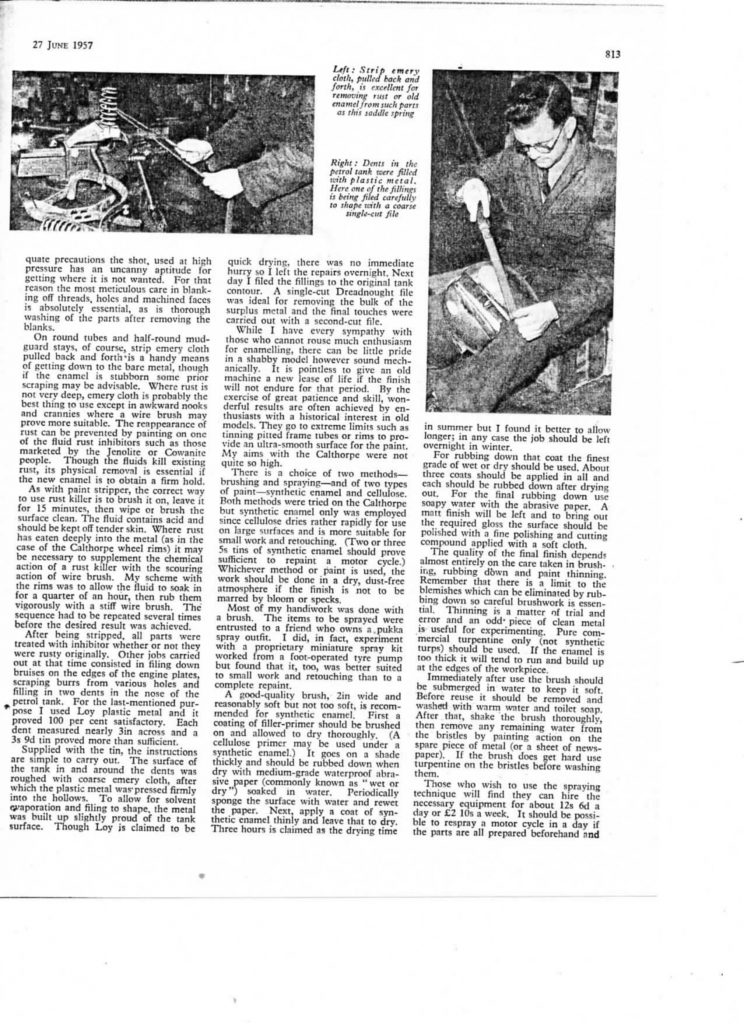
Everything had to be made in wood just in case there were mistakes or adjustments to spacers or holes, and there were many. The constant removal and refitting of engine and gearbox was very taxing. The drawing that you provided could only be used to give a vague idea of where some of the holes were as it did not account for many of the gearbox holes such as the clutch cable routing hole which took a long time to find on Google pictures and the gearbox adjuster mechanism holes. When the wood templates were finished and amended we had to select just the right thickness metal for the job and the spacer thicknesses had to be taken into consideration. Not all of the spacers were of the same thickness so a lot of thought had to go into each leg of the process. There were a lot of try ins as each hole was drilled and the spacers were made 2 by 2 and tied in and checked that it wasn’t going to throw anything out of position.
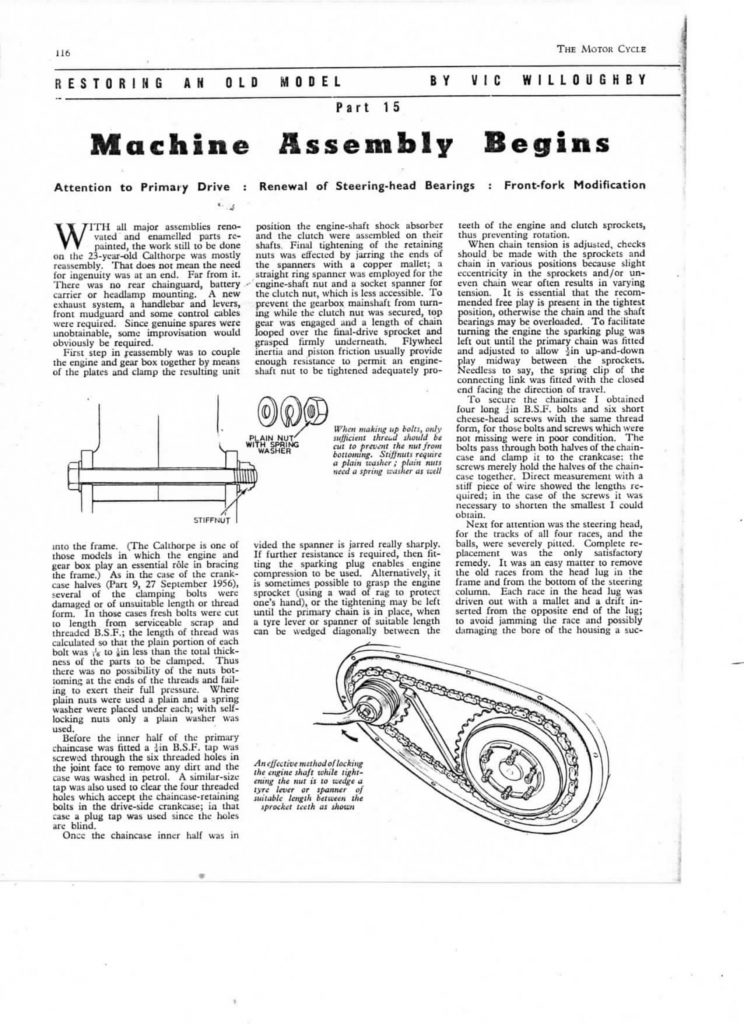
After this long winded process was attained we were able to mount the engine and gearbox into position and make the gearbox adjuster mechanism and drill a couple of extra holes. Most of the plate work was rough cut around the holes so as to give clearances to gearbox and engine cases. Once this was all done the shaping could take place to get the look of the originals. I spent a few hours perusing pictures on the web to figure out how the plating crept around the cases and such. The plates and spacers being finished we turned onto the engine and gearbox studs and washers and nuts all with cycle threads as to spec. Once the concept was now secure we manufactured the set of templates in steel sheeting with all of the holes pilot drilled and all of the hole sizes were number punched. (pictures below)
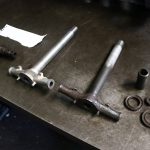
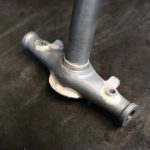
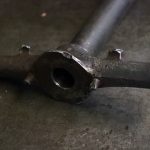
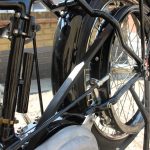
The fork bottom yolk and steering stem which i was very reluctant to make was a bugger and was really a foundry job as there was not a lot of machining as it was mostly filing to shape and then brazing parts on and then filing them in and more parts added and more brazing and filing and back and forth measuring and comparing to the original, very time consuming to complete a better product and finish than the original. (picture below)
The costs bear out the time and effort we put into the job to get perfection. See you on Monday.
On 5 Feb 2022, at 11:24, Sugundo wrote:
Thanks for the explanations. See you on Monday as well. Have a great weekend.

Now that I’ve done my bit, He will take the motorcycle back to Holland and use his contacts for the rest of the restoration work.
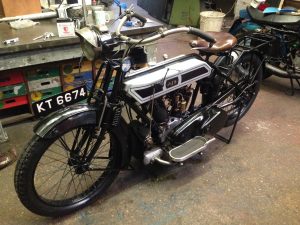
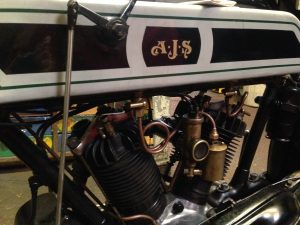
When me and Malcome first spoke, he phoned me up and after a short conversation about vintage V- twins he asked if I was willing to work on a 1913 AJS Vee Twin that had been laid up for many years that was previously owned by his father. We come to an agreement and for the motorbike to be delivered. When i received the first email from him I had just got the motorcycle in my workshop and was getting to work on it.
On 28 Nov 2021 19:08, Malcome wrote:
Just a short note, to find out if there is any news on the AJS. I am concerned about the internals of the engine, possibly a bad piston & rings, valves, worn big end and habitual oil leaks, despite my fathers attempt to add oil seals . When hot it always ran on one cylinder, except when accelerating. Hope the box of bits makes a complete gearbox, also as discussed the clutch is my fathers version of what it should be like and needs converting back to original. It was never possible to “Slip” the clutch, leading to a lot of stalling. It was On or OFF !!
On 28 Nov 2021 21:43, Terry wrote:
I have checked the bottom end and all is perfect. The heads have been decoked and the valves ground in. The valve guides are perfect. The cylinder head gaskets were capoot so i have made some new copper ones. The front cylinder bore is really good but the rings were absolutely knackered showing an .080 thou at best ring gaps on both rings, amazing it ever fired up.
The rear cylinder was another story, the bore was .010 tight at the bottom of the barrel and it was .013 thou oval and the top ring gap was over an 1/8 of an inch gap. I have rebored the barrel to the correct size so it is now parrelel. I have made new rings for both pistons and all has been put back together and the valve gaps reset. I have made the fuel pipe and cleaned out the old fuel from the tank and cleaned the carb internals.
the box of gearbox parts revealed a brand new main shaft that hasnt got the woodruff key slot cut into it prior to hardening and grinding, i will precision grind one in to it. I have put the box together and tested the gearing and there is something going on between second and third gear that would be fatal to the box, i am at present looking into it, can’t be a big problem as the box is so simple.
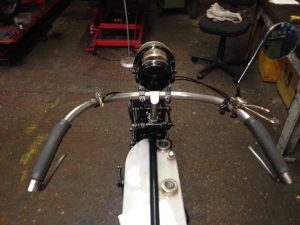
I have dealt with the extraordinarily long front brake cable as the length of the cable wants to absorb what little braking it has. As the oiling system is a total loss system i cannot understand why there would be over oiling other than a leak where the hand pump feed is, i will look into this on monday.
On 29 Nov 2021 09:58, Malcolm wrote:
Thank you for the update. The extensive oil out of the engine could be due to over pumping. My father said a full press every mile. This might be the problem.
On 29 Nov 2021 23:33, Terry wrote:
The brand new gearbox main shaft had an area on it that was machined to the wrong dimension so i have built it up with stelite weld and remachined it so it mimics the old shaft. gearbox is now better but not perfect so slight adjustment still needed. I have also stelite welded some worn dogs on the first gear and dressed them in, if i didnt do this you will find it will want to jump out of gear. I am doing all your bike stuff in between a host of other work but we are getting there. I cleaned and checked oil pump non return ball valve.
On 30 Nov 2021 08:09, Malcolm wrote:
Thank you for the update, appreciate your help. Wasn’t expecting the bike back soon so, no problem. I’m pleased with progress and all the issues already sorted. I wonder if the piston rings were the cause of oil squirting out of the engine everywhere due to the crankcase being pressured by the combustion.
On 2 Dec 2021 23:58, Terry wrote:
The gearbox has now been remedied. Your dad was going to fit the new shaft and the new second gear that slides on the square section of it but he must have run into some probs with the gear and the mating gear as they were new components and would not mate up as the gears had not been machined to the correct pitch circle diameters making it impossible to run through the gears from top to bottom and visa versa.
I am one of the few companies that does gear grinding, mainly for the defence industry though, so it enabled me to do the mods to the gears. you will now find that the sweetest gears in the box are second gear. As i said in a previous mail that i had to stelite weld the shaft to enable it to work properly ”as when i tightened up the geabox shaft lock nut that bears onto the thrust washer (that dad made)” it all locked up tight. This was due to the clutch side of the shaft which has a shoulder on it to bear heavily onto the end of the bronze gearbox bush. Box is fitted and the gear change is good. I have some fiber inserts for the clutch plates as per original so i should be able to get them done and fitted on tuesday and you will have a perfect clutch.
On 3 Dec 2021 08:07, Malcolm wrote:
Wow – So pleased with what is happening and the solutions to all the issues. I was also concerned about engine and gearbox alignment. I suspected a slight twist in the front down tube (possible sidecar use in the early days).
On 3 Dec 2021 22:01, Terry wrote:
Clutch of hell is nearly finished, i could write a blog on it. I am returning it to original spec and i will send some pics of what it looks like now. Quite a bit different.
On 4 Dec 2021 07:38, Malcolm wrote:
That statement is going into the family book of quotes !
I did say we considered my dad as a bit of a bodger. !!
On 5 Dec 2021 00:56, Terry wrote:
I couldnt wait for my son to take pics on monday as we have 4 vintage car chassis coming into the workshop and they are going to take up a lot of room so i had to put the clutch back together this morning. Here is what i have done to it. All of the fibre was removed from the plates and in doing this it revealed 35 equispaced 1/2 inch diameter holes in each plate as i expected except for one, this one had to be drilled and was made of stainless steel. I have not put cork in these but instead i have precision punched woven fibre discs to fill the holes as it will be superior to cork. I had to make a plain plate as the thick one that dad had made was of stainless steel and was too thick and was unmachinabale. All of the fibre discs were a size for size fit in the holes so if you took the clutch apart you would have loads of discs falling out of there respective holes. After a little use of the clutch the discs will bed in and tightly fit within the holes and the only adjustment that may have to be made should be via the screw and lock nut on the push rod actuating arm and this should be done to only free the plates, but only just. The clutch in my opinion is in perfect working order and will be better than it was when new in 1913. I also dressed the teeth in on the starting quadrant gear as some of them were meshing way too heavily and made a horrible noise as well as not letting the kicstart pedal return properly. Also there was a spacer missing in the rear wheel as when i tightened the rear axel nut on the brake side the rear wheel locked up and would not rotate so i removed the wheel and found a spacer missing, also the brake pads were laden with oil. All of the rear end has been attended to and refitted as well as the chains and the cables and chain covers. I also filled all of the oilers on the fork spindles. All i need to do in the morning is check for spark and check ignition timing and fuel her up. Nearly there.
On 5 Dec 2021 10:22, Malcolm wrote:
Great news as always. Please let me know how you get on and if finished, I’ll come over and collect it to give you some room.
On 13 Jan 2022 23:06, Terry wrote:
- I have removed the heads and checked the valve guides, all perfect.
- Stand has been straightened.
- Gear lever has been rectified.
- Exhaust has been modified and sealed.
- Checked the ignition timing and it was on the dot.
- Removed the mag and took it apart and found it to be very dirty inside.
- Checked all internal parts for resistance and all was as it should be.
- Cleaned all internals and lubricated all of the correct parts and rebuilt it.
Other than dirt it was perfect.
The bike seems to behave in a different manner and consistently runs cleanly throughout the rev range. i have not been able to test ride it but I have had it idling at all different revs with no miss firing and the cylinders are running at the same temperature 10 minutes of running would have shown up any probs. If you run the bike on full retard it will play up and be very awkward. I have put a sticker on the tank to point out where the advance lever position should be kept.
I have born in mind the generous payment you made previously and have deducted about 3 hours leaving a total cost of £350. if after riding it, you find it still plays up I will not charge you as it would only be something very minor like a dirty plug. Ready to collect when you are ready
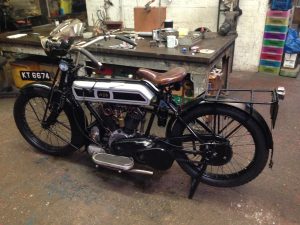
On 17 Jan 2022 14:04, Terry wrote:
I wanted to contact you to let you know how pleased I am with the1913 AJS vee twin.
It has been in the family for over 70 years, having been restored to running condition about 30 years ago. It is now running the best I can remember. The work you did with the clutch and gear box , now makes it a pleasure to ride. I have a steep and long hill nearby, which I use as my test route. I was amazed at the pulling power of the engine. I went up swiftly, without missing a beat. Again testament to your full engine rebuild.
Thank you for your help and advise with the use of the bike as well. I am an extremely pleased and satisfied customer.
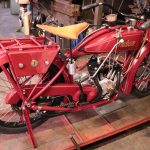
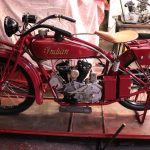
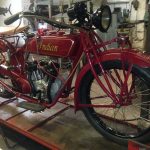
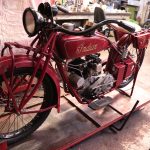
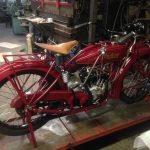
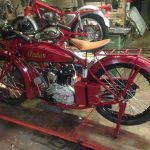
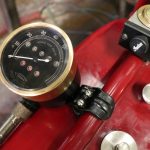
The 1926 Indian Scout

I was tipped off by a friend in Holland that there was a 1926 Indian Scout for sale. He had inspected it and said it was a good one but it had no speedometer or speedo drive and it had a vape ignition system fitted but didn’t look out of place.I duly bought it just before the brexit so as to avoid import taxes.
It came from Holland very fast. On receipt of the Indian I stayed late that night at my garage and stripped the engine down to its nuts and bolts so as to inspect its build and internal condition. All I can say is that it had been restored to perfection internally and didn’t show any ware at all on all components. On digging out a bit of it’s history it has spent it’s life in new south wales and had been restored by a top Indian specialist in New Zealand some years ago.
It had obviously done very few miles if any at all. After 15 hours I had stripped, checked and rebuilt the engine and fitted it back into this frame without a workshop manual only looking on the web for valve clearances and ignition timing. My grandfather in America owned a 1926 Indian Scout and it was his faviourite bike even though he worked for the car industry, he used to have a part share of an island in Canada where hw was the only guy to go by bike, the others by car drove there for annual Salmon fishing. The journey was a round trip of 1800 miles. Because of the fact that my grandad had a Scout I thought I would put one on my list for the future.
Now comes the fun, registering it in the UK, Age related plate, sort out some of the cloth covered wiring, get a speedometer and drive system, put the throttle on the right hand side and a few other little bits. Due to Covid it has been 7 months so far trying to get age related plates. All of the cloth covered wires were replica ones except better than the original as they were silicone lined. I put a few more eaths in place, that’s all.
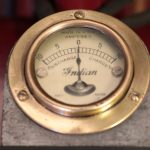
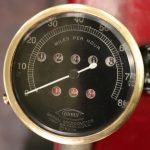
The speedometer that was needed was a Corbin one, “wow”, so expensive and nothing in the UK. Nearly £3000 would get you one from the USA. It had to have a Godegree drive and put it into the copy of the shell that I made including the screw on brass bezel and bevelled glass window.
I needed to calibrate it so I could use the big drive gear on the rear wheel that i got from Poland including the drive system but I needed to work out the driven sprocket using math, the smiths speedo was a different ratio to the Corbin speedo. The driven gear was 37 teeth so I dear cut one out of Tuffnol.
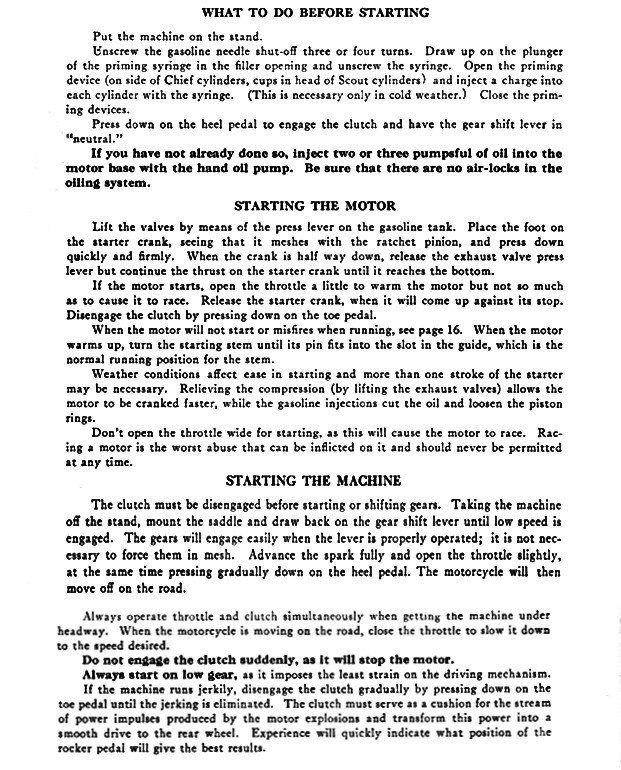
The 1926 Indian scout had no front brake but had a dual rear brake. The right hand worked the usual drum brake but a foot pedal on the right worked a contracting band brake on the outside of the drum.
The throttle was worked from the left hand and an advance retard twist grip was on the right with the horn button. Clutch is worked from a foot pedal on the left and a hand gear change lever in on the right with the valve seat lifter. Hypodermic needle in it to prime the cylinders via a pair of priming cups that partially unscrew. This bike was the baby twin of 600cc Indian Scout.
When I opened the engine I was expecting chains to be the driving media on the timing side, no, all gears as well as on the primary side. My overall view of the Indian is it is not “ploddy” and “triumphy” but revvy and spritely and mechanically simple and profound in its own way and quirky in its controls.
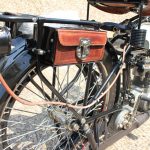
Looks like I sniffed out a good one at a good price. Throw over leather bags usually adorn the rear ends of Harly Davidsons and Indians among others but I didn’t want this as I wanted to put a bit of my own creation on the bike so I made some pannier toolboxes the way I envisaged Indian making them in the day to suit the bike, painted in Indian Red and embellished with an Indian head waterside decal and nickel plated knobs to hold the covers on. The way I have fitted the boxes on will still allow the obligatory saddle bags to be thrown on.
Below is an extract from “1923 Indian Chief and Scout instructions book” On starting. Its a different year but the procedure is the same.
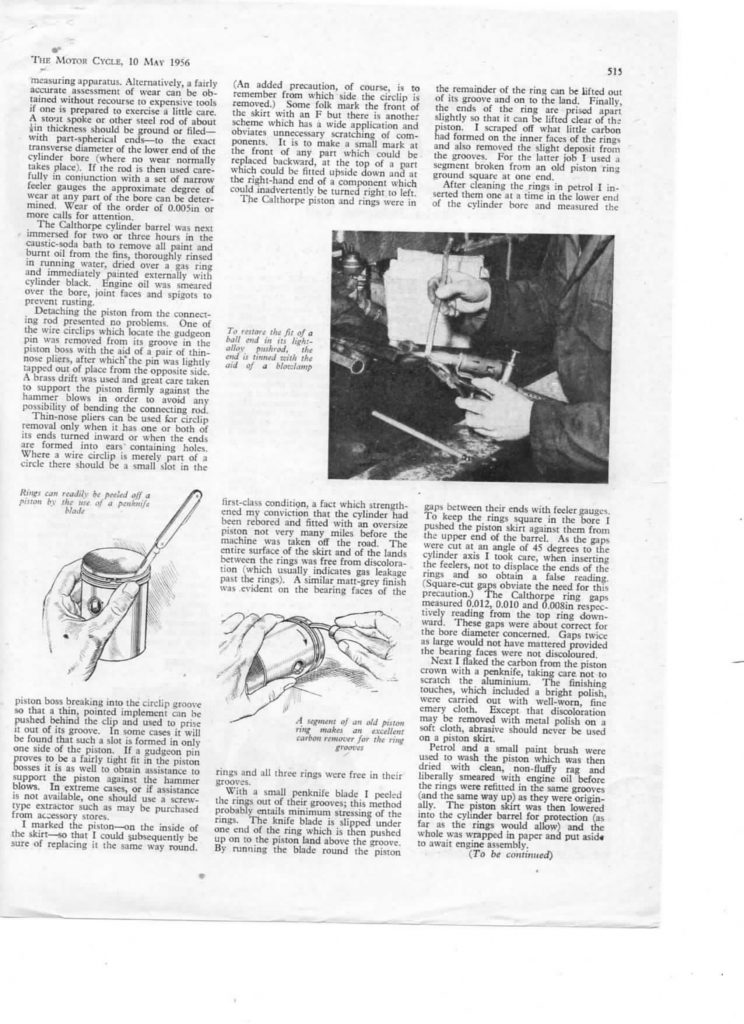
Petrol Tank Sealing or Lining
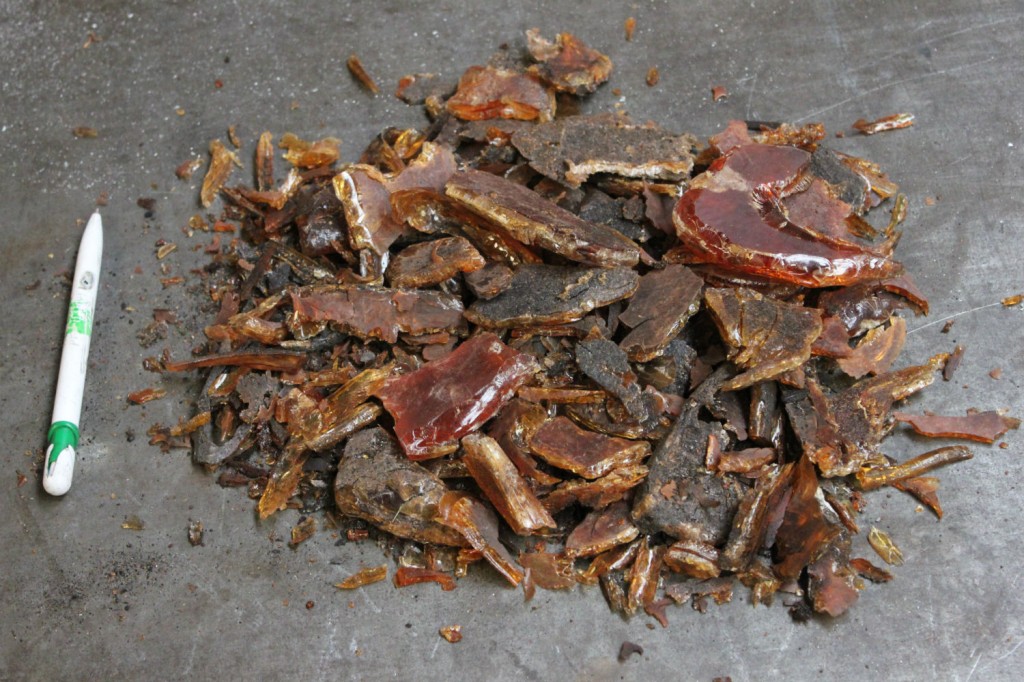
Amber Petseal removed from tank
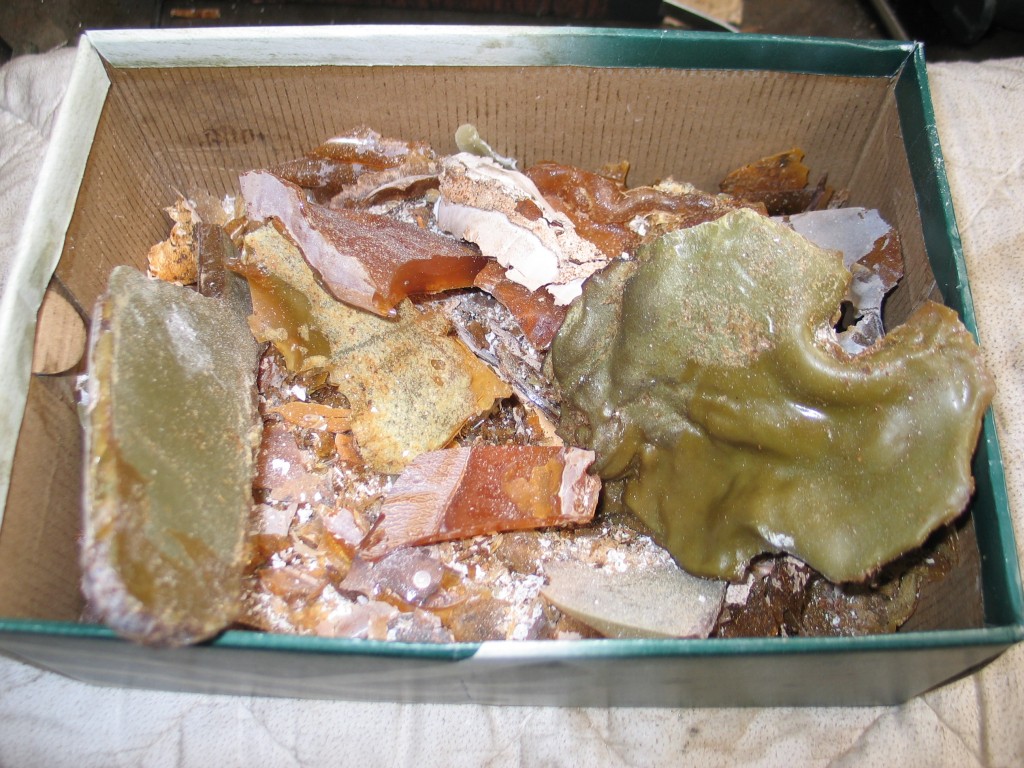
Mixture of removed petseal in show box
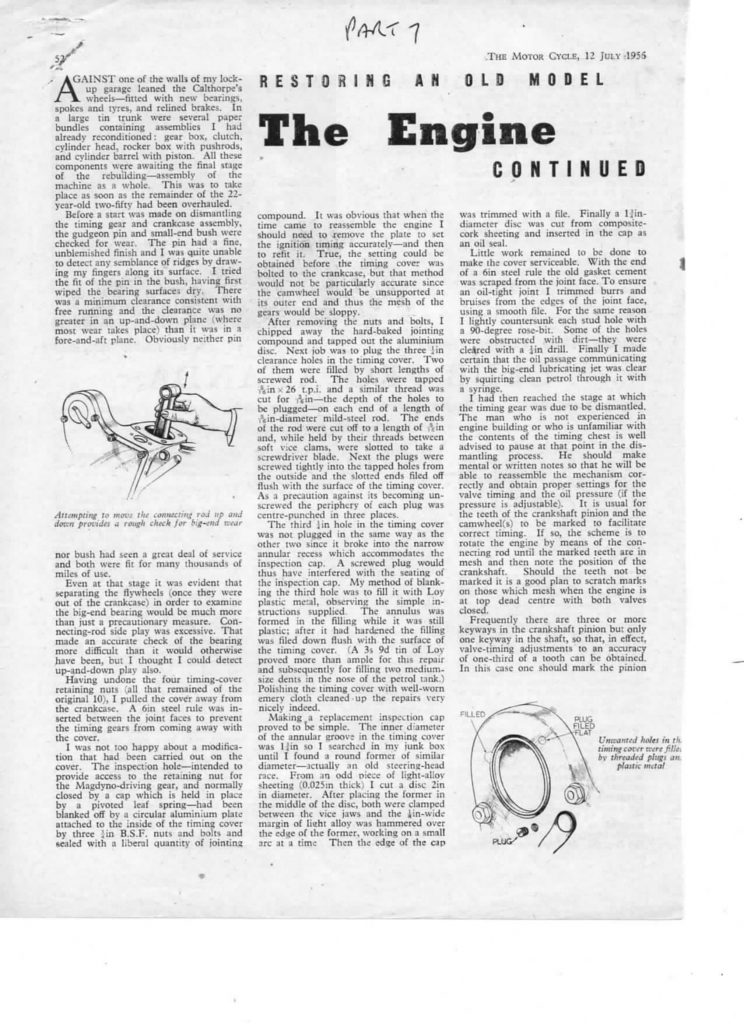
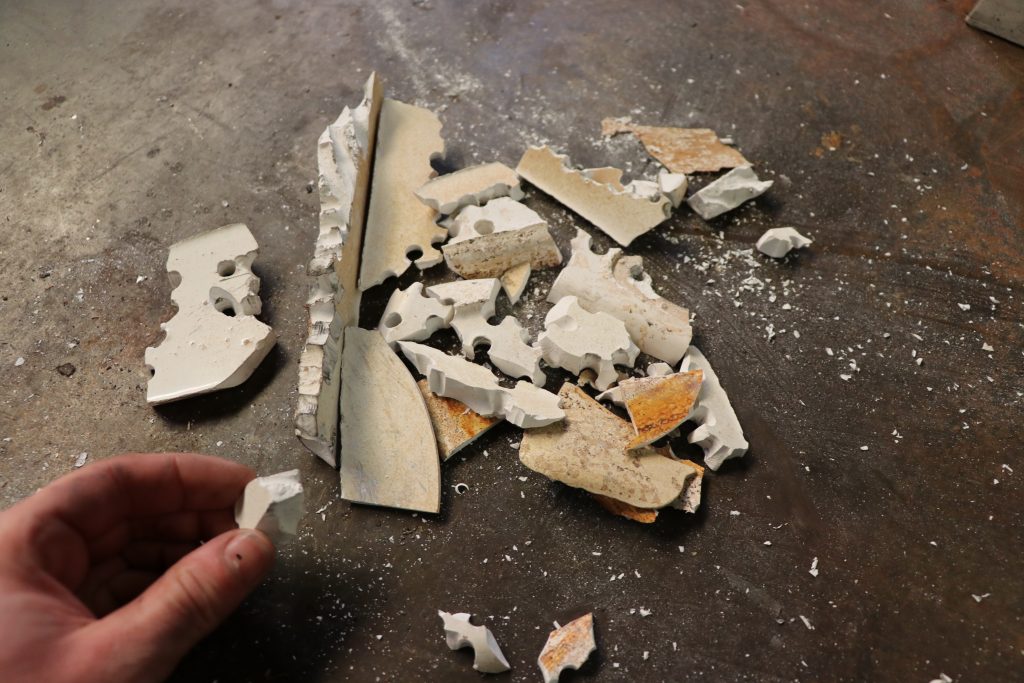 Petseal Drilled and broken for removal
In days past, tank sealing was unheard of due to the lack of moisture attracted by fuel due to the addition of ethanol. Many old tanks have seen years of service with no problems and then they have succumbed to the ravages of ethanol fuels. In days past we never even thought of inspecting the innards of our tanks, we just filled them up at the national Benzol petrol station and forgot about it. The responsibility was in keeping the engine going and the tires filled up.
Things change such as fuel that creates another responsibility, the tank. A hot of tank sealers came onto the market place when ethanol reared its ugly head and started to cause tank problems.
The application on a DIY basis was pushed by the marketeers at the behest of the owner of the tank. Sealers applied in the early days of sealers were relatively tolerant for a few years until bad DIY application showed it’s fruit.
At Stotfold Engineering we have and are tackling the problems of pinholes in old sealed tanks. As an example a tank came to us to have a pinhole fixed, it transpired from probing and scraping that there were a host of pinholes and a line of rot at a seam. The tank had been sealed in the past and was now breaking up. Generally the liner has to be removed as much as possible so as to allow us to braze the rusted areas for a permanent fix. If the liner is left in situ and we braze the pinholes then lots of toxic fumes are produced.
This typical tank had a sealer put into it DIY style as there was an inch thick slab of sealer in the bottom of the tank. The owner didn’t manipulating the tank throughout the setting process to create and even coat. The final set product should be almost like a thick plastic bag within the tank to protect the metal from further corrosion from the fuel, the correct process is time consuming.
Even when done to the instructions that came with the sealer, it can go wrong. One example of this is the case when the base metal isn’t good enough to permanently adhere to the sealant, this combined with the sealer going brittle over time and shrinking can cause it the break into pieces ultimately not providing corrosion protection but also causing damage in other places due to the sealant sometimes dissolving or turning to dust like particles that go into the carburetors and so forth. A raw metal base and high quality sealant along with rotating throughout setting is necessary to solve this problem. The aforementioned isn’t usually misunderstood most sealant instructions will include directions for “getting” this raw metal finish but often are futile due to poor quality chemicals and lack of machinery.
Now back to this tank. A couple of ¼ inch holes strategically drilled at the base of the tank and a rod put into one of the holes and hit with a hammer and the other hole dealt with in the same manner usually shifts it in one go. Getting the slab out is time consuming as it has to be broken up into parts so as to get it out via the filler hole. Now we can braze it up for a permanent fix. There is no use to use liners as they are not permanent and always come loose. After brazing we pressure leak test it. On vintage and veteran tanks that have been lead soldered it is quite common for a leak to occur between the oil gallery and the fuel part of the tank, not an easy fix and complicated. An old trick for some restorers is to gaffer tape all the holes up and fill the tank with sealer and then remove the tape after setting and then off to the painters, as good as new, really! Tanks that have been lined properly may not have been perfectly cleaned out, time will tell!
brazing them is a permanent repair.
The bike was purchased and stripped down to the bare bones. The first thing I tackled was the engine, as I love working on them Because everything can be done in my workshop regarding restoration or replicating new parts.

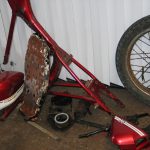

I decided to attempt to purchase any new parts that were needed via Ebay. These were parts that I could not cost effectively make. The first part purchased was a front mudguard from the USA, When received and opened I found it to be an early aftermarket part. My brother who is an electroplater duly polished and rechromed it.
The next part was a rear mudguard from a company in Thailand advertised with an original Honda Wrapper. This part came overseas extremely rapidly and unwrapping it I noticed some creases in the tail end, definitely an aftermarket job using ancient copies of the original Honda tooling “We live and learn when we are new to Ebay”.
Some parts were impossible to find such as some chrome fork parts. I had to original monkey metal parts that had metamorphosised into balls of fluff and decided to stuff it, I’ll make my own and my brother can chrome plate them. By the way they’re made them from steel. The bike was in quite good visual condition until one gets down to the nitty gritty and the perfectionist that I attain to be looks at little things like the steering lock and wonder about Ebay Thailand with their tempting low prices “ No restoration is needed here”.
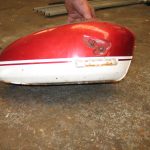
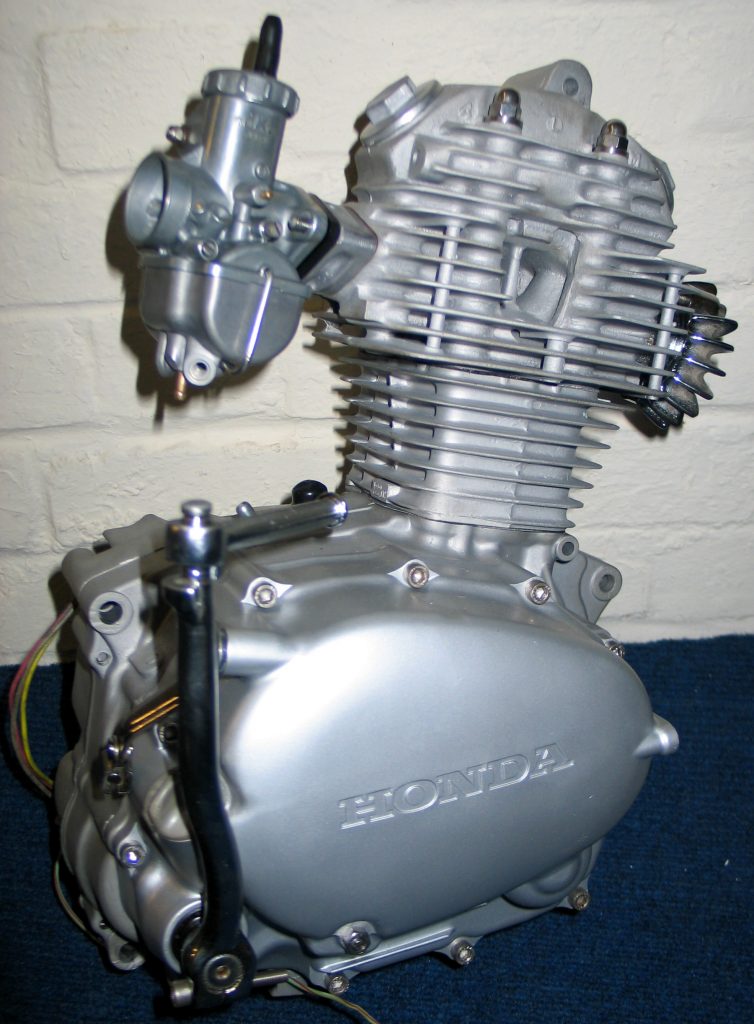
The engine is nearly complete, draped in all of it’s resplendent chroming and original Honda silver spray all I need to get is some points covers and a couple of other small covers that seem to be very allusive. But I will find them.

The worst thing is to see a whole Honda CB125S bike on Ebay up for grabs at £400 and its got all you want fitted to it, but that’s not going to be a challenge. Having down as much as I can without spending mega dollars on obscure bits, I’ll get on with the bits that I can manufacture or restore myself IE, The seat that is in quite good condition. You may find that aftermarket seat covers do not have the sponge inserts sewn into the underside for the seat cover. These inserts give the ribbed effect on the upperside of the finished upholstered seat.
I am going to be very fussy about originality regarding the CB125S so I am not going to waste money and time on replating parts such as indicator,lens backs as they are made out of Mazak and when they go pimply they will readily rechrome but the acidic baths that are used in such industries attack the zinc and oxidize it under the plated surface causing pimpling and flaking in a short time. New indicator bowls were purchased from David Silver Spares.When you weigh up the cost of replating it’s worth buying them new.
The wiring loom was all intact, original and wanted cleaning and resleaving, the original type of plastic silver grey sleeve is available in the USA. I used grey sleeve and blew it over with silver paint lightly mixed with a thinner that embeds the paint into the plastic, you would never tell the difference.
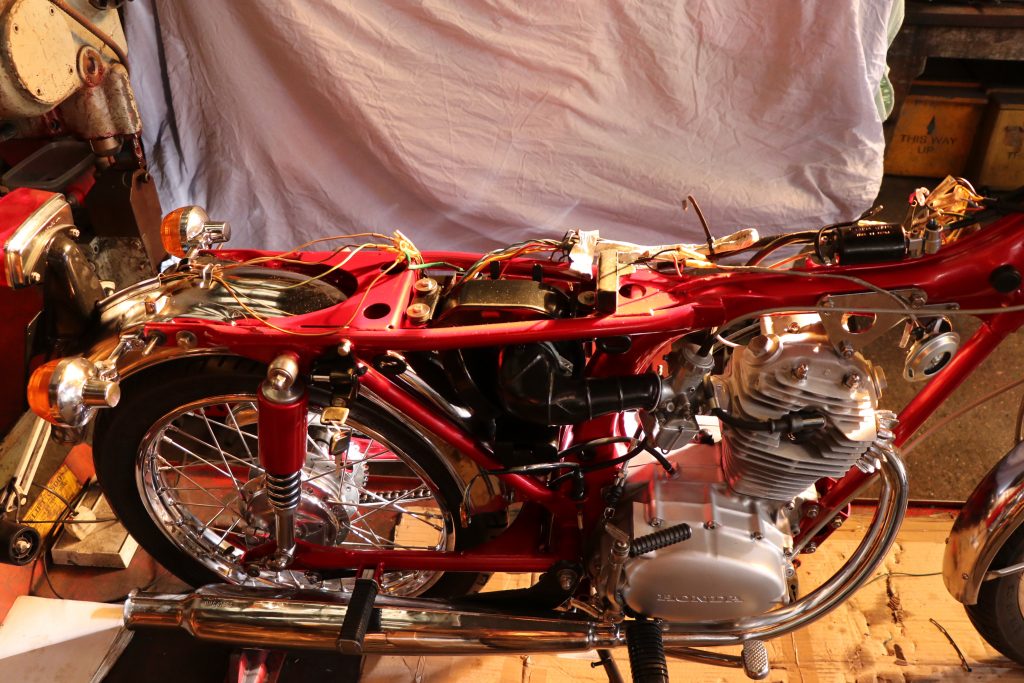
The switch gear internals are a fiddly affair to get right and getting all those wires laying in the right place. Horn button contracts are commonly burnt out and a lot of patience is required to get it working correctly. Honda and Japanese bikes in general have plenty of earth wires so there should be no electrical problems like in British Iron
The rear shocks can be tricky to get back together under the spring pressure without marking the painted surfaces. I made a tool to make this job easy. Regarding nuts and bolts, stainless steel was used throughout and any markings and makers marks were machined off. You will notice that the exhaust silencer is the early rare trumpet shaped variety and was brand new and original.

Every nut, built and washer was greased prior to fitting and the wheel bearings were not overly greased, not one part of the bike was missed. Out of interest it took just under 1 lb of lubricant over the whole bike. One can of WD40 and a little Vaseline finished the complete bike. The whole bike has been built to better than new factory specification and is only missing the plastic tool kit bag which i will make to match the knackered originals details. I know that there are aftermarket tool kits advertised for early 1970s CB125S but the tools do not have the right makers marks on them.
All of the workshop manuals I have come across, do not cover all these little things. Restorations done to this standard of accuracy are certainly not cheap and are exceedingly time consuming and a bit of a punt and not necessarily cheap. I have found David Silver Spares cheaper than most parts from Ebay and you know at the end of the day that you will get the right part. All chrome parts such as new rims were preplated with copper, nickel, chrome for longevity.


On 22 June 2020 John wrote:
Hi Terry, it was great to meet you in Biggleswade this afternoon. The contact at the VMCC is Bryan Marsh who recommended you. I would be very pleased if you could run your eye over this little bike. The main problem is starting and as you can see we have bent the kick start in our attempts to get it going. The front brake is virtually useless and anything you could do there would be great.
On 23 Jun 2020 Terry wrote:
Finished work at 8.15pm. I checked the points and no spark. I then checked the magneto and found it was weak on the poles. Me and Chris my electrical magition remagnetized it and changed the spring loaded carbon pick up from the commutator thing and she fired up but not with gusto as the carb was leaking badly. The carbs on these bikes were reliant on a mass of suction to create vacuum to lift the fuel from the float bowl into the main jet. Most users of vintage machinery expect carbs to behave in a fashion condusive to 50s and 60s machinery but this is not so with vintage machinery. One needs a vacuum to start a vintage bike, the vacuum creates a negative pressure in the carb with the choke in the on position. I have found in all vintage machinery that the choke has to be a little open , say an 8th open so as the engine on the inlet phase will not wet the spark plug but have a bit of air with vacuum to start her up. This measure is encountered with the starting procedure of vintage velocetes. I have addresed the issues pertaining to your carbs and on stripping them down to the bones i have found shot blasting media throughout the carb assembly. I have cleaned your tank out as well as the whole fuel system of any remnants of blasting media . The blasting media was dry bead blasting. Your front brakes will not work well on the set up provided as the friction material fitted is a ferodo based material working on chrome plated rims that were not fitted to your model. I have chosen a brake friction material that will be better than what you have got at the moment but it is not perfect. In the days of yaw you would have had painted rims with a high density rubber working on the rims to give you breaking provenance and to add to the braking system you would have changed down a gear to add engine braking to the system.
On 23rd June 2020 John wrote:
Dear Terry, gosh, that was quick work, we did not expect you to find so much so quickly and it was great to read you could get the bike started. I am so looking forward to seeing this running well and greatly encouraged by your work. I see there are a few companies offering a magneto rebuilding service, would you recommend this? I would be pleased if you can get the front brake working and I have seen a triumph fitted with a hub brake in the front wheel, would this be a good option on a period bike such as this?
On 24th June 2020 Terry wrote:
The Triumph has been sorted and now start a treat every time.What I have found is that your bike is wet sumping due to a very weak spring in the pump non return valve and the seat that the non return valve ball sits in was full of blasting media. I have sorted this out. I have replenished your tank of oil that ended up in the crankcase during the night. When i started the bike up in the morning it drew a lot of attention because the amount of smoke that was being produced during the scavenging of oil residues left in the engine was incredible, a bit like a traction engine rally. The starting procedure for your machine is no choke and the throttle set an eighth open . Turn the fuel tap on and press the carb tickler down for 4 seconds as this is not the type of carb where you want to see fuel exuding from the float chamber tickler as on , say 1960s triumphs, and two kicks with the valve lifter on and one gentle kick with the valve lifter untouched or released to start her up. If you deviate from this procedure she will not want to start and the plug will get wet. To stop your machine you will have to turn the fuel tap off and pull the valve lifter in. Never leave the fuel tap on when the machine is not being used. The carb does not drip at all when running or not running . The float chamber has a brass float that operates a needle with a taper on the top of it and when the fuel is turned on the fuel fills the bowl slowly and forces the float up slowly but slow enough that a certain amount of encouragement is needed to fill the bowl up with fuel by depressing the tickler that bears down on the brass float and stops the top of the float needle mating up with its mating taper. Old style carbs would never close off the fuel supply by stopping the machine, ie the float bowl fills up and it wont take more fuel. This is not so and it is overlooked by so many owners nursing wet dripping carbs and putting up with it because it was how it was made in the day. Petrol was never a cheap commodity and could never be wasted and at the end of the day it would not be good for sales if a bike was fitted with a carb that never quite fulfilled its duties when new. So turn the fuel on when starting and turn the fuel off before stopping. No drips and no waste. The kick start was bent as you mentioned and this has been rectified sympatheticaly without disturbing the nikel plating. A bent kick start is condusive to non starting and a misunderstanding of how the machine is to be coaxed into life and i do not mean any insult to the new owner of a veteran machine as he or she may have been entrenched in the tolerable attributes of a japanese machine. When your bike has had its petrol tap turned on there is an unimpeded delivery of fuel delivery to the carb float bowl that needs instant use when the bike is running.There is a cursory measure of metering from the float needle and when you start your bike there is an unimpeded flow to the engine and when your bike is running there is a regulated flow of petrol through the top of the float needle. At the end of the day if you are going to use it turn the petrol on and if you are not going to use it turn the petrol off.Your bike is ready to pick up.
7th October 2020 Hugh wrote:
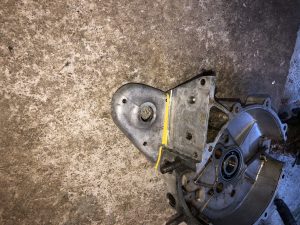
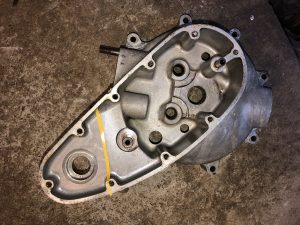
I have an aluminium crankcase half from my 1936Triumph Tiger 80
It needs a welding repair . I recently bought this engine from an elderly gentleman who knocked it off a workbench whilst attempting to steam clean it. The engine landed on the corner of its timing case which was destroyed. The crankcase behind this casing has sustained a hairline fracture approximately 12cm long, and the broken part of the casing was pushed inwards by about 6mm.
I have stabilised the broken crankcase by attaching another outer cover. I attach photographs for your inspection, and have marked the fracture with yellow tape. Unfortunately, the fracture itself does not show up very well on photographs. If it is possible to weld the casing, particular attention would have to be paid to the following:
- An idler gear wheel rotates over the fracture, there is a clearance of about 3/16inch between the casing and gear wheel.
- The fracture extends through a threaded hole (1/4 inch Whitworth thread) to which the outer casing attaches.
- On the inward facing side of the casing, there is a platform for a magneto/dynamo unit.
again there is a similar clearance for a weld The engine is very rare, and only a few of this type were produced between April and August 1936, so I am keen to preserve it I have cleaned the casing with degreaser, detergent and carburettor cleaner solvent to remove grease. I would be very interested to hear if this crankcase is repairable, and if the external repair can be done neatly and I look forward to your reply. An estimate of costs would be greatly appreciated too.
8th October 2020, terry wrote:
Hi Hugh this should be not a major prob to do at a reasonable rate.
Our turnround at the mo is 4 days. What will be needed is the cover
that mates up the broken piece. We can do almost invisable
restorations of aluminium cases.
8th October 2020 Hugh wrote:
Thank you very much for the prompt reply, it’s just what I wanted to
hear. I will send crankcase half together with outside cover and
idler gear.
9th October 2020, terry wrote:
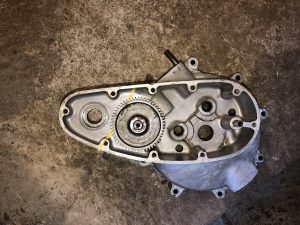
Hi Hugh i told you we work fast. i have fully welded both sides of the crack ie inner and outer . the outside has been dressed down and grained to look like the rest of the casting and the inner has been left with weld on as it will be needed for added strength. You will find that the gasket face is now perfectly flat . the inner weld clears the gear easily. The oil union stud has been removed without disturbing the original thread, i hate helicoils. i have fitted the stud in place. Total cost is £240 postage is in the price. bank details are 30/90/79. acc 00229388 lloyds tsb. will post monday. you wont be dissapointed.
9th October 2020, Hugh wrote:
Wow, that is an absolutely fabulous turnaround, I am pleased that you have managed to repair my engine successfully. I had doubts that you would be able to fix it. My local blacksmith destroyed a Tiger crankcase when trying to weld ia damaged bearing housing a couple of years ago, so I am glad that I found your company via the internet and sent my crankcase downtown you from Scotland.
I will go to my bank on Monday and make a transfer of £240 as per your request. I assume that the name of your account is ‘Stotfold Engineering’ , my bank usually asks for the name of the account holder whenever I make a transfer.
Thanks again for all your effort, great communication and fantastic service, I know how I will contact next time I need an engineering job.
12th october 2020, Hugh wrote:
I transferred £240 to your company account this morning.
On 03 June 2020 Terry wrote:
The bike is back together. All i need to do now is valve clearances and fix oil leak tomorrow. In the gasket set there was no timing side cover gasket and no oil pump gasket so i had to make them. What i got out of the oil ways was loads of clear silicone sealant. It seemed to be everywhere, in the primary case it was ridiculous as this stuff shouldn’t be used on any bikes at all as it doesn’t dissolve. when i clean engine cases i take particular care in cleaning out all of the casing tapped holes as your casings in the past have definitely been shot peened or vapor blasted. Every tapped hole had remnants of grit in them and i am positive that no high pressure air was involved in the cleaning process. I am glad to say that no grit was found throughout the engine , only silicone sealant . Your engine was a home restoration obviously out sourcing some professional resources but the engine was put together by the owner with some care. I can say that the torque settings were all over the place on the head and barrel when they were fitted. When i put nuts on dry studs they never torque up to the correct values. your engine was incredibly dry on all of the nuts and studs. Torque values can be compromised by 10 per cent when there is no lubrication involved or the wrong lubrication is employed.This is well over looked by modern man. By the way i never use copper slip as when tightening screws down it is easier to strip threads as it is too slippery and it was never used in the day of production . Good old grease is what is needed as it doesn’t wash out or thin down as long as it is the right type of grease. Your bike has been dry stored for many years but it has escaped the ravages of time because it hasn’t got too hot , say in a conservatory with the sun blazing down through the roof. I was given by an owner of four Honda 400 fours all in different colours with no miles on them and all of the seals and rubber parts were ruined from the heat in the conservatory where he had them stored. All of the paint work had leached out. Oily rag is good but i tell this to a lot of owners of machines that i restore ground up or do partial restorations on and they seem to want stuff looking dry. When these bikes were bought they were bought purely for a mode of transport and needed to be cared for at minimal cost. What the modern man has done is bought a machine and cared for it in a different way because it is only to be used for occasional trips out rather than what it was made for in the day. We see these workhorses of yesteryear as semi retired mules that are meant to perform as well as they did in the day of daily use. Except for ethanol in our fuel that loves to eat paint and certain rubber parts there is nothing wrong with British iron as it is used at least once a week. The long and tall of it is, “If your not going to use it don’t own it”. Can i use this in my blog ?.
On 03 June 2020 Howard wrote:
Thanks for the report Terry. The valve clearances are 0.006” inlet and 0.008” exhaust. Yes you can use your report in your blog, even add the bike photos in etc. Don’t forget to turn the oil tap on once the tank is fixed if you are going to start it. Have you had a chance to look at the side stand length? Modify just enough to hold the bike up right, not leaning over too much Be in touch
On 04 June 2020 Terry wrote:
I had the day off with a very bad back but will have to go in tomorow normal time.
On 05 June 2020 Terry wrote:
I managed to haul my self into work and amazingly my back feels better, but I have to be careful. all that needs doing on your bike is the side stand tomorrow. There is a big screw in blanking cap on the front right side of the crankcase, It has corroded from the inside and caused a small hole and a part of the thread on the cap has broken away. do you want me to make one at reasonable cost or do you want to buy one from draganfly ? Oh by the way i found and repared the 3 pin pricks in the bottom of the oil tank. no leaks so far.
On 05 June 2020 Howard wrote:
Terry Might be better logistically for you to make a new cap as we do not know if Dragonfly will have them in stock or delivery time, you could check though. Thanks for getting onto the side stand. As discussed, is it possible to crank the gear leaver out a little to clear the casing? May need a little heat!
On 06 June 2020 Terry wrote:
I seemed to predetermine your suggestion re gear lever as it was done a couple of days ago . side stand and pivot bolt was a real hash up and i can understand why this was not properly attended to as it is awkward if you don’t have a machine shop. the carb top has been fitted with the right screws for the threads in the carb body. I am in work tomorrow and will make the blanking plug or whatever it is out of an aircraft alloy that we have in stock. I have ordered a set of spark plugs as one of yours has a break in the ceramic and i don’t have any spares in stock, i am not sure if it was due to me removing it or if it had a fracture in it already, but it broke when removing it. Plug is free even though i had to order 4. I have bagged up all parts that were removed and changed including any spare gaskets. I return everything including old gaskets if possible.
On 08 June 2020 Howard wrote:
Terry Thanks for the update, glad to see you are on top of it all. Look forward to the end of the week when it might be completed, no rush mind.
On 09 June 2020 Terry wrote:
work carried out at Stotfold Engineering Co Ltd Hi here is a break down of what we have done Strip down engine and clean all sludge traps and oil ways and rebuild. £800 as agreed although this is a very tight price and a moderate hourly rate if you work fast. The engine had been restored some time ago with a great deal of attention accept for the torque settings and the lack of external lubrication. All of the gasket faces had been dressed with clear silicon sealant in copious amounts. Silicon sealant has been found throughout all of the oil ways and the sludge traps but has not caused any damage. It was found in big masses in the primary chain case as i know this is a big leak area. The rebores to plus .020″ were on the tight side minus .0005″ from standard and this showed on the piston skirts which i have attended to through minimal honing and dressing of the piston skirts to give the original desired clearances. The piston on the front right side showed the worst distortion on the
- Dress pistons skirts and hone barrels and measure piston ring gaps. £45.
- Remove and repair the leaking oil tank and respray the repair £52.
- Rework the gear lever £20.
- Restore the right hand passenger foot rest as it was very bent. £25.
- Sort out carburetor screws as they are not standard. £10.
- Remodel side stand £52.
- Pick up and delivery £70.
- Total cost is £1084.
Cash on delivery is ok or bank transfer to lloyds tsb. acc 00229388, sort 30/90/79. reference square four.
On 09 June 2020 Howard wrote:
Did you miss including the cost of the 4 spark plugs you ordered? Have you tried to start it (oil tap on first)? Will pay by bank transfer if that is OK. Can I assume she is ready to pick up? Did you take any further photos you could send me?
On 09 June 2020 Terry wrote:
I will keep the 3 spark plugs as i need them for the ivory calthorpe and the 2 ivy v twins that are coming this week to the work shop. I have not started it up. But if it ran before i picked itup it will run better as i set up everything to the book. She is ready to pick up. I told my son to take pics of your Ariel engine while i was working on other engines. We have, out of interest just finished a frame that was written off as there was so much rust and decay for a square four for a guy in Newfoundland. I am going to write a blog on your bike and any pictures will be in there.
On 10 June 2020 Howard wrote:
Thanks Terry Will pay you tonight on line, aim to pick up the weekend if that’s ok and weather permitting.
On 10 June 2020 Howard wrote:
Paid, please check it has gone in tomorrow.
On 11 Jun 2020 Terry wrote:
I recon saturday before 11 am.
On 13 June 2020 Howard wrote:
Terry I have ordered a new distributor cap and having it sent to you, I was not sure the old one is OK.
On 14 June 2020 Terry wrote:
just got in from work. In between jobs i have checked some stuff out on your bike and this is what i have found. i checked the ignition timing and it was spot on. i checked the points gap also good. the last time we done a spark test i said the spark looked a bit weak and yellow. I had another look at the points and found a dot of grey metal based filler stuck to the points. it looks like the condenser screw has been fitted in with this filler but i do not want to undo the screw and open up a bag of worms. The dizi cap has got a crack in it and you found that a threaded part had broken. I phoned my son not long after you left, i asked him about it, as he removed the dynamo and dizi in one piece. he said that he has the broken piece and it came away easily when he unplugged the spark plug leads. it looks like an old fracture in the bakelite. the rotor position mark according to the manual is not visible on the dizi base but there are some scratching and arrows on the dizi body and this points to experimentation by the previous owner. Unusually after doing all this we now have no spark at all. As i said i am no electrician but i can follow an electrical wiring diagram step by step. I guy came over who is into his classic fords and he pointed out some loose wiring that i should check out and repair. I asked him about me mounting the positive wire from the coil to the dynamo housing and he said it doesnt matter as that wire was a live from the coil going to a live to the frame so there would be no short circuit or damage. I have found that the coil is loose in its mounting but i cant see that it will cause problems as it doesnt get any earth through its body, i have tightened this up. He also pointed out that the carbon brush in the dizi cap was cockeling over in its housing but it should be ok but not ideal. The guy who came over to collect his velo 2 stroke was amazed at how easy his bike started after 42 years standing and i had confidence in it starting as i had in yours without even starting it up prior to collection as nothing electrical had been disturbed. It is deff an ignition prob not mechanical as i rebuilt your engine to the original specs in my original Pitmans Arial square four manual. my electrical man may be in on Monday to have a look at the wiring and he wont be pleased as he works for British rail communications. dose not like to see plastic house hold junction blocks and loads of joins in wiring looms. Sorry for the shit you went through today as i was as disappointing as you. i will keep you informed. Out of interest, did you buy this bike from a guy who uses a web name of WMC65 or WCM65 as i have had no end of problems with stuff that has been bought from him.
On 15 June 2020 Howard wrote:
Thanks for the update, It always started 1st 2nd time no problem so something has changed or not gone back correctly perhaps. There must be a way of checking the distributor timing to the cam without stripping the engine. I have however ordered a new distributor cap to be delivered to yourself, it may help. Please keep me updated
On 14 September 2022 Howard wrote:
Been a while but I thought I should give you an update with the Ariel square 4. Turns out the ignition timing is zero degrees at TDC, most old British bikes would be 6 to 8 degs BTDC, so the ignition timing being too far advanced was the misfiring issue. Sounds too retarded I know, zero degs at TDC, but is correct. Not running the fuelling too lean as well is also required, not so the plugs are black, just not too lean. Using fully synthetic engine oil to keep the insides clean, no point putting mineral oil in as this is the cause of slugging and synthetic oil performs better within a ‘hot’ engine than does mineral oil. I have been out on several runs this summer, even on the hottest days with no signs of over heating, so all good.
Another thing to know (as I am sure you do) is the points plate in the dizzy earths the static side of the points through the two small screws that hold the dizzy plate in place. I added an extra earth to the points plate as these screws do not earth well over time. Causes loss of spark and unless you know this one can be a real head scratcher.
Cheers, Howard
I am going to use this blog on a Velocette Viceroys as a testament of how a vintage motorcycle can be recommissioned fast and efficiently with plenty of dialogue between the owner and me, you will note from the dates of the to from dialogue through the emails that I am committed in sharing information while I work through the project. You will note with my emails that they are sent after work hours as I do not like to pass the costs on to the owners.
I can kill two birds with one stone by writing a report on the work being carried out and using the report as a blog on the website. By doing it this way I hope to show honesty and efficiency to suit both parties.
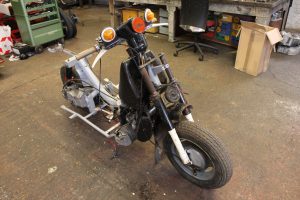
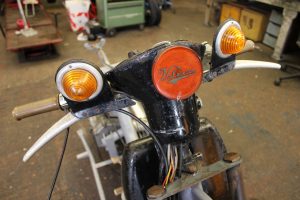
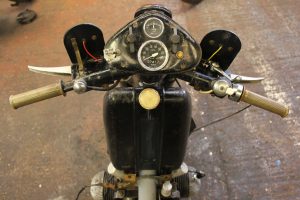

Pictures are also at the end. This conversation is ongoing so this blog will be updated later on.
On 22/04/2020, John wrote:
I hope you are all surviving the current global crisis. Would it be possible for you to give me.a ball park quote for restoration of a Velocette Viceroy fuel tank. It was last run in 1977, but has been stored dry ever since. Externally it is not bad, but internally it definitely has some rust. Based on a cursory inspection it looks like it should be liquid tight.
On 23/04/2020, John wrote:
Hi Terry, Thank you for the speedy reply. I’ve now had a chance to look at the rest of your website and see that you do complete restorations. I know it’s a bit of a “How long is a piece of string” question. But can you give me an idea of the costs to get our Velocette Viceroy running again?
What I do know – It’s not super rusty, and the engine rotates (By hand) The left hand cylinder is missing one of the cylinder head studs (Either missing or snapped, not taken the head off to look) It’s completely missing the Front brake cable (No cable guide, or cable) It has a lot of 1970s era electrics added to it (Indicators, headlight switches etc), I am happy to deal with the electrics myself.
It’s current got all the bodywork removed, so I could look at the state of the underlying engine/gearbox. I’ve not gone any further with stripping it down. My original plan was to take the engine and gear box out, and send them off for refurbishment, but you guys are only about 40 mins away from me (I’m just outside cambridge), so I thought I’d start the conversation
On 23/04/2020, Terry wrote:
you have picked the right man as i love engine and gear box work and hate electrics as it is so time consuming and costly. I recon i can go through your Velocette Viceroys and do what needs doing to the engine for between £300 to £500 as a guess. turnaround at the moment for engines is 4 days.
On 25/04/2020, John wrote:
Hi Terry, That sounds great. Hopefully you also love Brakes and Shock
absorbers? Are you guys still working? What I would like to do (if possible) is to bring the whole bike (Less the bodywork) over to you, fo you to take a look at. Once you’ve got the Engine/Gearbox/Fuel tank off it (And ideally the brakes and front forks too ) I’ll come and take the chassis away to wire brush and paint it. That way, I don’t mess it up by taking any bits off and loosing them Then once everything is in working condition again I can brind the chassis back for refitting. Without the bodywork on, it’ll happily fit in the back of my van, and I’m sure we can do an appropriately social distanced hand-off. If that sounds ok with you, then let me know when might be best to bring it over.
On 25/04/2020, Terry wrote:
John when you bring the parts over when it suits you. You will see that we have the machinery to do everything in house.
On 27/04/2020 , Terry wrote:
update of what we have done. removed exhaust system, this will be overhauled tmoro. worked out why there is no drive to rear wheel as drive key has sheared but no prob as easy fix, carb has been stripped and rebuilt with new gaskets , a little problem with missing ferule on twist grip but i found one so need to mod the cable, make it a
little longer . starter motor works after a little cleaning of terminals, petrol tank is cleaned out of all rust. spring fitted to choke lever. rear suspension works perfectly now it has been lubed up. tomoro is look for spark , make head stud, fit exhaust. I think what we think is ignition switch is actually steering lock as ig switch is small
toggle switch on left hand side of dash. This is a really nice machine to work on and i like the whole design. is it ok if i can write a blog with no names mentioned for the interest of readers. You will note from my blogs that i like to state the ease or difficulty of removing or servicing parts regarding the machine i am working on. so far i cannot knock your bike but i am bound to find something.
On 27/04/2020, John wrote:
Hi Terry, Wow, that’s great for just a few hours I’d be happy for you to write it up as a blog. I think there would be people interested out there as the Viceroys are really rare, and it’s hard to find anything much on the web about them.
On 30/04/2020, Terry wrote:
All is done, engine start tomorrow as been out on site work today.
On 30/04/2020, John wrote:
Hi Terry, That’s great. Please let me know how the engine start goes tomorrow. I guess that means I could pick it up in the afternoon assuming all goes well?
On 30/04/2020, Terry wrote:
no reason why she wont start but will report back tomorrow.
On 03/05/2020, Terry wrote:
There is some added work to do as i think the condenser has gone down as it started to show open circuit as there were some fat sparks coming from the points contacts. I am now in a bit of a predicament as i need to get your engine going but i have to play with the electrics to do this. I have ordered a condenser. so all i can do is wait for the part. will keep in touch.
On 03/05/2020, Terry wrote:
Hi Terry, OK, Thanks. Keep me informed how you get on. If the new condenser doesn’t fix the issue, maybe I should come get it back, and work through the electric issues here, and then bring it back over once we’ve got a reliable spark.
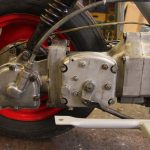
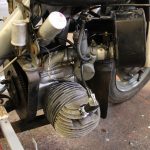
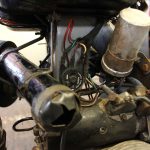
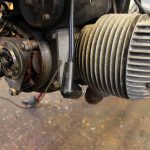
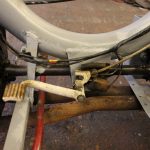
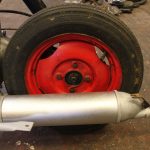
Copyright © 2020 Stotfold Engineering Company Limited. All rights reserved.